Adding a User
You can add a user in the Users page. After adding a user, you must add them to a user group as shown here. You can then attach a policy to the user group as shown under here, and/or attach an application to the user group as shown under here.
|
1.
|
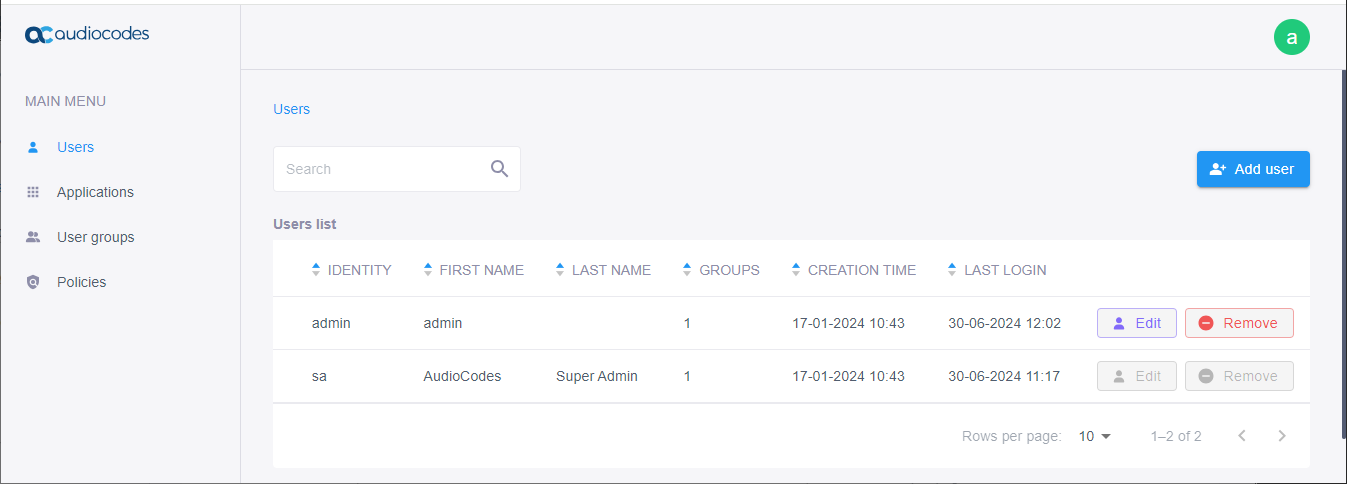
In the navigation menu, click Users. |
|
2.
|
Click the Add user button. |
The 'Add User' screen for inviting a user in Azure is different to the screen for a locally added user. The former comprises only a UPN field to enter their identity into, and an 'Invite' button which sends them an invitation to join IAM.
|
3.
|
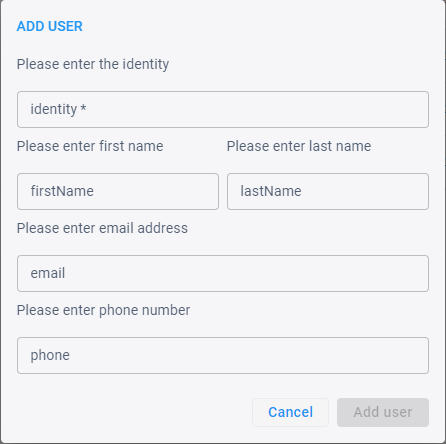
Fill in the following fields: |
|
●
|
In the 'Identity' field, enter your username. |
|
●
|
In the 'First Name' field, enter your first name. |
|
●
|
In the 'Last Name' field, enter your last name. |
|
●
|
In the 'email' field, enter your corporate email address. |
|
●
|
In the 'phone' field, enter your corporate phone number. |
|
4.
|
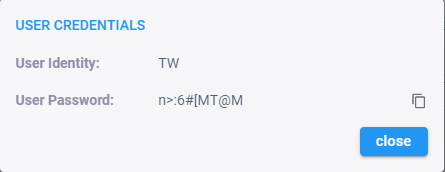
Click Add user; the following message box appears, indicating that the user has been successfully added: |
|
5.
|
Copy the 'User Password' to your clipboard, by clicking the  copy icon. Paste the password in a location for future use. copy icon. Paste the password in a location for future use. |
Once you close this message box, you will not be able to know the password. Therefore, it's recommended that you copy and record the password for future use.
|
7.
|
After adding the user, you can do the following: |
|
●
|
Attach the user to a user group - see here for more information. |
|
●
|
Change the user's password - see here for more information. |
|
●
|
Lock | unlock the user - see here for more information. |