Billing models
Live Hub supports two billing models. The difference is when you pay for the service.
| Prepaid | Postpaid | |
|---|---|---|
| When you pay | Pay in advance by adding credit to your balance. | Pay at the beginning of the following month. |
| What you see in the top bar | Your remaining balance. | Your month-to-date charges and, if applicable, your spending limit. |
| What happens when you run out | Live Hub suspends services until you add credit. | Live Hub deactivates the account until the next billing cycle. |
| Who can use it | Standalone and parent accounts. | Standalone and parent accounts. |
Subaccounts do not have their own billing model. Their charges are billed to the parent account, and they use the parent account's balance. For more information, see Account types.
Set a billing threshold to receive a warning before your balance becomes too low and interrupts service. For more information, see Alarm thresholds.
Prepaid
Live Hub deducts recurring and usage-based charges from your balance as they occur. You can add credit in two ways:
- Credit card: CLive Hub adds the credit to your balance immediately. For instructions, see Add credit with a credit card.
- Wire transfer: Live Hub adds the credit to your balance after AudioCodes receives the funds. To arrange a wire transfer, contact AudioCodes.
The following conditions apply when you add credit:
- Only standalone and parent accounts can add credit. Subaccounts use the parent account's balance.
- If the account is on a Trial plan, whether active or expired, adding credit upgrades the account to the Essential plan. For more information, see Account plans.
- To add credit, you must be a member of the Billing Administrator group. For more information, see User groups.
AudioCodes uses BlueSnap to process credit card payments. BlueSnap complies with PCI DSS requirements, and AudioCodes does not store credit card details. Payment receipts are sent from notifications@bluesnap.com.
Define your billing address
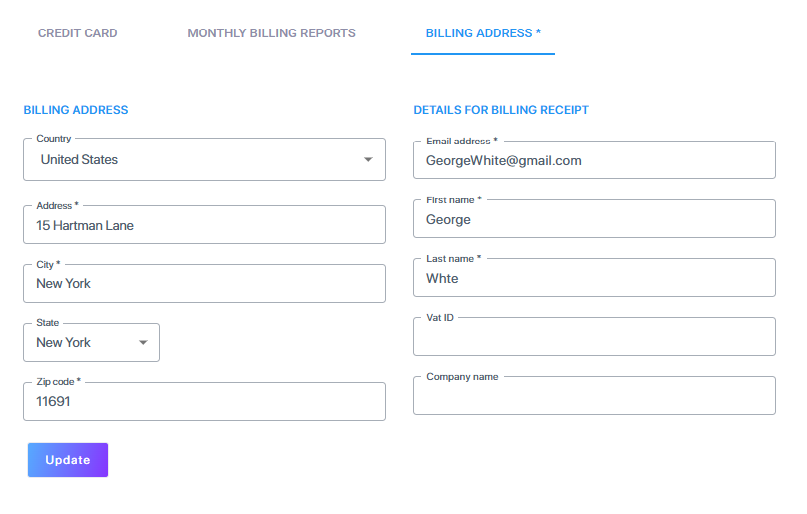
You must enter a billing address before Live Hub will accept a card, because it is needed for tax. The Billing Address tab also sets what appears on the BlueSnap receipt.
To set the billing address:
-
In the Navigation pane, select Billing.
-
Select the Billing Address tab.
-
Fill in your details, and then click Update.
Add credit with a credit card
Use a credit card to add credit to your prepaid balance. Live Hub requires a billing address before you can add a credit card.
To add credit:
-
In the Navigation pane, select Billing.
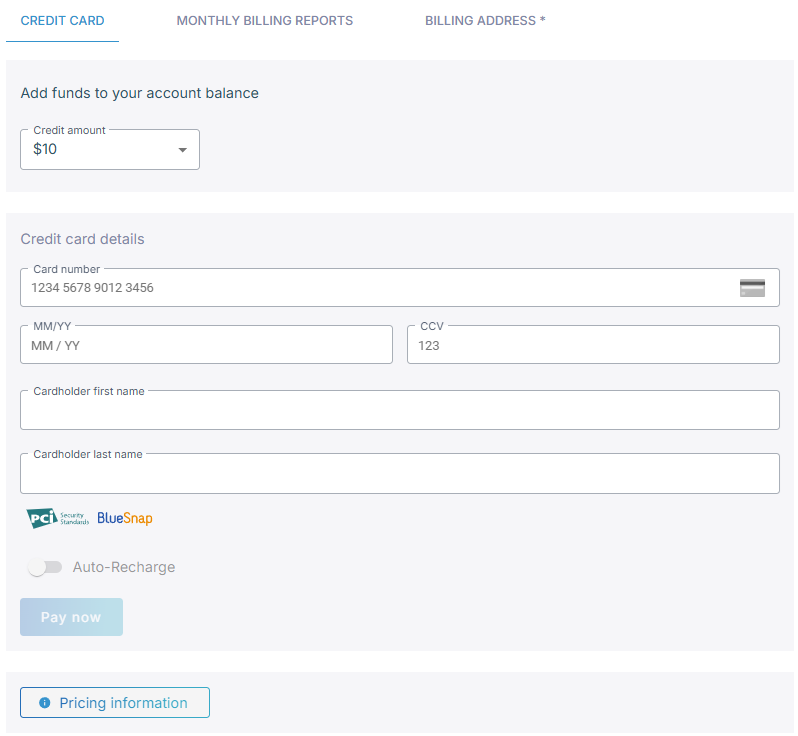
The Credit Card tab opens by default.
-
If you have not given a billing address yet, click the billing address link and enter one. See Define your billing address.
-
From the 'Credit amount' drop-down list, select how much to add, in US dollars.
-
Under Credit card details, enter the card details, and then click Pay now.
-
Check the amount in the confirmation, and then click Yes.
The credit reaches your balance immediately, and BlueSnap emails the receipt.
Enable auto-recharge
Enable auto-recharge so your balance is replenished automatically. This helps ensure that increased usage does not result in suspended service.
To enable auto-recharge:
-
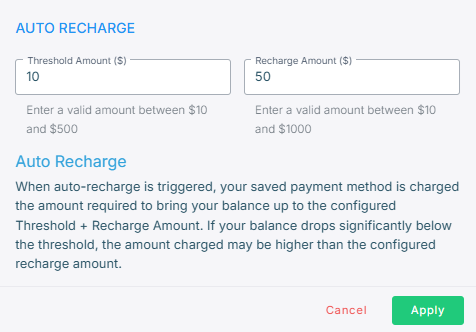
On the Credit Card tab, turn on Auto-Recharge.
-
In the 'Threshold Amount' field, enter the balance at which to recharge.
-
In the 'Recharge Amount' field, enter how much to add.
-
Click Apply, and then confirm with Yes.
Auto-recharge restores your balance to the recharge threshold plus the recharge amount. If your balance falls significantly below the threshold before auto-recharge runs, the charge may be greater than the configured recharge amount.
Postpaid
Use Live Hub services first and pay later. There are three postpaid options, which differ in who invoices you:
| Route | How it works |
|---|---|
| Azure Marketplace | Subscribe through Microsoft, and Live Hub charges appear on your Azure invoice. See Azure Marketplace. |
| Genesys AppFoundry | Subscribe through the Genesys AppFoundry listing, and then finish onboarding in Live Hub. |
| Monthly invoice | AudioCodes invoices you at the start of each month for the month before. Contact AudioCodes to set it up. |
If your account has a monthly spending limit, it sits beside the month-to-date charge in the top bar; reaching it makes the account inactive until the next cycle starts.
Azure Marketplace
Live Hub is a public SaaS offer in Microsoft Azure Marketplace. You subscribe and pay through the listing, on a pay-per-use basis, and every charge appears on your Azure invoice through the Marketplace APIs. You still configure everything in Live Hub, and Billing reports still show the detail.
Subscribe from Azure Marketplace
You subscribe in the Azure portal, and finish setting up the account in Live Hub.
To subscribe from Azure Marketplace:
-
Open the AudioCodes Live Hub offer, and then select Get it now.
-
If you are asked to, sign in with your Azure credentials.
The offer opens in the Azure portal.
-
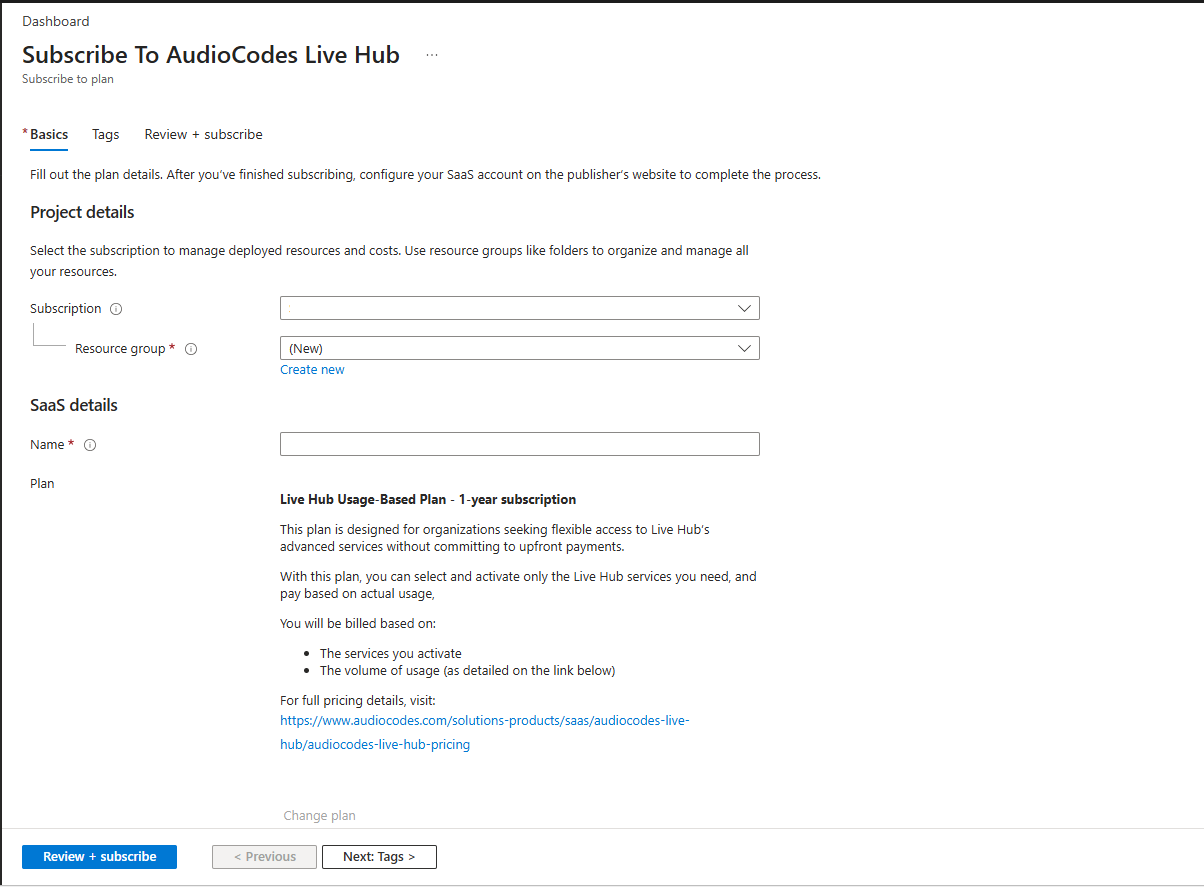
Check that the Plan is Live Hub Usage-Based Plan, and then select Get it now again.
- Select your Subscription and Resource group.
- Give the subscription a Name.
-
Select Review + subscribe.
-
Review the terms of use, and then click Subscribe.
-
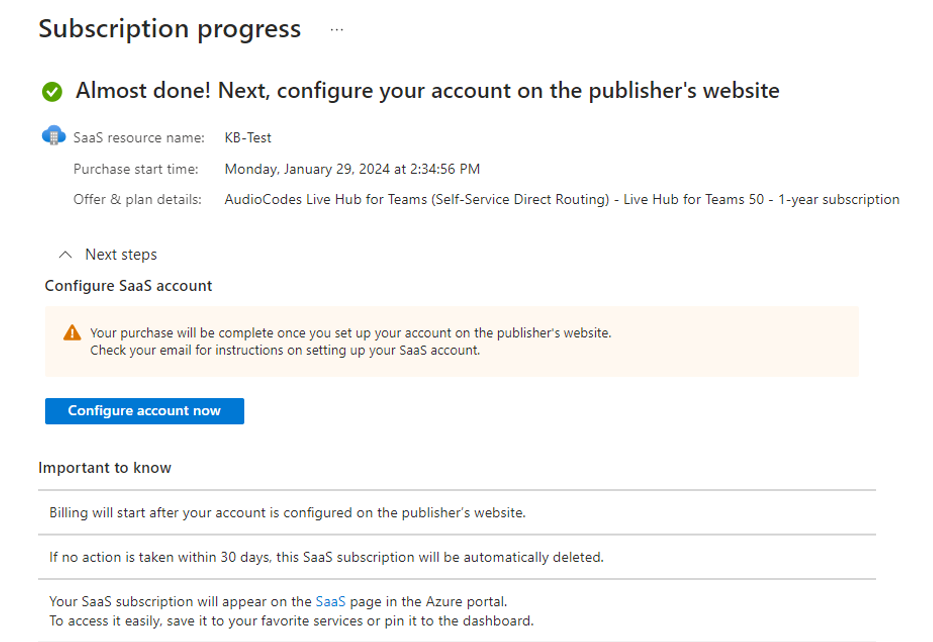
Wait for the deployment to finish.
-
Select Configure account now.
Azure redirects you to Live Hub to finish setting up the account.
Return to Live Hub
You can return to a Marketplace account through the Azure portal, or by signing in to Live Hub directly.
To return through the Azure portal:
- Sign in to the Azure portal.
- Search for SaaS, and select it.
- Select your Live Hub SaaS resource.
- Select Open SaaS Account on publisher's site.
To return through Live Hub, go to the sign-in page, click Sign In, and then Login with Microsoft.
Add users to a Marketplace account
Invite people as you would in any account. See Manage users. They can be Microsoft Entra ID users or local Live Hub users.
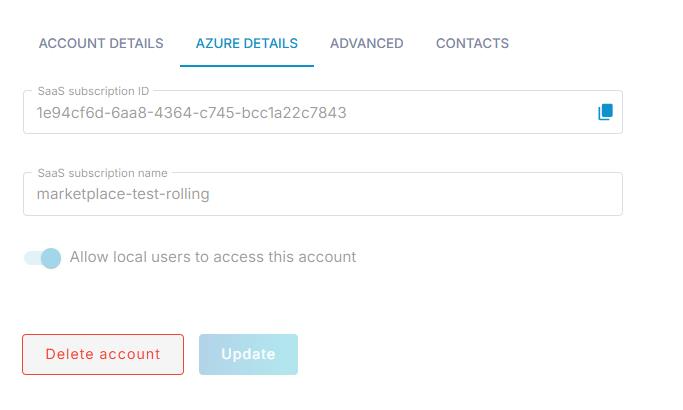
To allow Entra ID users only, go to Settings, select the Azure tab, and then turn off 'Allow local users to access this account'.