Configure automatic translation
Configure voice translation for the system to automatically translate the call once it's connected. This is the default configuration.
To set up voice translation automatically:
-
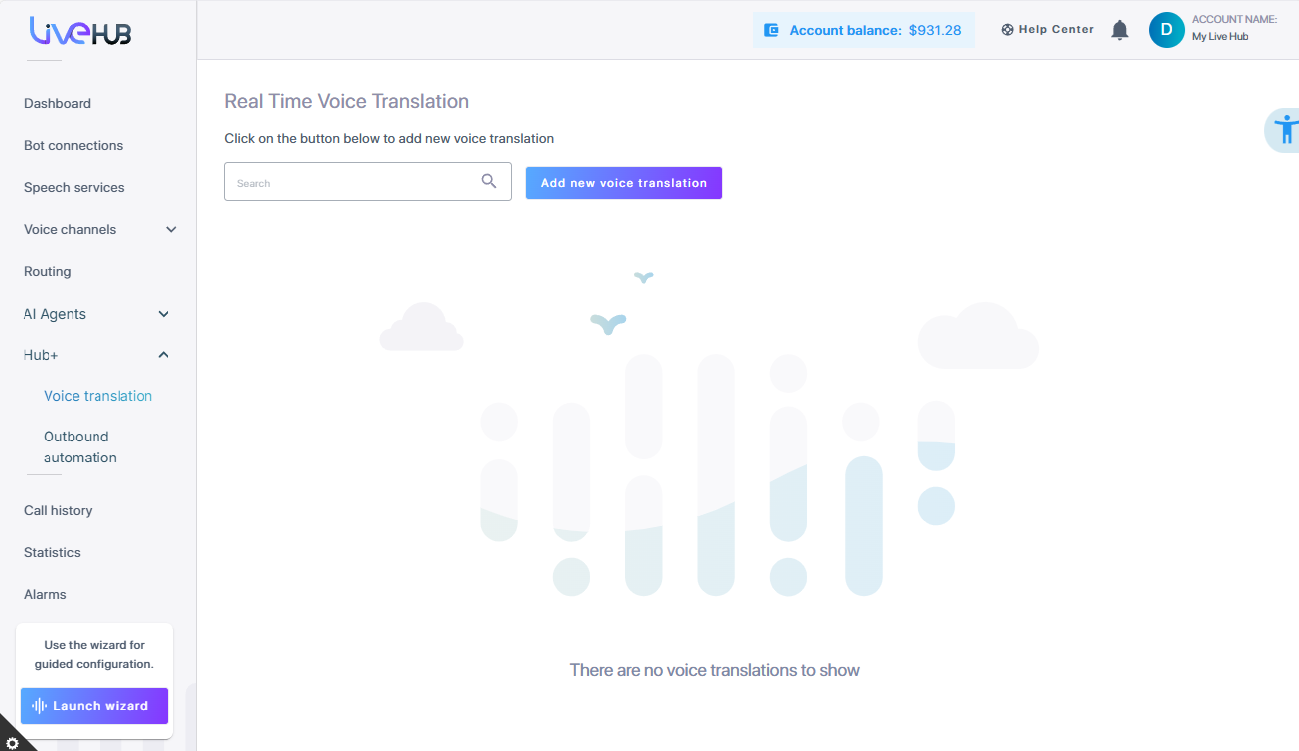
In the Navigation pane, expand Hub+, and select Voice translation; the following appears.
-
Click Add new voice translation to configure automatic voice translation.
-
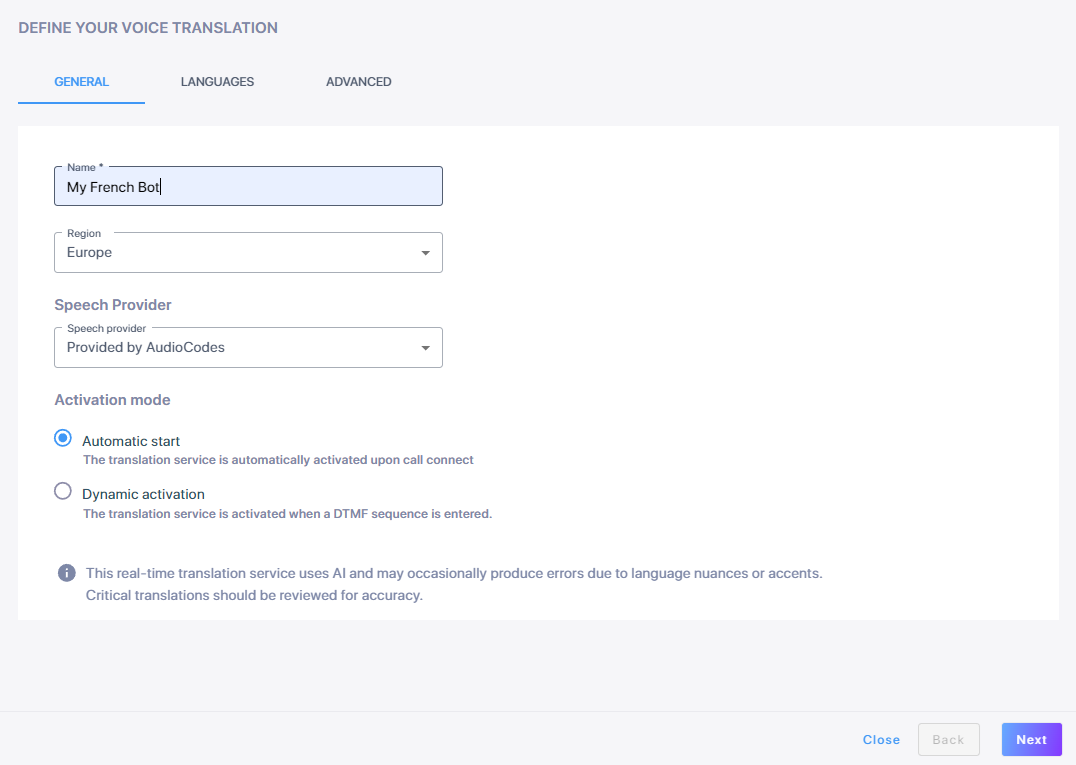
In the 'General' tab, in the 'Name' field, enter the bot name.
-
From the 'Region' drop down list, select the region associated with the bot.
-
From the 'Speech provider' drop down list, select whether you are using AudioCodes speech provider (default), or your own.
-
Under 'Activation mode', select Automatic start (default).
-
Click Next. The following Languages tab is displayed.
-
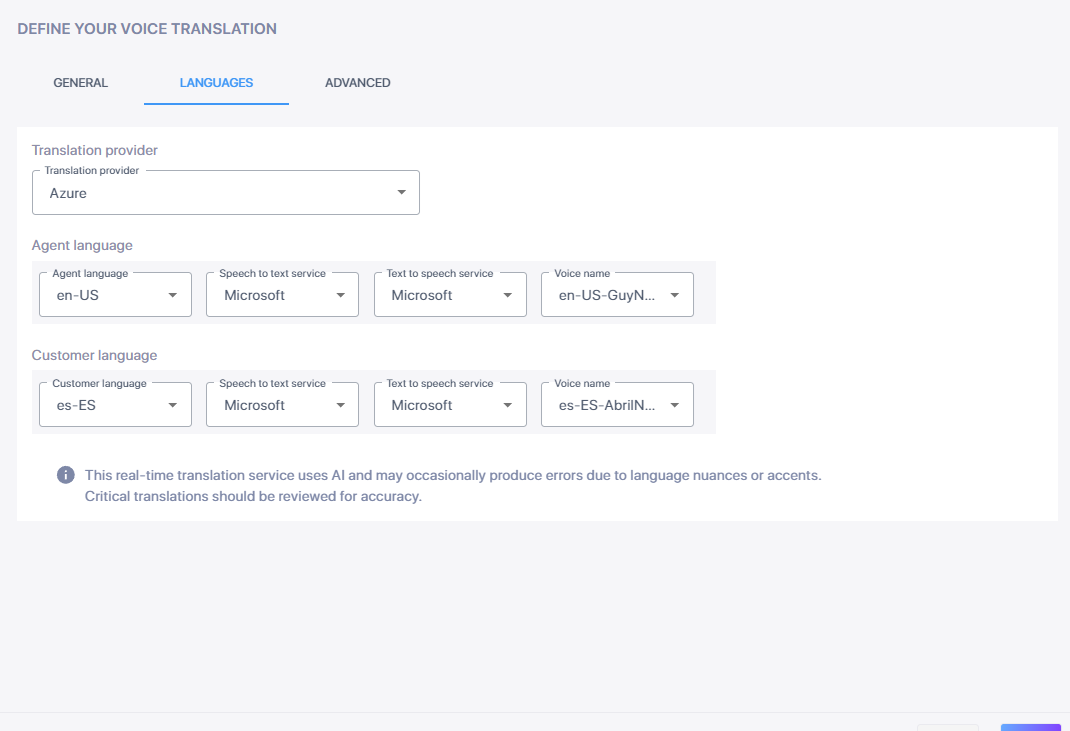
Under 'Translation provider', from the drop-down list, choose Azure, Claude, or Open-ai.
-
Under 'Agent language', configure the settings for the language the agent is speaking.
-
From the 'Agent language' drop-down list, select the language the agent is using. For example, for an English speaking agent, choose English (British) (en-GB).
-
From the 'Speech to text service' drop-down list, choose Googlev1, Googlev2, or Microsoft.
-
From the 'Text to speech service' drop-down list, choose Amazon, Google, or Microsoft.
-
From the 'Voice name' drop-down list, select a name for the voice translation service. For example, choose a male British voice, en-GB-EthanNeural (Male).
-
-
Under 'Customer language', configure the settings for language the customer is speaking.
-
From the 'Customer language' drop-down list, select the language the customer is using. For example, for French speaking customers, choose fr-FR.
-
From the 'Speech to text service' drop-down list, select Googlev1, Googlev2, or Microsoft.
-
From the 'Text to speech service' drop-down list, select Amazon, Google, or Microsoft.
-
From the 'Voice name' drop-down list, select a name for the voice translation bot. For example, for a French speaking customer, choose fr-FR-EloiseNeural (Female)
-
-
Click Next. The Advanced tab is displayed.
-
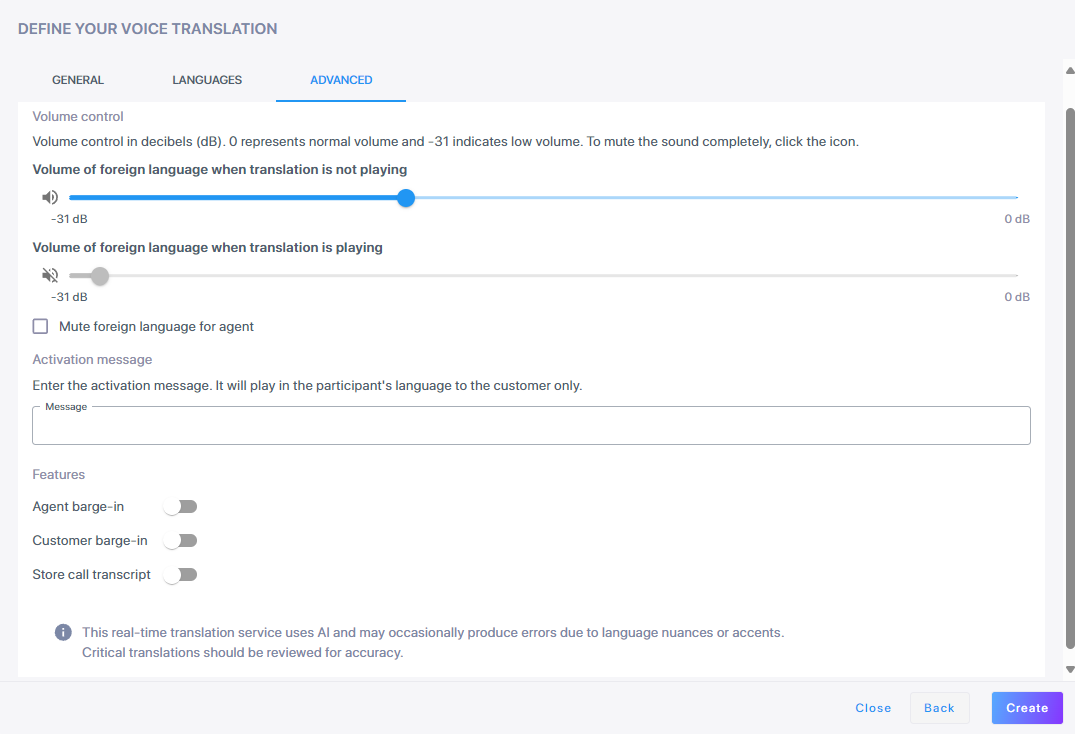
Under 'Volume control', use a slider to adjust the volume of the audio of the bot during the simultaneous translation. 0 db represents normal volume, and -31 db indicates low volume.
-
Adjust the volume of the foreign language when the translation is not playing.
-
Adjust the volume of the foreign language when the translation is playing.
-
Select Mute for foreign language for agent if you do not want the agent to hear the foreign language.
Click the sound icon to mute, the slider will be deactivated.
-
-
(Optional) Under 'Activation message', enter the activation message that you want the customer to hear. It will play in the customer's language. The message cannot be more than 200 characters.
-
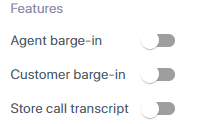
Under 'Features', enable the desired options.
-
'Agent barge-in'. Turning this feature on means that if the agent begins to speak while the translation of the customer’s words is being played, the agent will barge-in and the playing of the translation of the customer's words will be stopped.
-
'Customer barge-in'. Enabling this feature means that if the customer begins to speak while the translation of the agent’s words is being played, the playing of the translation of what the agent said will stop.
-
'Store call transcript'. Turning this feature on enables the automatic recording and storage of call transcripts for future reference or debugging. Both the original language and its translated version are transcribed and stored.
-
-
Click Create.
-
After defining voice translation, you need to create a new routing rule that enables voice translation (see Add a routing rule). Alternatively, you can update an existing rule to ensure voice translation is enabled. For details, see Edit a routing rule.