Connect Teams tenant in Live Hub
Now it is time to finally connect Live Hub to your Microsoft Teams tenant.
Make sure that you have completed the provisioning of service account for Live Hub and verified availability of the eligible Office 365 license, as described in previous steps.
To connect Live Hub to your Teams tenant:
-
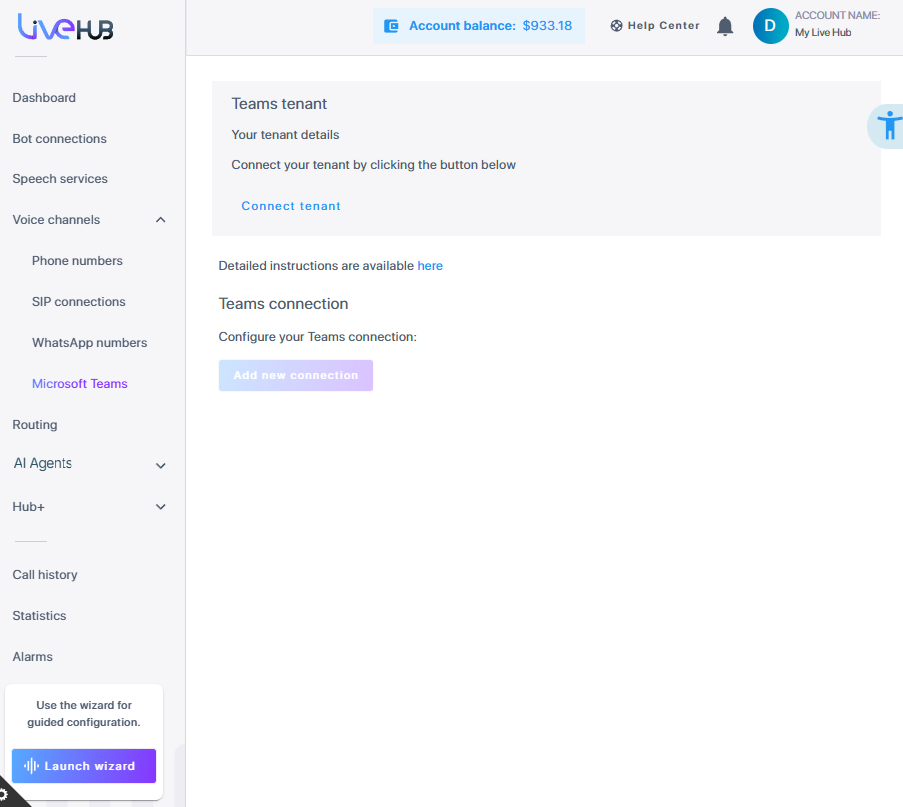
In the Navigation pane, expand Voice channels, and then click Microsoft Teams.
-
Click Connect tenant; the following appears:
-
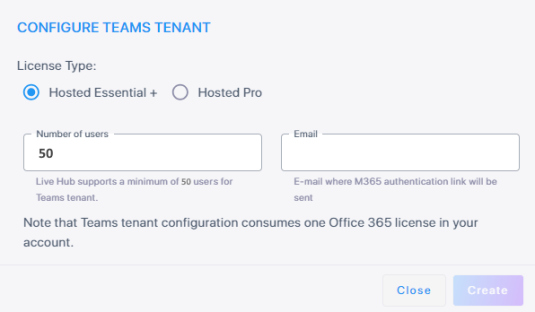
Choose the license type:
-
Hosted Essential + license allows you to manually assign DID phone numbers to specific Teams users – either individually, via the portal’s user interface, or in bulk, via the CSV file.
-
Hosted Pro license allows you to assign Lifecycle Management Templates based on Azure Active Directory security groups membership, assign phone numbers automatically from the pre-defined ranges and perform various additional Teams tenant management tasks. See Lifecycle management for a detailed description.
-
-
The value in the 'Number of users' field defines the number of Teams users in your organization that can be assigned with DID phone numbers. It directly affects the cost of Teams connectivity. Refer to Direct Routing for Microsoft Teams for details. The value may be adjusted after the initial connection with Teams tenant is established.
-
In the 'Email' field, enter the address where an email with detailed instructions and activation links will be sent. You may enter your own email, or an email of your IT administrator who created Live Hub service account in your organization, as described in Provisioning service account for Live Hub.
-
Click Create; the dialog closes and a message is displayed advising that an activation email has been sent.
-
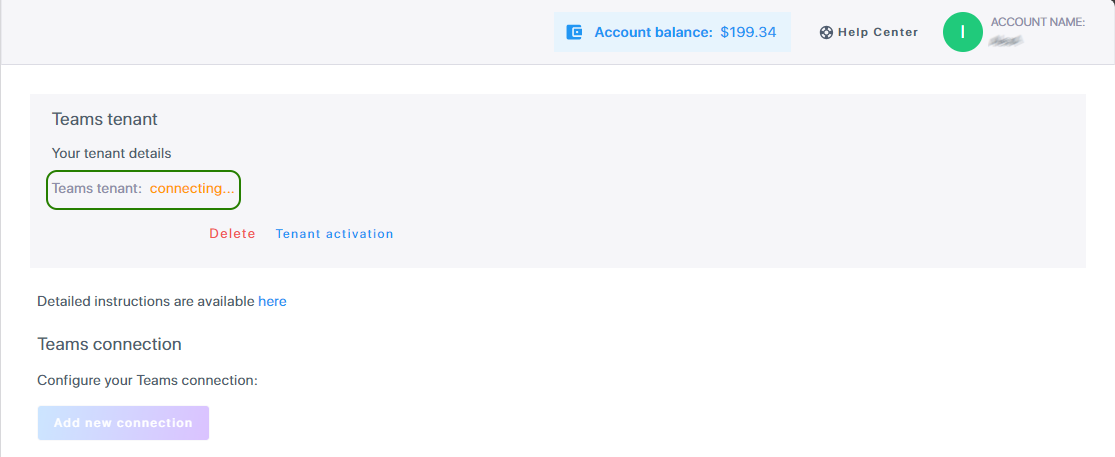
The Teams tenant state changes to 'connecting'; the tenant remains in the 'connecting' state until you complete the activation.
-
You have two options to proceed:
-
Open the email and follow the instructions in it.
-
Click the Tenant activation link.
-
-
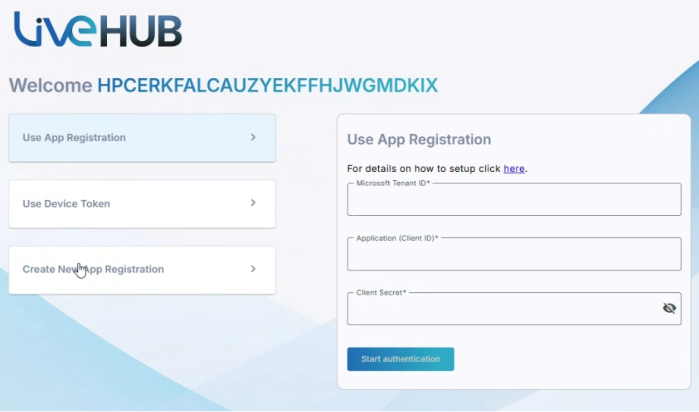
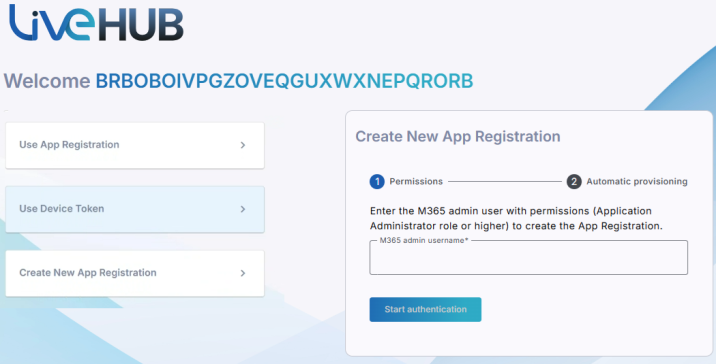
After you do one of the above, the Tenant Activation page opens. Click one of the three options to proceed: Use App Registration, Use Device Token, or Create New App Registration.
-
Use App Registration - Choose this if you already have an existing app registration in Azure.
-
Click Use App Registration.
-
Enter the following details from Azure: 'Microsoft Tenant ID', Application (Client ID)', and 'Client Secret'.
-
Click Start authentication.
-
Proceed to creating the Teams Connection as described in Create a Teams connection.
-
-
Use Device Token - Choose this if you want to authenticate using a device token.
-
Click Use Device Token.
-
In the 'M365 admin username' field, enter the username of the Live Hub service account, as created in Provisioning service account for Live Hub. It would typically be “livehub@<your-domain>”.
Make sure that you enter the username of the Live Hub service account, as created in Provisioning service account for Live Hub and not your regular username and/or username of your Global administrator.
-
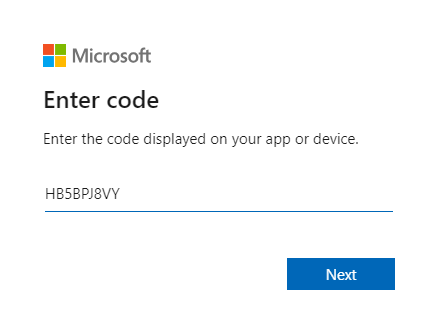
Click Start authentication; instructions to sign in via https://microsoft.com/devicelogin appear at the bottom of the page.
-
Copy the provided authentication code to clipboard, by clicking the Copy icon next to it.
-
Continue with Grant permissions.
-
-
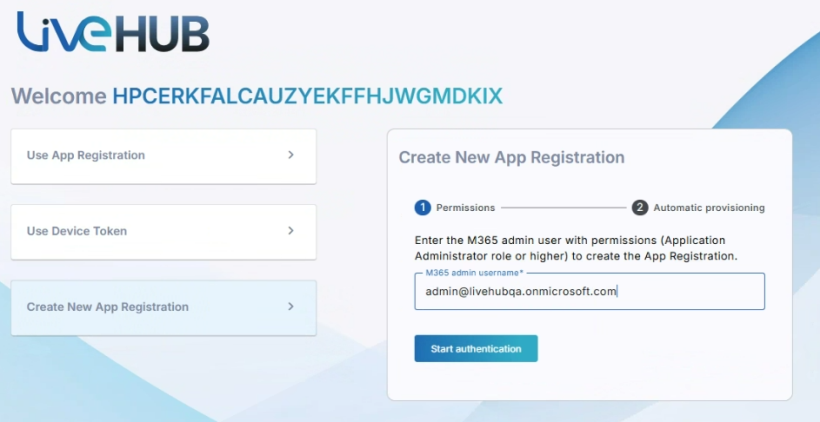
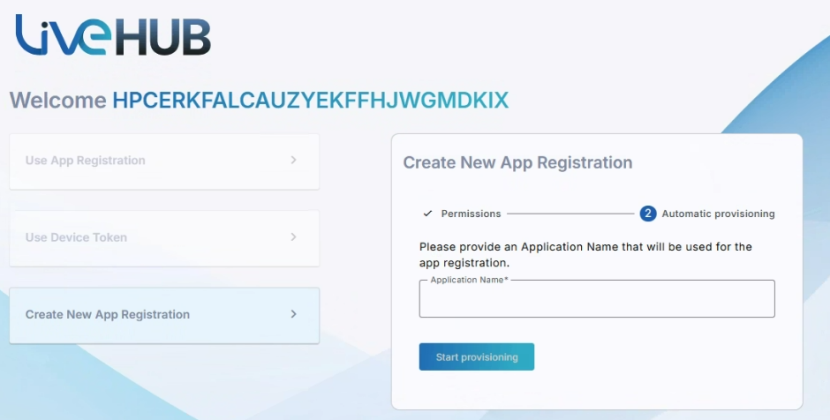
Create New App Registration - Choose this if you need to create a new app registration in Azure.
-
Click Create New App Registration.
-
In the 'M365 admin username' field, enter the username of the Live Hub service account, as created in Provisioning service account for Live Hub. It would typically be “livehub@<your-domain>”.
Make sure that you enter the username of the Live Hub service account, as created in Provisioning service account for Live Hub and not your regular username and/or username of your Global administrator.
-
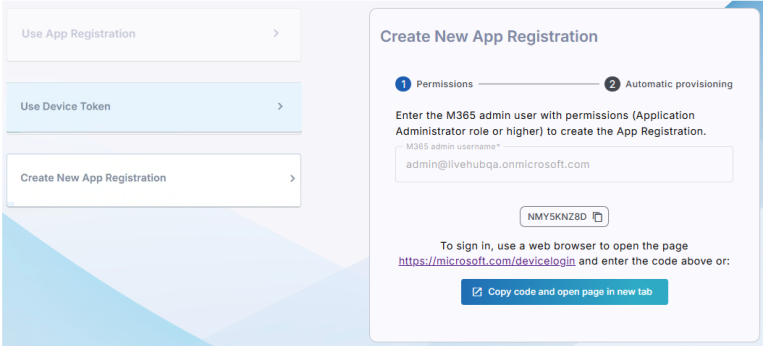
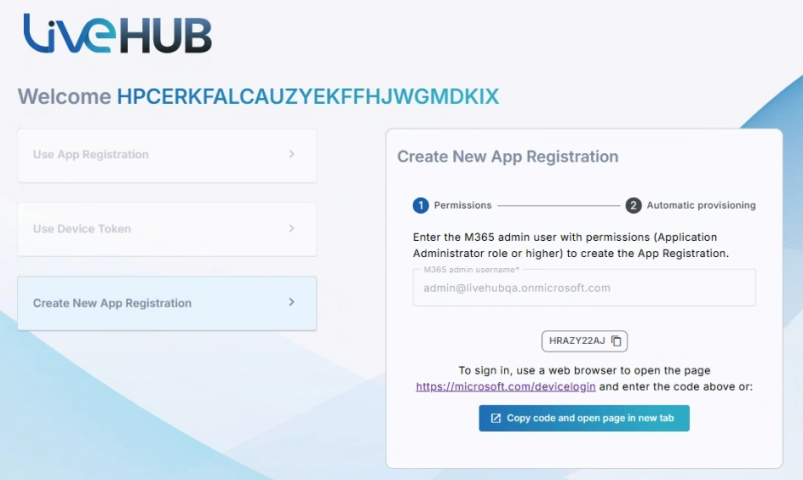
Click Start authentication.
-
Copy the provided authentication code to clipboard, by clicking the Copy icon next to it.
-
Enter a unique Application Name, and click Start provisioning.
-
Continue with Grant permissions
-
Grant permissions
-
Click the https://microsoft.com/devicelogin link; the Microsoft Device Login page opens in a new tab.
-
Paste the authentication code from the clipboard (e.g., via Ctrl-V), and click Next.
-
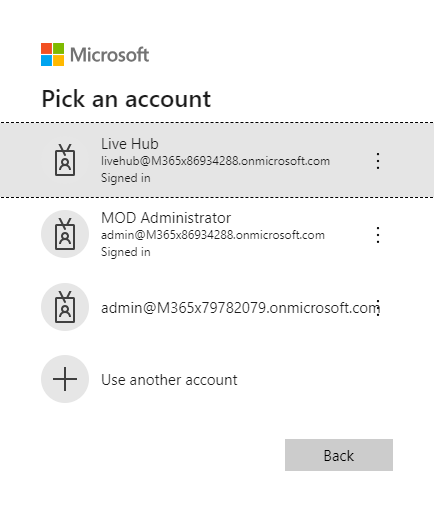
Log in as Live Hub service account, as created in Provisioning service account for Live Hub. Depending on whether you already logged into a Microsoft account or not, you may be presented with list of last accounts being used. The Live Hub service account (livehub@<your-domain>) will typically not be in this list. Therefore you should click Use another account, and then enter Live Hub service account’s username and password, when prompted.

Make sure that you log in as a Live Hub service account, as created in Provisioning service account for Live Hub, and not as your regular user or as Global administrator.
-
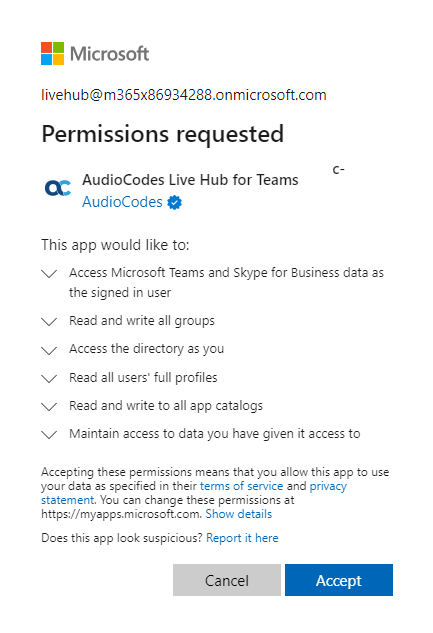
Once you complete the Azure authentication, the Permissions requested page appears:
-
Click Accept.
-
If you haven’t assigned an Application Administrator role to the Live Hub service account, you will see Request approval instead of Accept button on the Permissions requested page. Click the button.
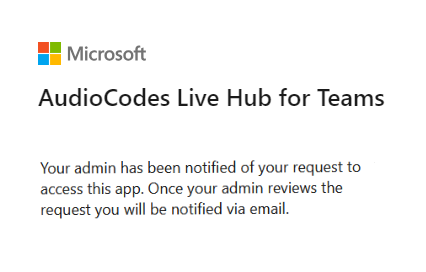
-
Contact your IT administrator to review your request and grant you access to the Live Hub application.
-
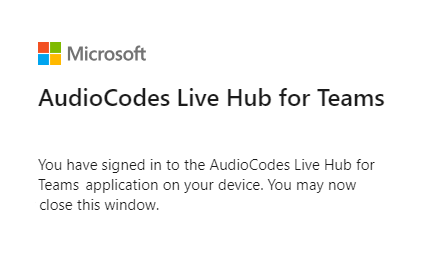
Close the browser tab; this brings you back to the Tenant Activation page.
-
Wait until the following message is displayed - 'Microsoft Teams Graph Token - Completed'.
-
If this is the first time that you are connecting Live Hub to your Teams tenant, click the button to continue the authentication process; a new tab opens and you are prompted to log in again.
-
Log in using the Live Hub service account, as before. Another Permission requested page appears:
-
Click Accept; a 'Thank you' message appears.
-
Close the browser tab; the Tenant Activation page appears with the following message: 'All tokens acquired! You can close this page now'.
-
Close the Tenant Activation page.
-
Go back to the Live Hub portal and log in if needed.
-
Select Teams in the navigation menu pane, and then wait for the connection to be established. This may take up to five minutes – so be patient.
-
Once the connection has been established, the page automatically refreshes and you will be able to see your Teams tenant ID, Admin domain, as well as the Configure, Manage, and Reauthenticate buttons.
If the tenant admin’s credentials have changed, click the Reauthenticate button to go through the authentication flow again, starting from step 9 in the previous procedure.
-
Proceed to creating the Teams Connection as described in Create a Teams connection.