
Create an account
The type of account that you can create depends on both the account that you are currently using and the permissions assigned to you in that account:
| From | You can create |
|---|---|
| A standalone account | another standalone account, or a parent above the current account |
| A parent account | A new subaccount, subaccount, or an existing account that you adopt as a subaccount. |
| A subaccount | Another standalone account. |
After you click Create, one of two things happens: - If the account does not require approval, Live Hub creates the account and switches you to it immediately. - If the account requires approval, Live Hub notifies you. After an administrator approves the account, you can switch to it.
Create a standalone account
When you create a standalone account, Live Hub creates a separate account that has no relationship to your current account. Your current account remains unchanged.
To create a standalone account:
-
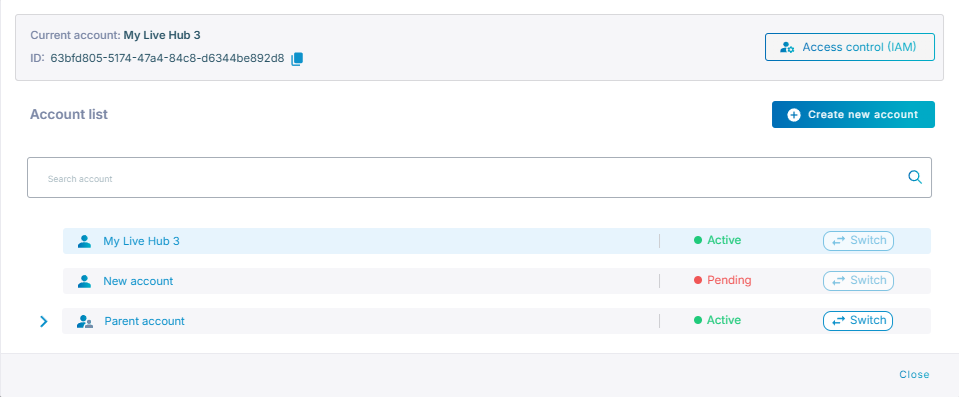
Click Current account in the top-left corner of the Live Hub window.
-
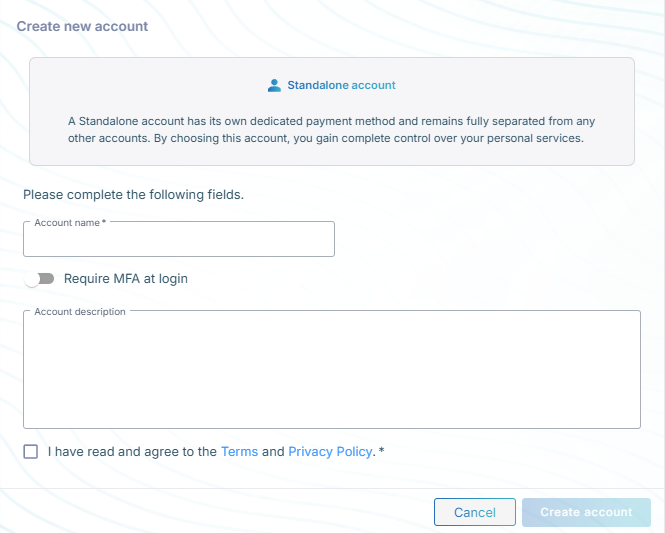
Click Create new account.
-
In the 'Account name' field, enter a name.
-
Optional: In the 'Account description' field, enter a description.
-
Select the 'I have read and agree ...' check box to accept the terms and privacy policy.
-
Click Create.
Create a parent account
Create a parent account from within a standalone account. When you create the parent account, your current standalone account becomes its first subaccount.
After the parent account is created, it becomes responsible for billing for that subaccount and any additional subaccounts that you add later.
Only standalone accounts can create a parent account. Accounts on the Trial plan and accounts purchased through Azure Marketplace cannot create parent accounts. This action is permanent and cannot be undone.
To create a parent account:
-
Click Current account in the top-left corner of the Live Hub window.
-
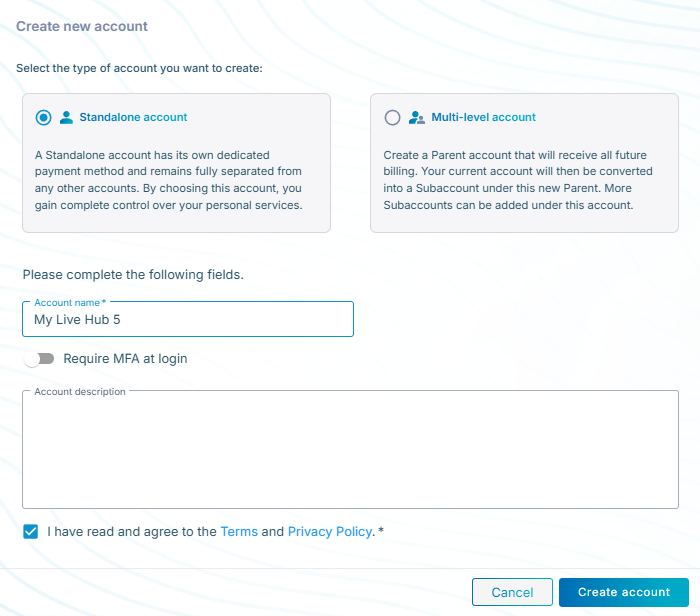
Click Create new account.
-
Select Multi-level account.
Selecting Standalone account here creates an unrelated account instead, leaving the current one as it is.
-
In the 'Account name' field, enter a name for the parent.
-
Optional: In the 'Account description' field, enter a description.
-
Select the 'I have read and agree ...' check box to accept the terms and privacy policy.
-
Click Create.
Create a subaccount
From a parent account, you can create a new subaccount or adopt an existing standalone account as a subaccount.
Create a new subaccount
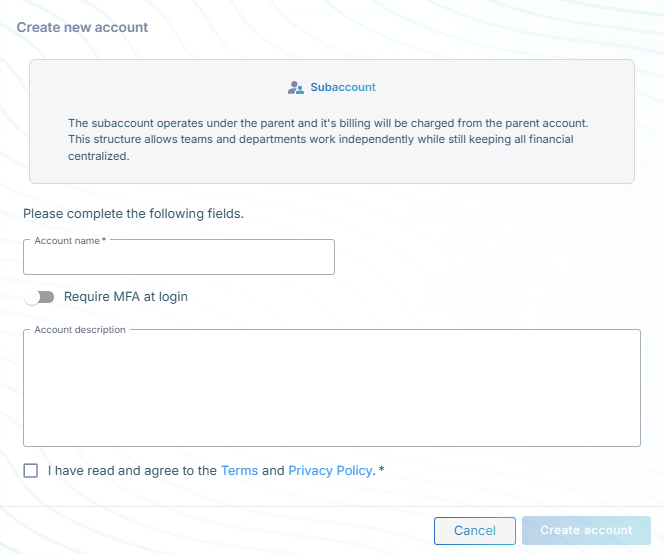
Create a new subaccount under the current parent account. The parent account is responsible for all charges incurred by the subaccount.
To create a subaccount:
-
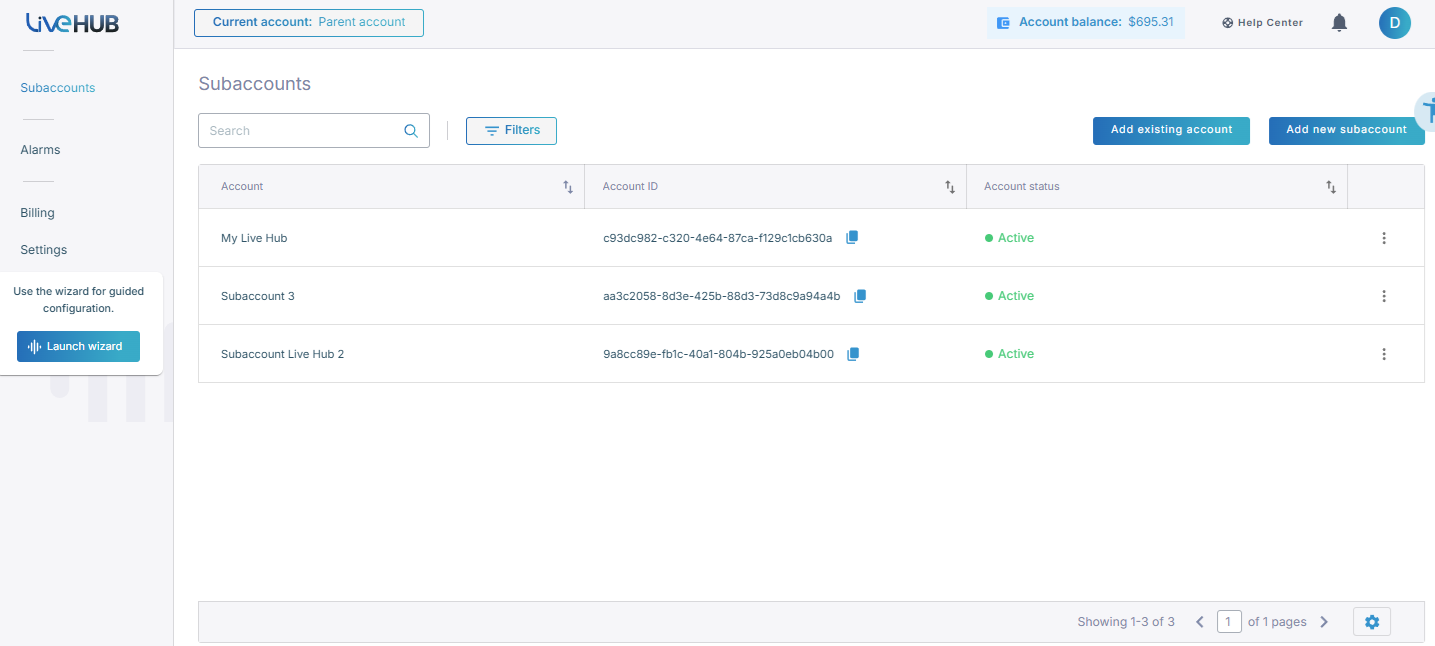
Go to the Subaccounts screen.
-
Click Create new subaccount.
-
In the 'Account name' field, enter a name.
-
Optional: In the 'Account description' field, enter a description.
-
Select the 'I have read and agree ...' check box to accept the terms and privacy policy.
-
Click Create.
Add an existing account
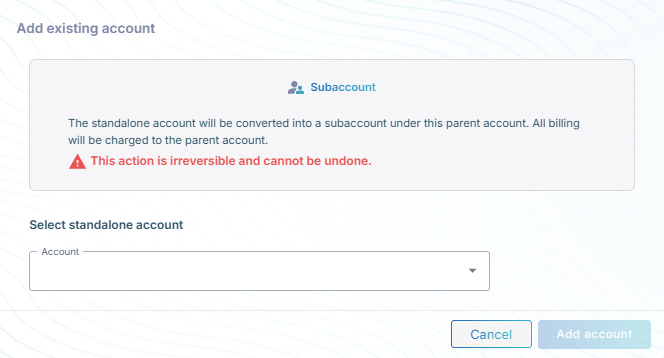
Adopting a standalone account converts it into a subaccount of the current parent account.
The account keeps its bot connections, voice channels, routing rules, and users. The only change is billing: all future charges for the account are billed to the parent account.
This action is permanent and cannot be undone.
To add an existing account:
-
Go to the Subaccounts screen.
-
Click Add existing account.
-
From the 'Account name' drop-down list, select the standalone account to adopt.
-
Click Add account.