Provision a service account for Live Hub
Live Hub manages your Teams tenant through a dedicated service account. Provisioning it takes four steps, the last of which is optional:
- Create the service account.
- Assign it administrator roles.
- Exclude it from conditional access rules that force re-authentication.
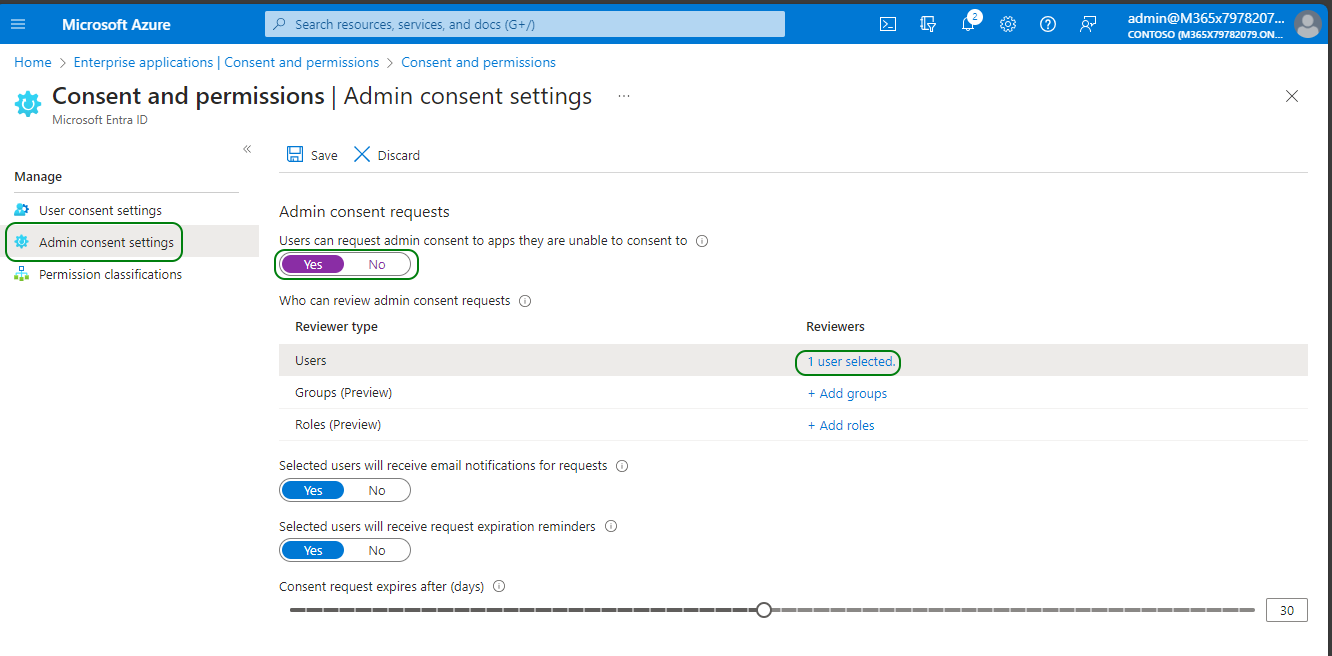
- Configure it as an admin consents reviewer, but only if you skipped the Application Administrator role.
These steps require Microsoft administrator permissions and permission to manage your organization's Microsoft Entra ID configuration. If you do not have both permissions, ask your IT administrator to complete these steps and provide the username and password for the account they create. You will need those credentials later in this procedure.
Create the service account
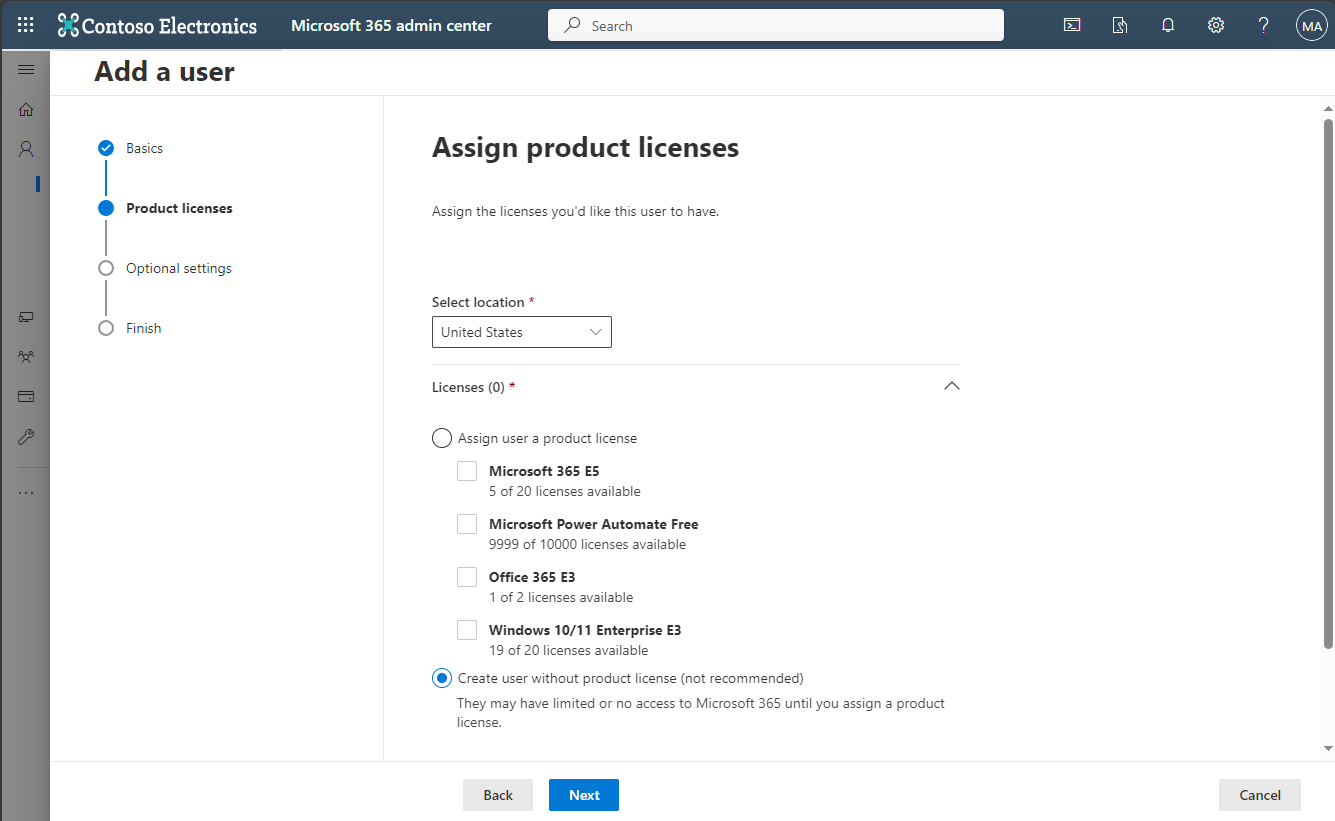
The service account is an ordinary Microsoft 365 user, created without a product license.
To create a service account for Live Hub:
-
Open the Microsoft 365 Admin Center.
-
Sign in as a user with the Customer Administrator or Global Administrator role.
-
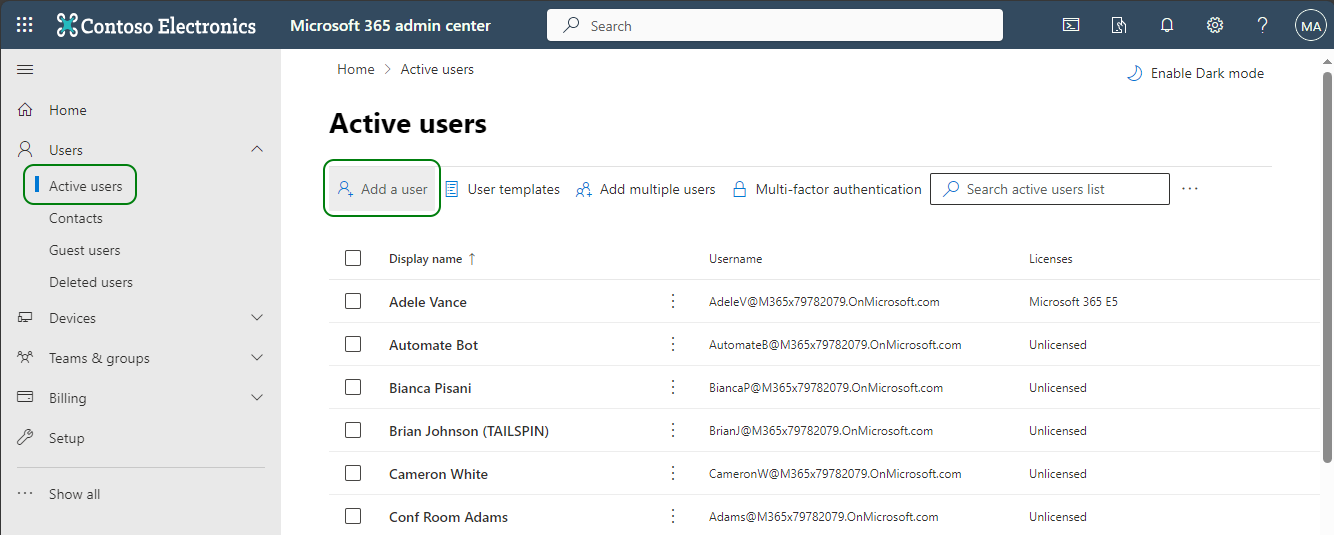
In the Navigation pane, select Users > Active Users, and then click Add a User.
-
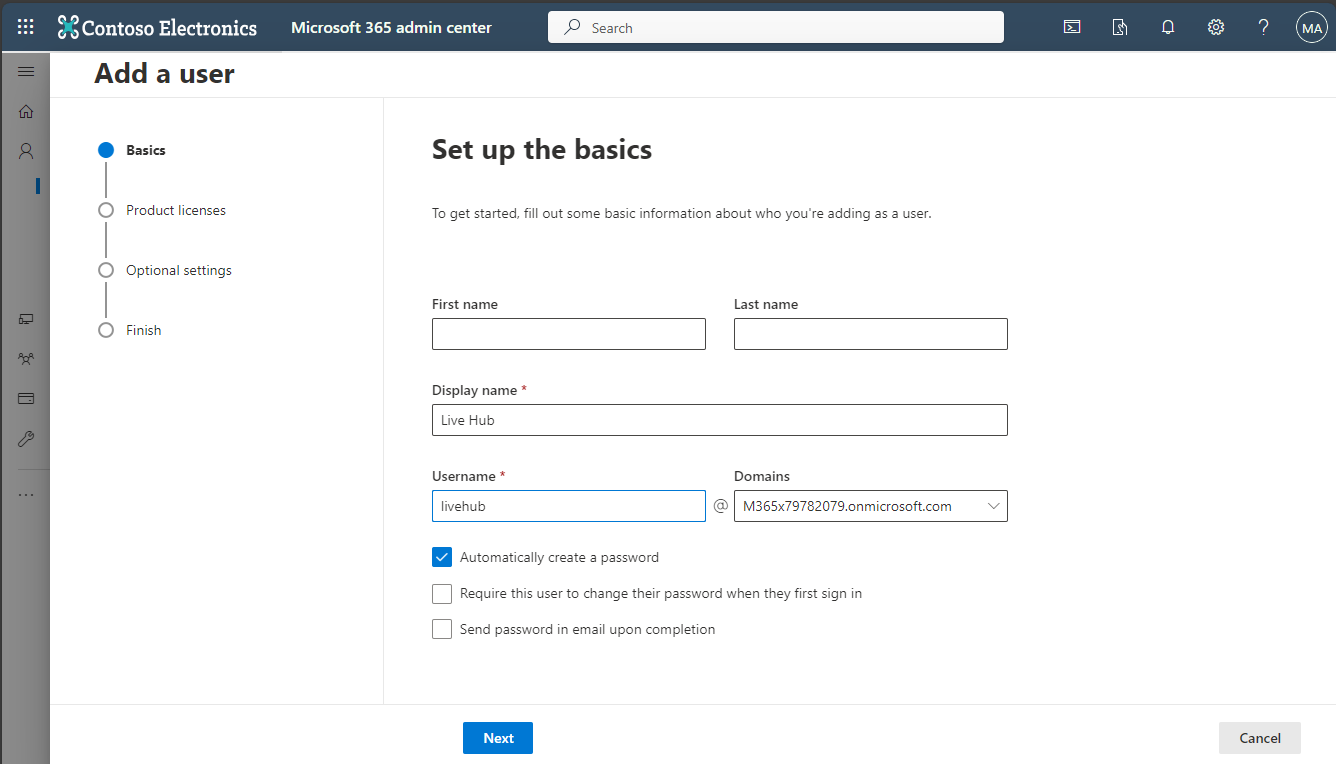
In the Add a user > Basics pane:
- In the 'Display name' field, enter Live Hub.
- In the 'Username' field, enter livehub.
- Clear the 'Require this user to change password when they first sign in' check box.
- Click Next.
-
In the Product licenses pane, select Create user without product license, and then click Next.
-
In the Optional settings pane, click Next.
-
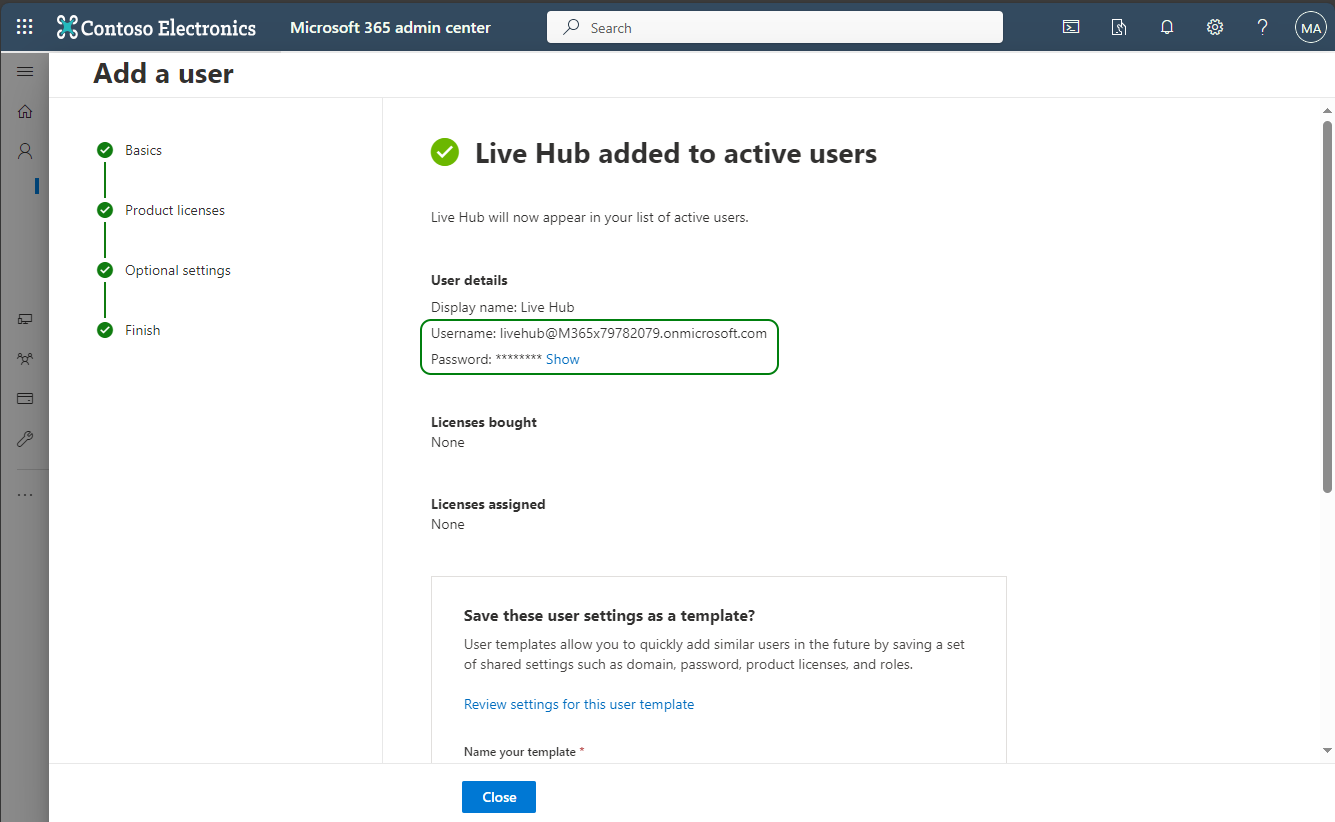
In the Finish pane, click Finish adding.
-
Click Show to reveal the generated password, and then write down the username and password.
Assign administrator roles
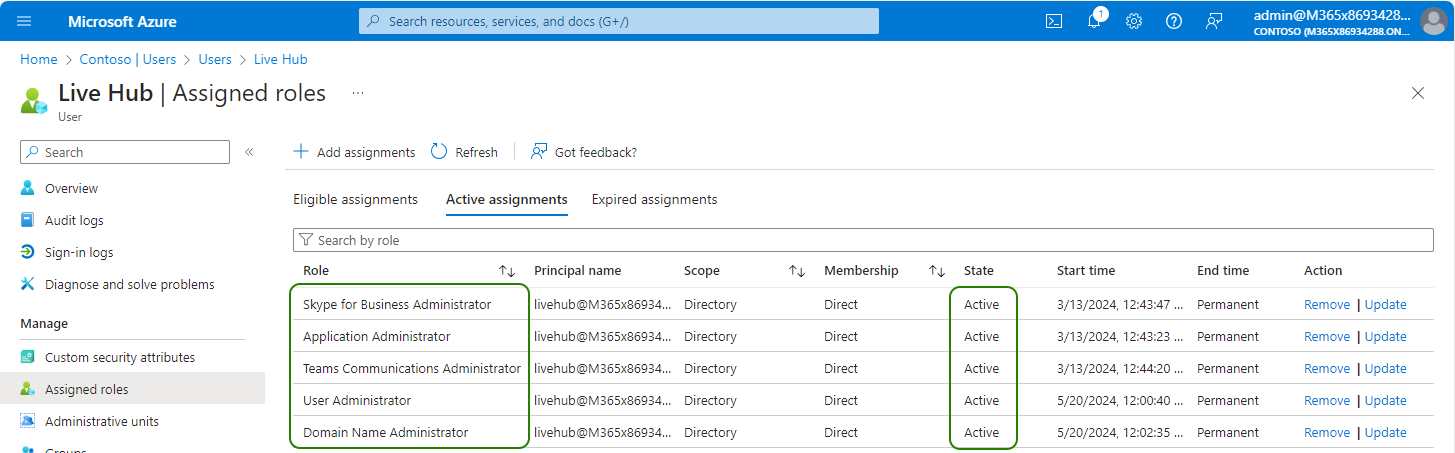
The service account needs the roles in the following table. Some of them are needed only while the tenant and Teams connections are being established, and can be removed afterwards.
| Role | Type | Why |
|---|---|---|
| Skype for Business Administrator | mandatory | Normal Live Hub operation. |
| Teams Communication Administrator | mandatory | Normal Live Hub operation. |
| Application Administrator | recommended | Establishing the tenant connection; can be removed afterwards. Instead of granting it, you can make the account an admin consents reviewer. |
| Domain Name Administrator | mandatory | Adding the Teams connection; can be removed afterwards. |
| User Administrator | mandatory | Adding the Teams connection; can be removed afterwards. |
To assign the roles:
-
Open the Azure portal.
-
Sign in as a user with a Customer Admin role, such as Global Administrator.
-
Search for Entra ID, and then open the Microsoft Entra ID screen.
-
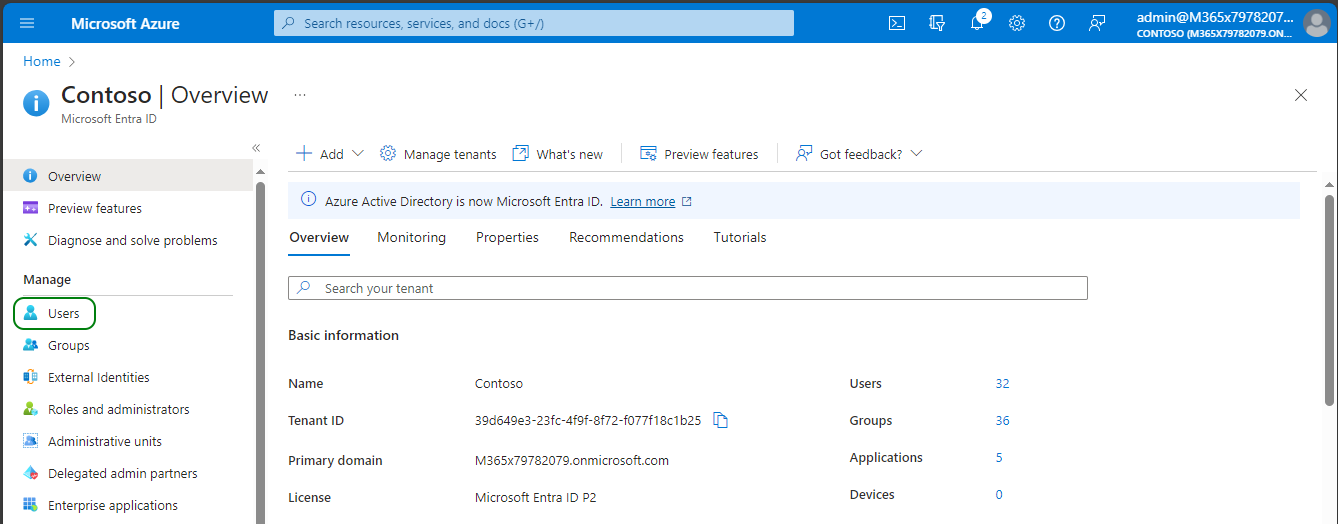
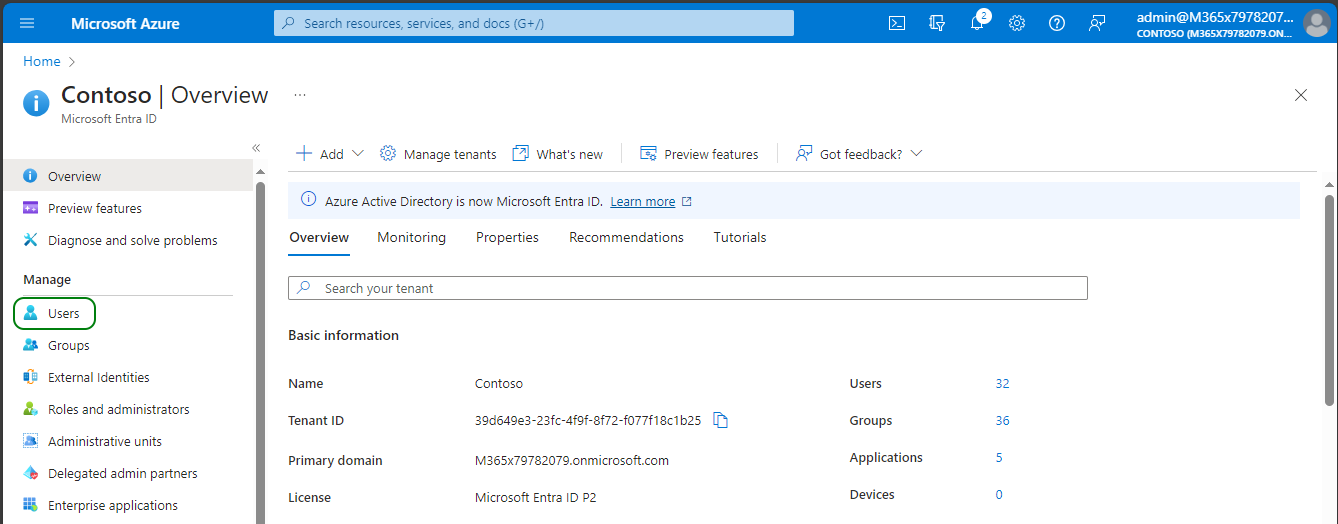
In the Navigation pane, select Users.
-
Search for
livehub, and then select the Live Hub service account.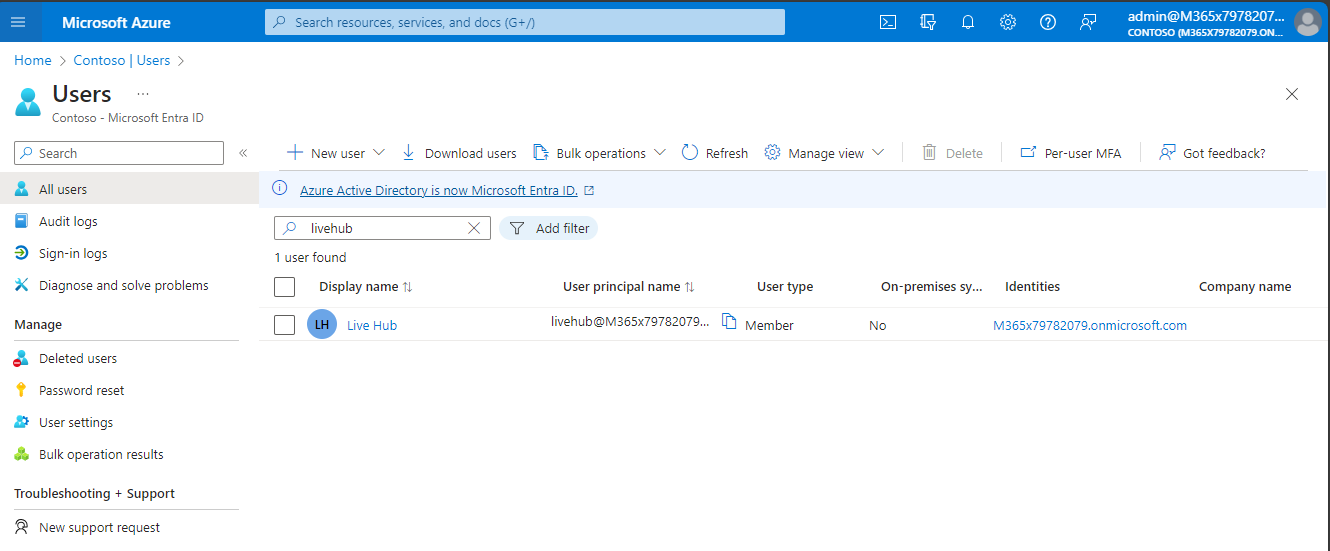
-
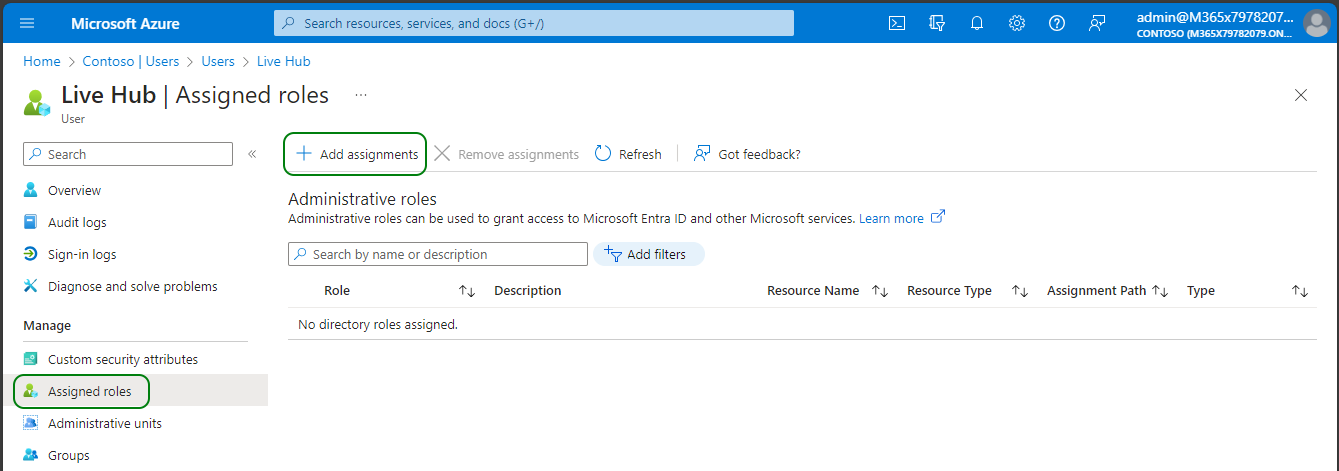
In the Navigation pane, select Assigned roles, and then click Add assignments.
-
Select the roles from the table above, and then click Add.
-
Click Refresh, and then check that every role is assigned and Active.
Exclude the service account from conditional access re-authentication
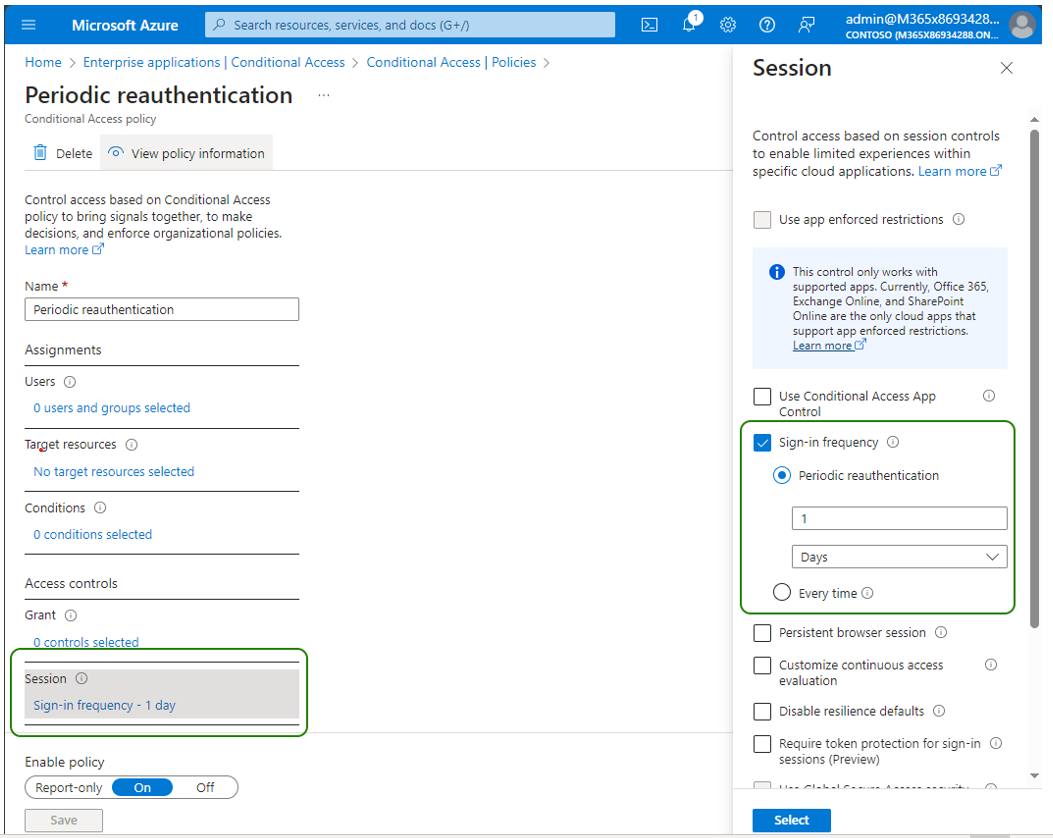
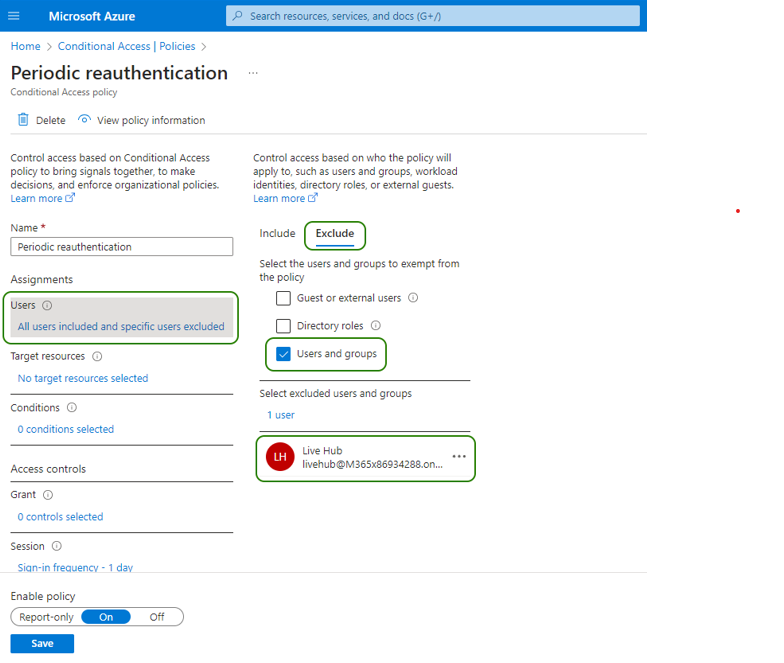
If a conditional access policy requires users to reauthenticate periodically, it invalidates the Live Hub access token. To prevent connection failures, exclude the Live Hub service account from any policy that enforces periodic reauthentication.
This step is mandatory. Without it, the connection to your Teams tenant stops working after a while.
To exclude the service account:
-
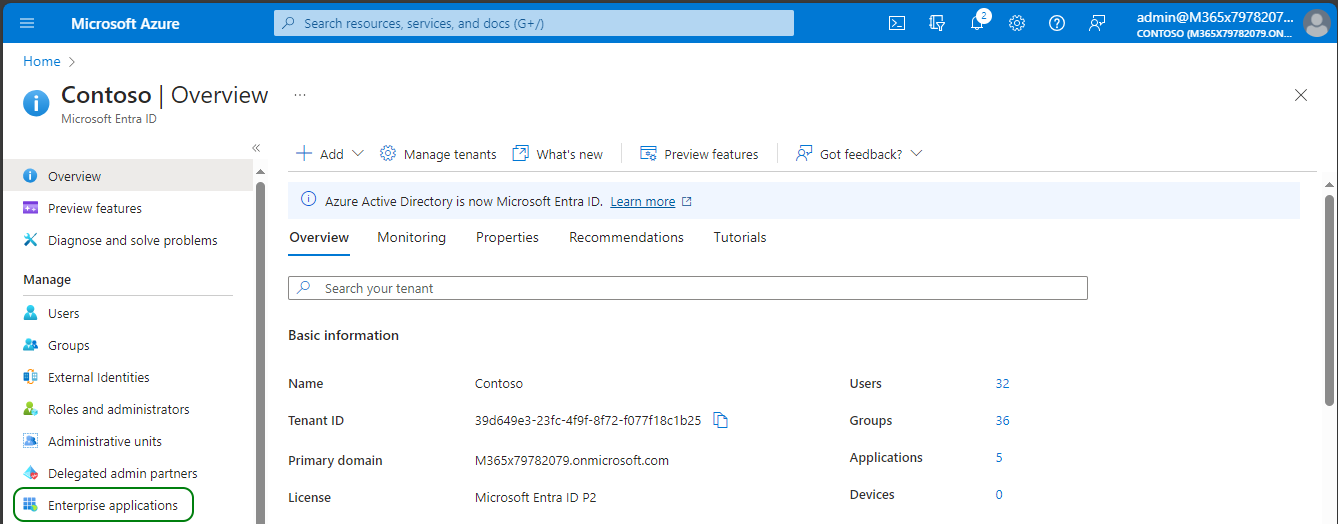
On the Microsoft Entra ID screen, in the Navigation pane, select Enterprise applications. You can also reach it by searching the Azure portal for Enterprise applications.
-
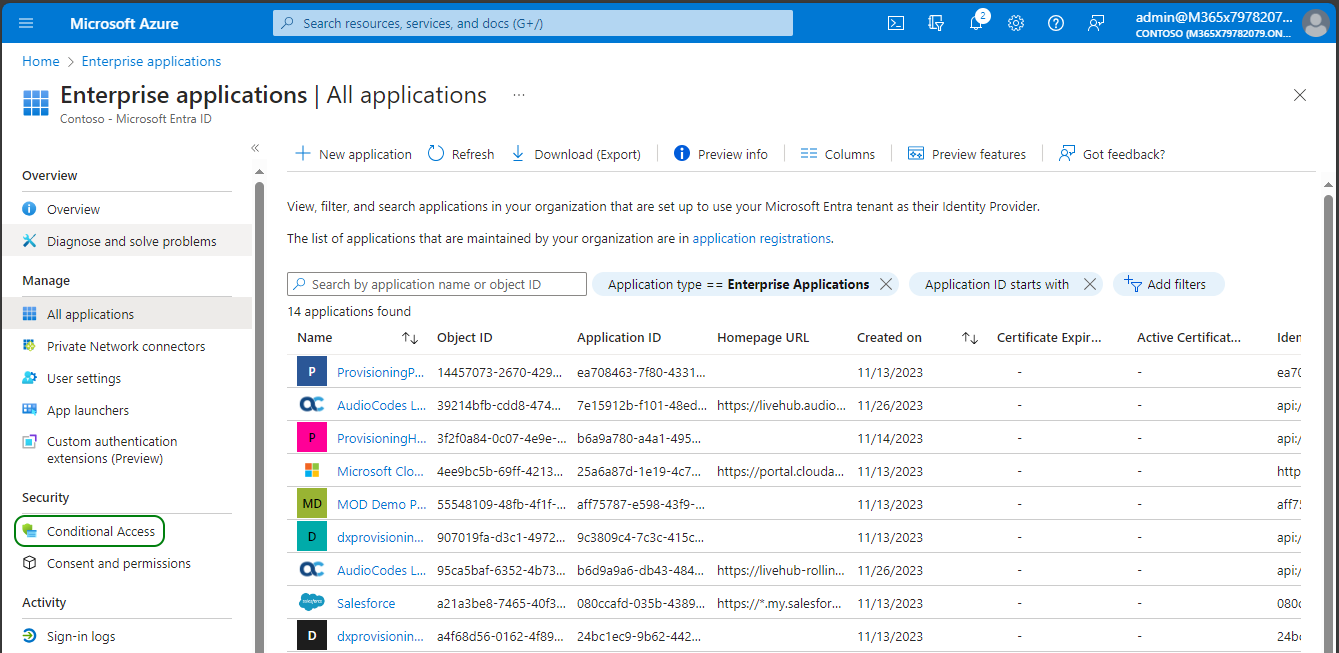
In the Navigation pane, select Conditional Access.
-
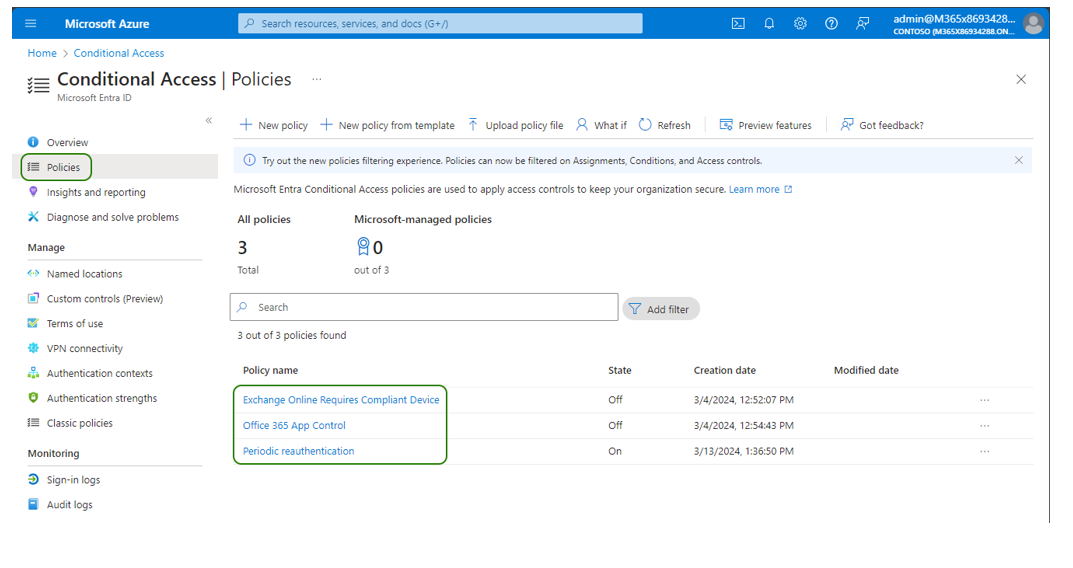
Open each configured policy in turn.
-
Check whether Access controls > Sessions sets either Sign in frequency or Persistent browser session.
-
If it does, add the Live Hub service account to the policy's exclusions, under Users.
Make the service account an admin consents reviewer
Complete this step only if you did not assign the Application Administrator role to the service account.
To configure the account as an admin consents reviewer:
-
On the Microsoft Entra ID screen, in the Navigation pane, select Enterprise applications.
-
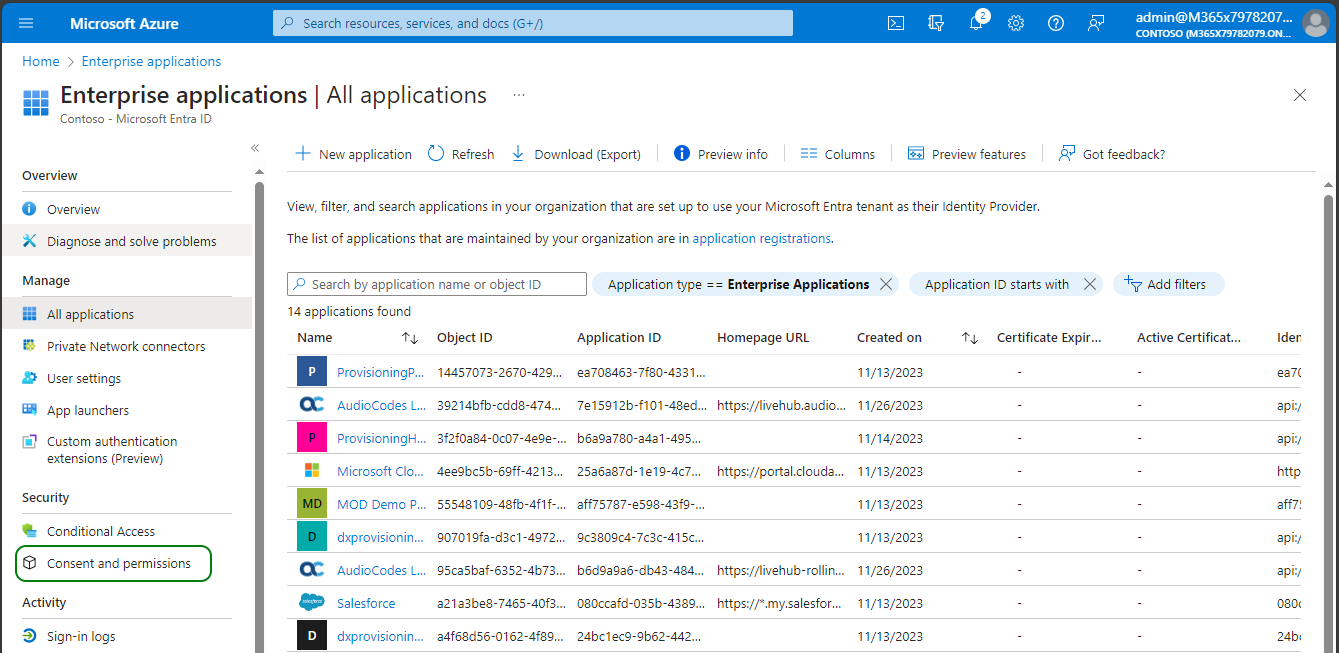
In the Navigation pane, select Consent and permissions.
-
Select Admin consent settings, and then:
- Set Admin consent requests to Yes.
- Under Reviewers, click Add user, and then select the Live Hub service account.
- Click Save.