Connecting Azure Communication Services to Live Hub
This section describes how to connect Azure Communication Services to the AudioCodes Live Hub Platform.
To connect Azure Communication Services to AudioCodes Live Hub platform, complete the following steps:
-
Configure Direct Routing Domain in your Azure Communication Services Account
-
Configure Direct Routing SBC in your Azure Communication Services Account
Create SIP Connection in Live Hub Platform
The following procedure describes how to create a SIP Connection in the AudioCodes Live Hub platform that represents your Azure Communication Services account.
-
Log in to your AudioCodes Live Hub.
-
In the navigation menu, choose SIP Connections, and then click the Add new SIP connection button to add a new SIP Connection.
-
In the GENERAL section:
-
Under the GENERAL tab:
-
For 'Name', enter the unique SIP Connection name (e.g., ACS).
-
For 'Provider Type', select UC Platform.
-
For 'Provider', select Azure Communication Services.
-
-
Under the INCOMING tab:
-
Select the FQDN (Request-URI) check box.
-
Copy the displayed SIP Connection FQDN value. You will need this value when configuring the Direct Routing in your Azure Communication Services account.
-
-
-
Click Create to create a new SIP Connection.
Configure Direct Routing Domain in your Azure Communication Services Account
The following procedure describes how to configure a Direct Routing Domain in the Azure Communication Services account.
-
Log in to the Azure portal as a user with Administrator privileges for Azure Communication Services.
-
In the search bar, enter “Communication Services”, and then locate your Azure Communication Services instance.
-
Open the Direct Routing page.
-
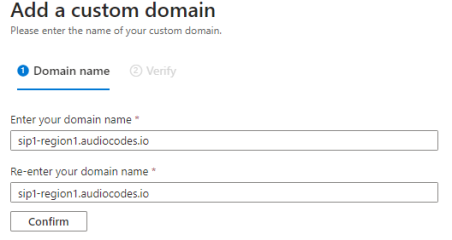
On the Domains tab, click Add domain:

-
Calculate the Live Hub 'base domain', by removing the first element from the SIP Connection FQDN. For example, for FQDN SIP Connection “fjoigfgmeuol.sip1-region1.audiocodes.io”, the Live Hub “base domain” is “sip1-region1.audiocodes.io”.
-
Enter the Live Hub 'base domain', and then click Confirm.
-
Click Add, and then wait for the domain to be added.

-
Click Verify domain.
-
Verify the domain via the displayed TXT record page. You are provided with the TXT record value that should be used for domain verification. Copy this value to the clipboard. Do not click Verify. Instead, proceed to Verify Live Hub Domain.
Verify Live Hub Domain
The following procedure describes how to verify the Live Hub Domain for specific Azure Communication Services instances.
-
Log in to AudioCodes Live Hub.
-
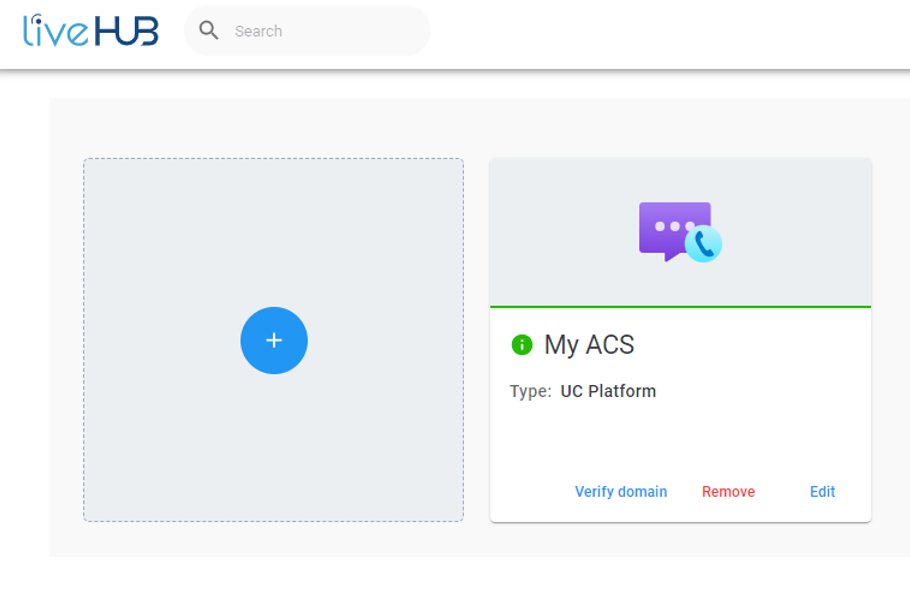
In the navigation menu, choose SIP Connections, and then locate the Azure Communication Services SIP Connection created previously.
-
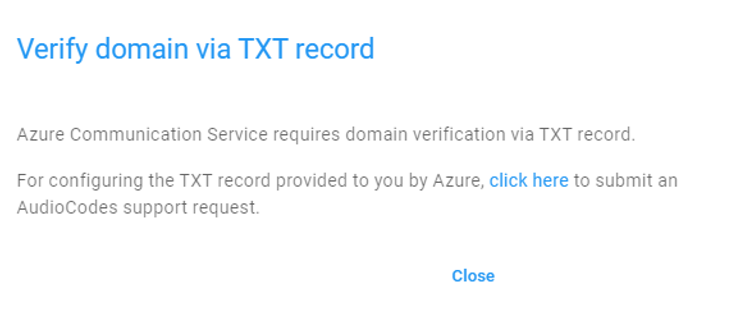
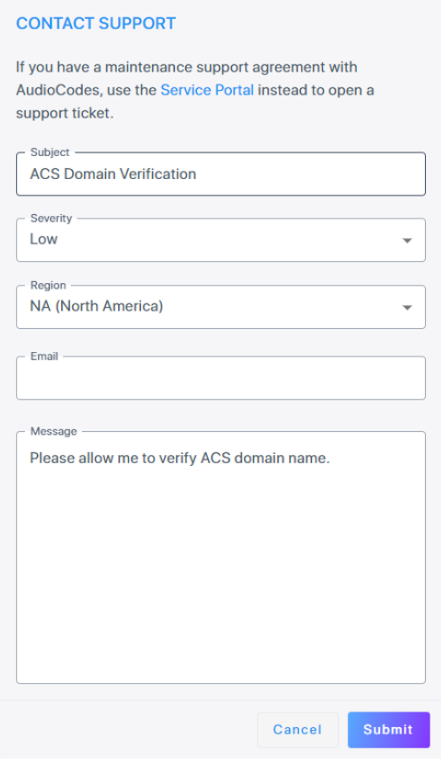
Click Verify domain in the SIP Connection card. You will be prompted to submit a support request for domain verification.
-
Click the provided link to submit a new support request.
-
In the 'Subject' field, enter ACS Domain Verification.
-
In the 'Message' field, specify that you are requesting Domain Verification.
-
Click Submit.
-
Wait for a response from the AudioCodes Support Team that confirms that the domain verification was enabled for your account.
-
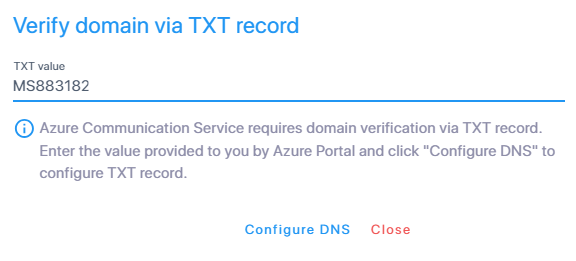
Click Verify domain in the SIP Connection card again. You will be prompted to enter the TXT value.
-
Enter the TXT value, and then click Configure DNS.
-
Log in to the Azure Portal.
-
Navigate to your Azure Communication Services instance.
-
Open the Direct Routing page.
-
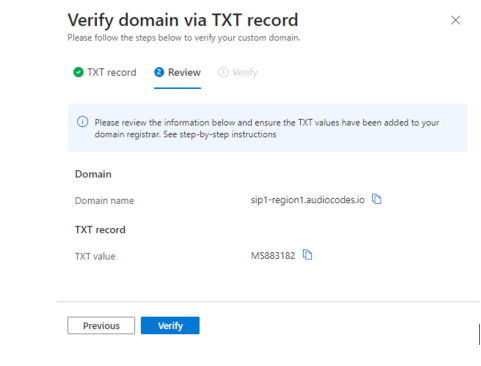
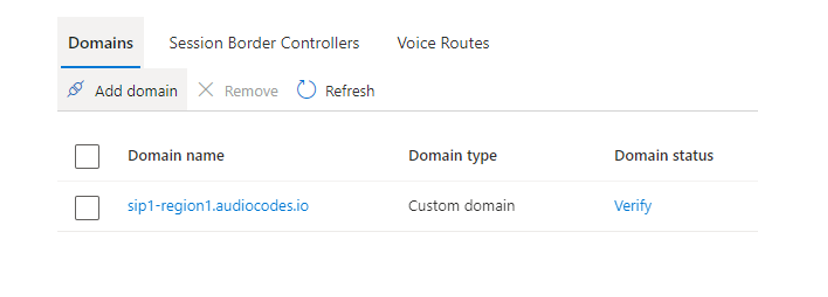
On the Domains tab, locate the Live Hub Domain that you added before, and then click Verify.
-
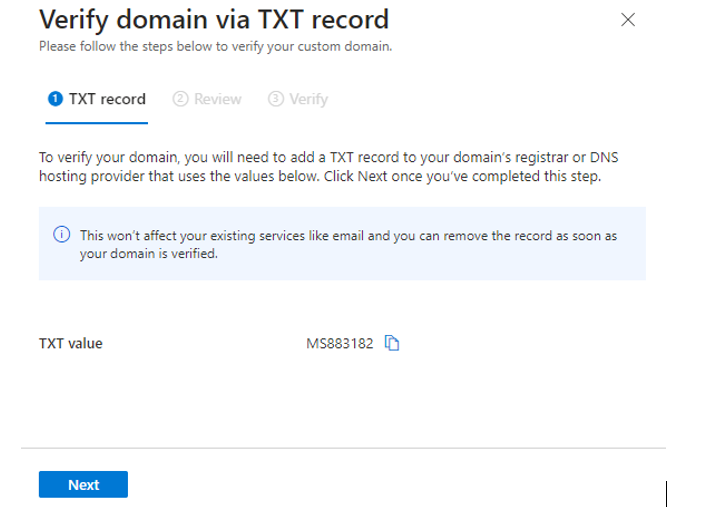
On the Verify domain via TXT record page, click Next.
-
Click Verify.

-
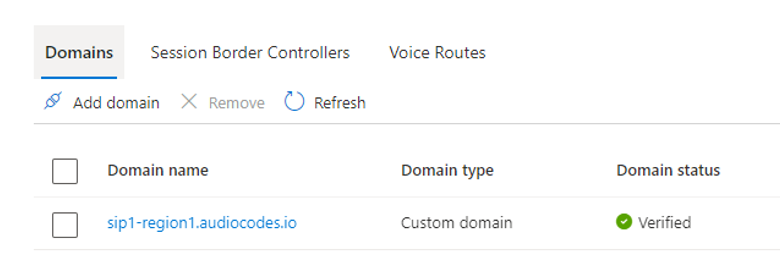
Wait for Azure Communication Services to complete domain verification. When that happens, the domain status changes to Verified.
Configure Direct Routing SBC in your Azure Communication Services Account
The following procedure describes how to configure Direct Routing SBC in your Azure Communication Services Account.
-
Log in to the Azure Portal.
-
Navigate to your Azure Communication Services instance.
-
Open the Direct Routing page.
-
Switch to the Session Border Controllers tab, and then click Configure.

-
In the Session Border Controllers tab:
-
Configure the first line:
-
In the 'FQDN' field, enter your SIP Connection FQDN value (e.g., "fjoigfgmeuol.sip1-region1.audiocodes.io").
-
In the 'Port' field, enter "5091".
-
-
Click Next.

-
-
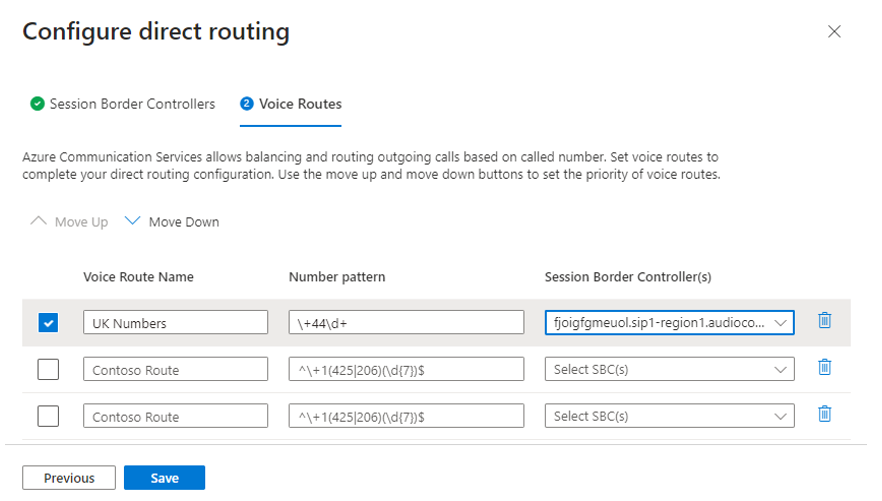
On the Voice Routes tab:
-
Configure voice routes that will be routed by Azure Communication Services to the AudioCodes Live Hub platform. For the Session Border Controller, select the SIP Connection FQDN value that matches the first line configured on the Session Border Controllers page.
-
For example, use the following configuration to route all calls starting with the +44 prefix to the Live Hub platform:
-
Name:
-
Number pattern: \+44\d+
-
Session Border Controller: fjoigfgmeuol.sip1-region1.audiocodes.io
-
Click Save.
-
-
Wait up to one hour for your configuration to get propagated across all Azure Communication Services platform elements.