Create a new speech service
The following procedure describes how to create a new speech service.
To create a new speech service:
Trial account users cannot define speech services. If you are a Trial account user and you click the +(icon), the following message is displayed -
“Only Essential account users can create Speech services. To upgrade this account, add credit to your account balance.”
-
In the Navigation menu pane, select Speech Services, and then click Add new speech service.
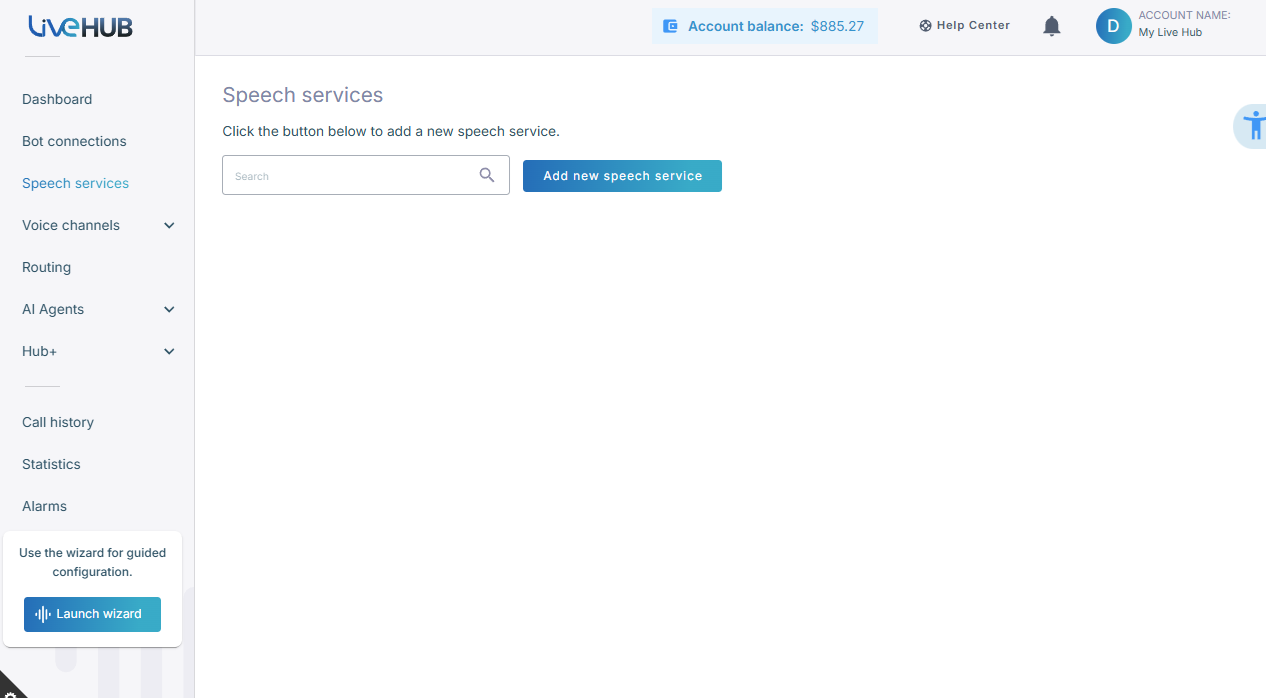
Essential account users can create a maximum of 30 speech services.
-
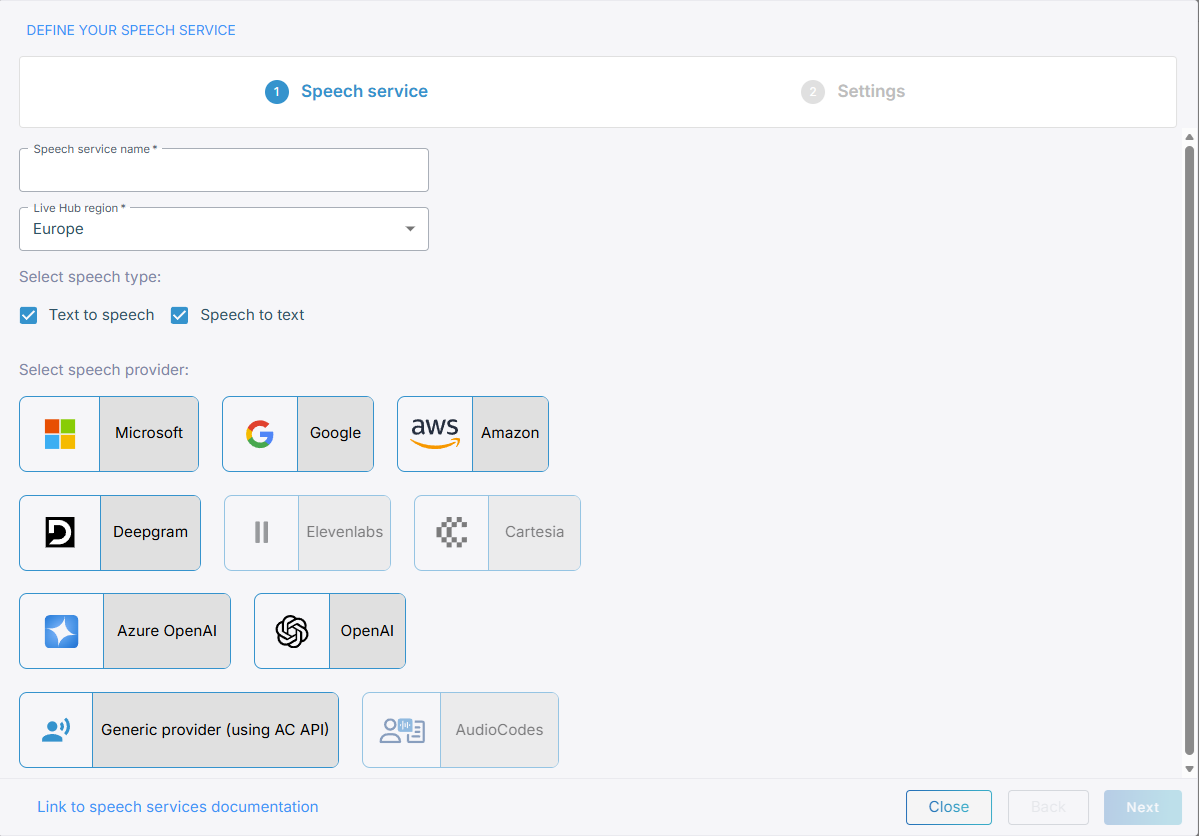
On the 'Define your speech service' page, in the 'Speech service name' field, enter the name of your speech service.
-
From the 'Live Hub region' drop down list, select the geographical location (region) in which Live Hub voice infrastructure is deployed.
-
Select the speech type, and then select the speech provider:
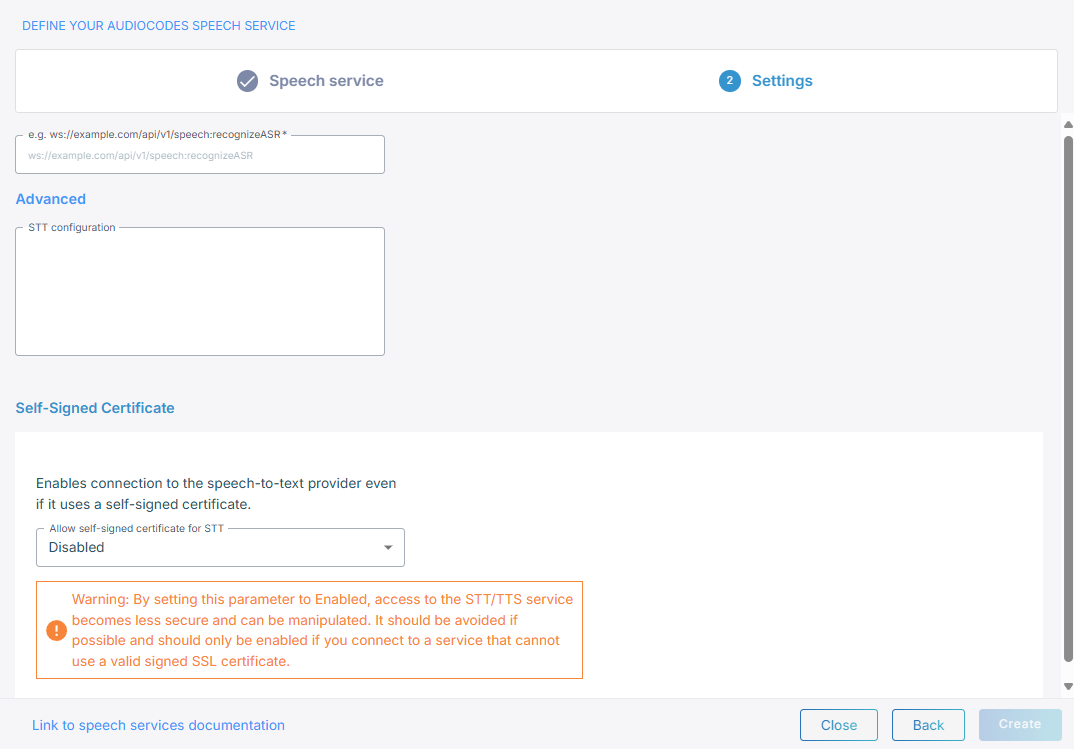
When creating speech-to-text/text-to-speech providers, you can choose whether you want self-signed certificates only for Microsoft, AudioCodes or Generic.The AudioCodes speech provider supports only speech-to-text speech type.
If you choose a speech provider different from AudioCodes, ensure you have the authentication credentials and endpoint URLs provided by the chosen provider.
Microsoft
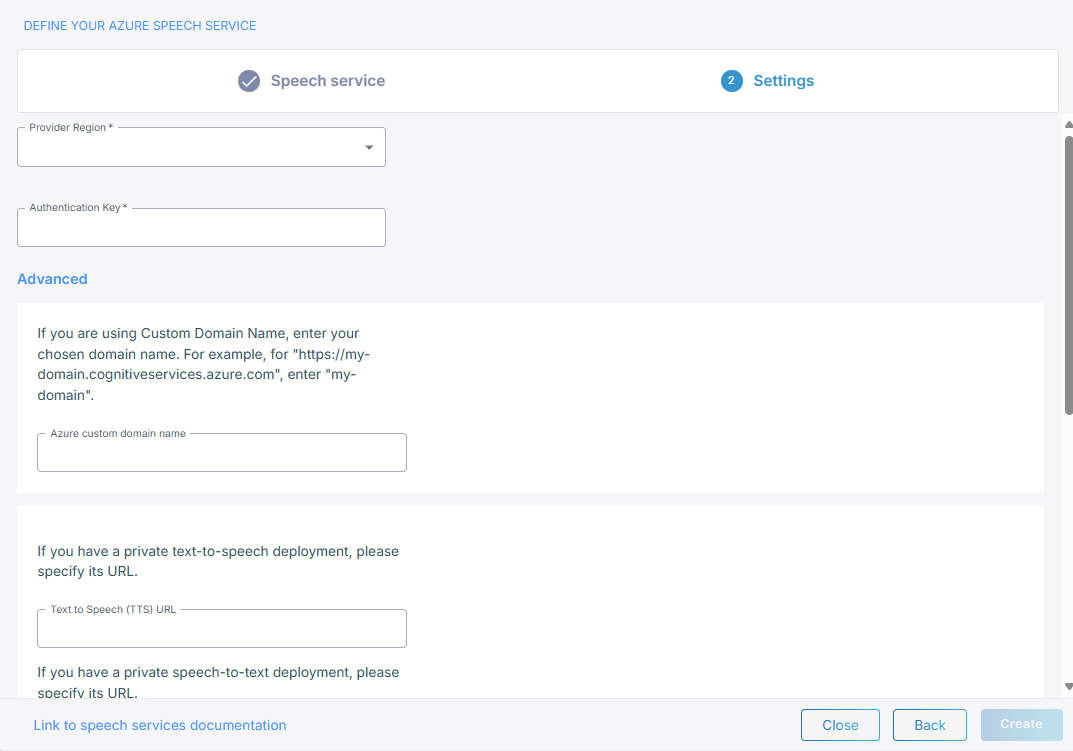
If you select Microsoft, do the following:
-
From the 'Provider Region' drop-down list, select the region.
-
In the 'Authentication Key' field, enter the Authentication Key.
-
Under Advanced, in the 'Azure Custom Domain Name' field, enter your chosen domain name if you are using a Custom Domain Name.
-
In the example field, if you have a private text-to-speech deployment, enter the URL.
-
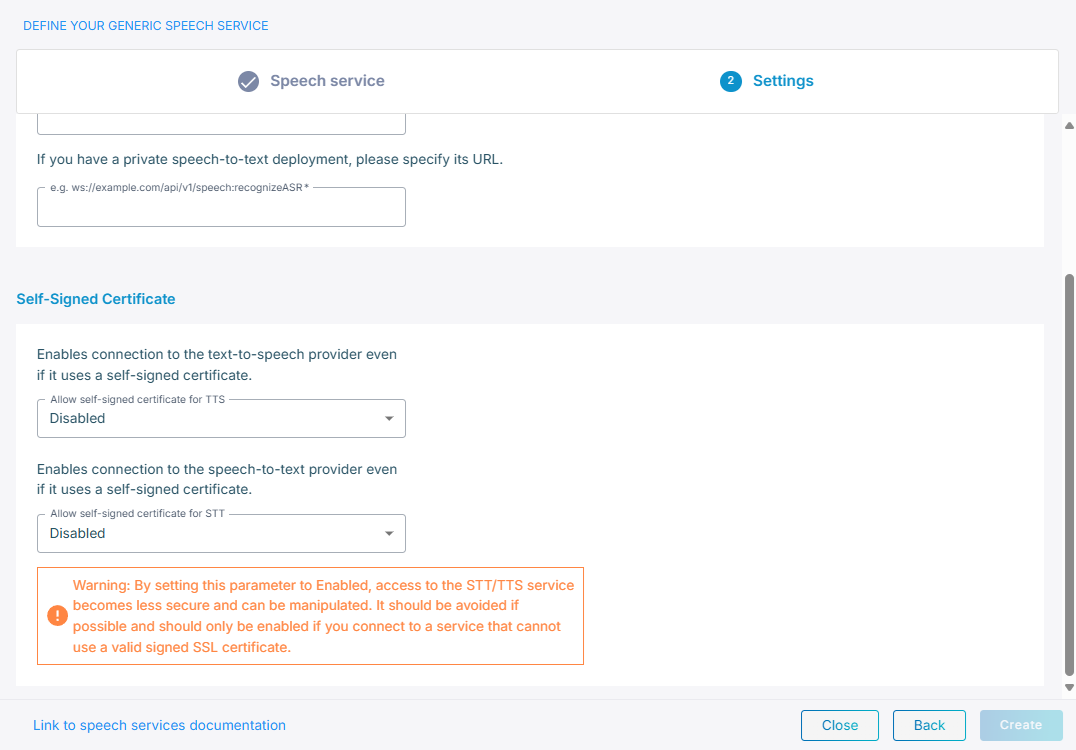
In the 'Speech To Text (URL)' field, if you have a private speech-to-text deployment, enter the URL.
-
Under Self-Signed certificates:
-
From the 'Allow self-signed certificate for STT' field, select Enable to enable connection to the speech-to-text provider.
-
From the 'Allow self-signed certificate for TTS' field, select Enable to enable connection to the text-to-speech provider.
-
Click Create.

-
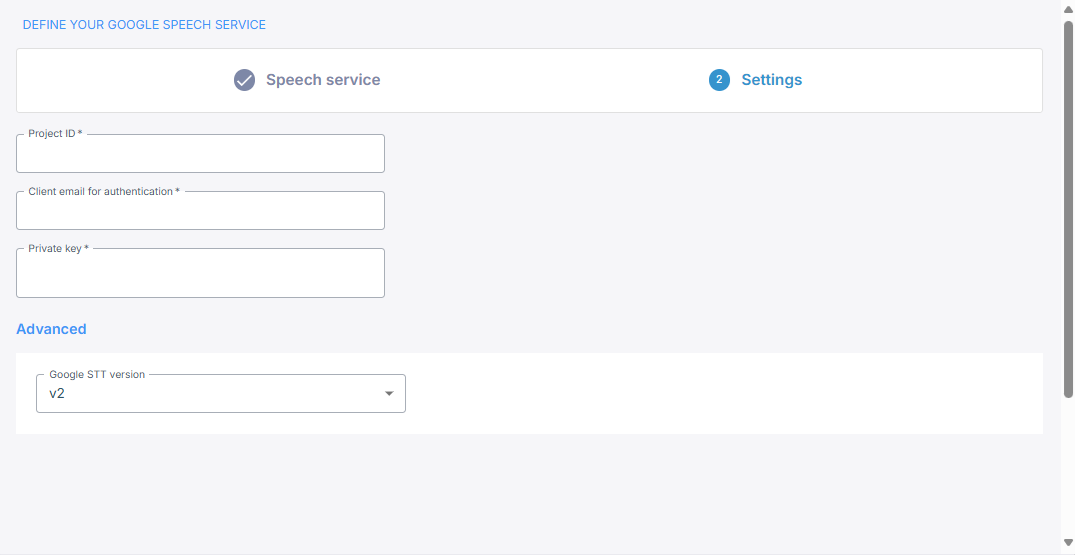
If you select Google, do the following:
-
In the 'Project ID' field, enter the Project ID.
-
In the 'Client email for authentication' field, enter the client email for authentication.
-
In the 'Private Key' field, enter the private key.
-
Under 'Advanced', in the 'Google STT version', its recommended to leave the default v2.
-
Click Create.
AC DNN
If you select AC DNN, do the following:
-
In the 'Speech To Text (URL)' field, enter the speech-to-text service URL.
-
In the 'Advanced' field, enter the STT configuration.
-
From the 'Allow self-signed certificate for STT' drop-down list, select Enable if your deployment uses self-signed certificates.
-
Click Create.
ElevenLabs
If you select ElevenLabs, do the following:
-
In the 'API key' field, enter the API key name, which you can obtain from the profile settings in ElevenLabs.
-
Under Text-to-Speech (TTS),
-
In the 'TTS host' field, enter the TTS hostname. The default value is api.elevenlabs.io, but you can replace it with a different hostname if needed.
-
In the 'TTS configuration' field, enter the JSON configuration that defines how speech should be generated.
For a list of advanced parameters, see ElevenLabs text-to-speech API. The parameters listed under "query parameters" in the ElevenLabs documentation should be placed under "query" configuration section. The parameters listed under "body" in the documentation should be placed under the "body" section.
-
-
Under Speech-to-Text (STT),
-
In the 'STT host' field, enter the STT hostname. The default value is api.elevenlabs.io, but you can replace it with a different hostname if needed.
-
In the 'STT configuration' field, enter the JSON configuration that defines how speech should be generated.
-
-
Click Create.

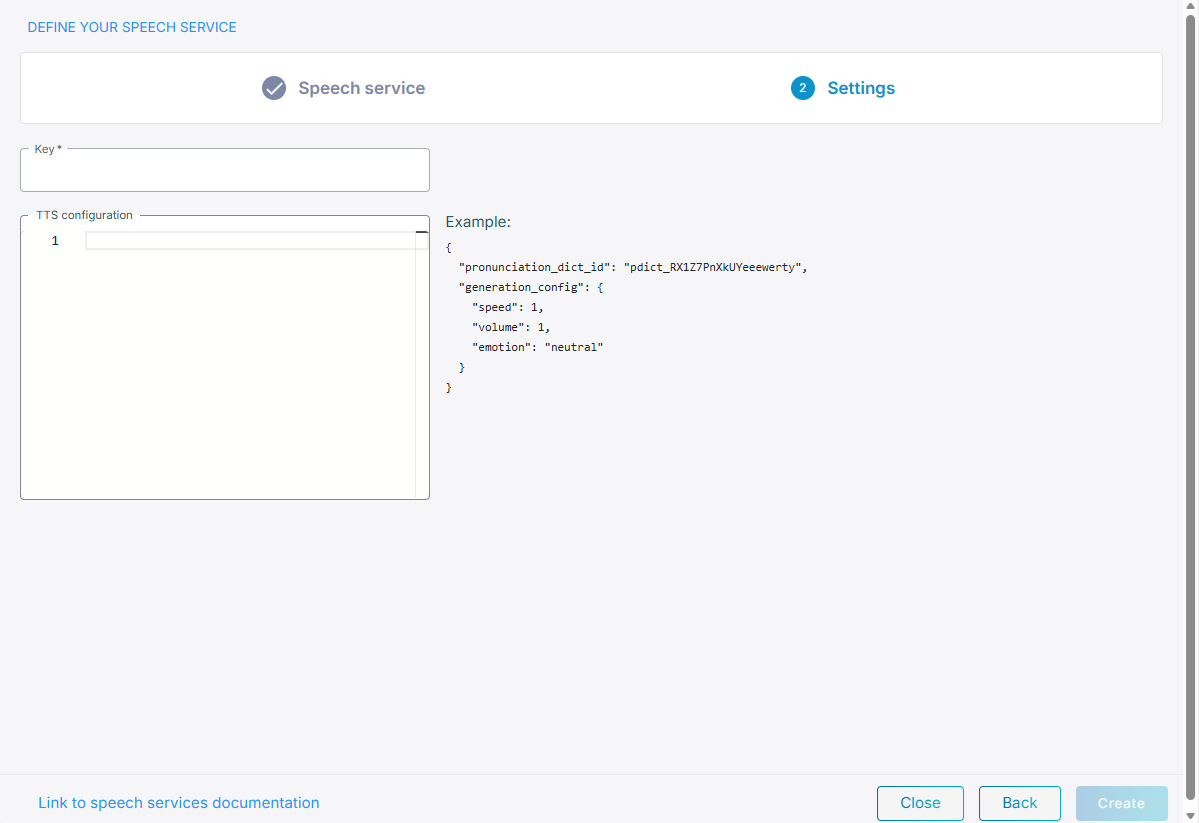
Cartesia
You can add a Cartesia Speech Service and select Cartesia text-to-speech models and voices when configuring bots. Cartesia only supports text-to-speech. If you select Cartesia, do the following:
-
In the 'Key' field, enter the API key provided by the customer from their Cartesia account.
-
In the 'TTS configuration' field, enter the JSON configuration that defines how speech should be generated.
-
Click Create.
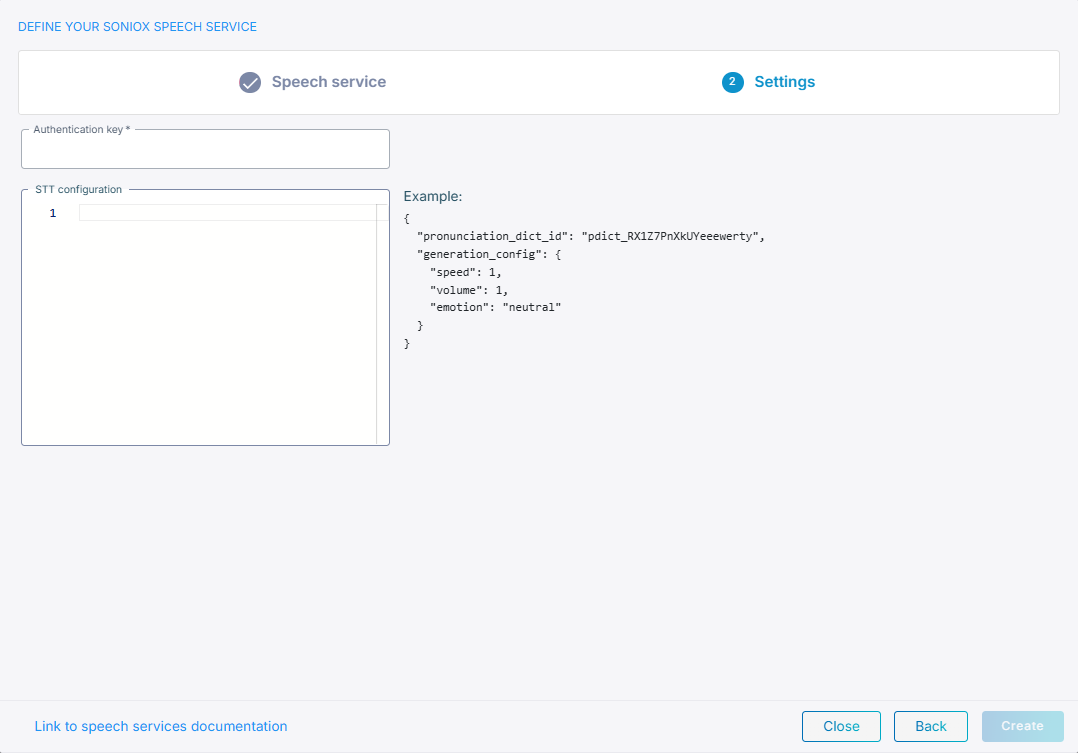
Soniox
Select ‘Soniox’ to use Soniox real‑time speech recognition. Soniox only supports speech-to-text.
If you select Soniox, do the following:
-
In the 'Authentication key' field, enter the Authentication key from their Soniox account.
-
In the 'STT configuration' field, enter the JSON configuration that defines how speech should be generated.
-
Click Create.
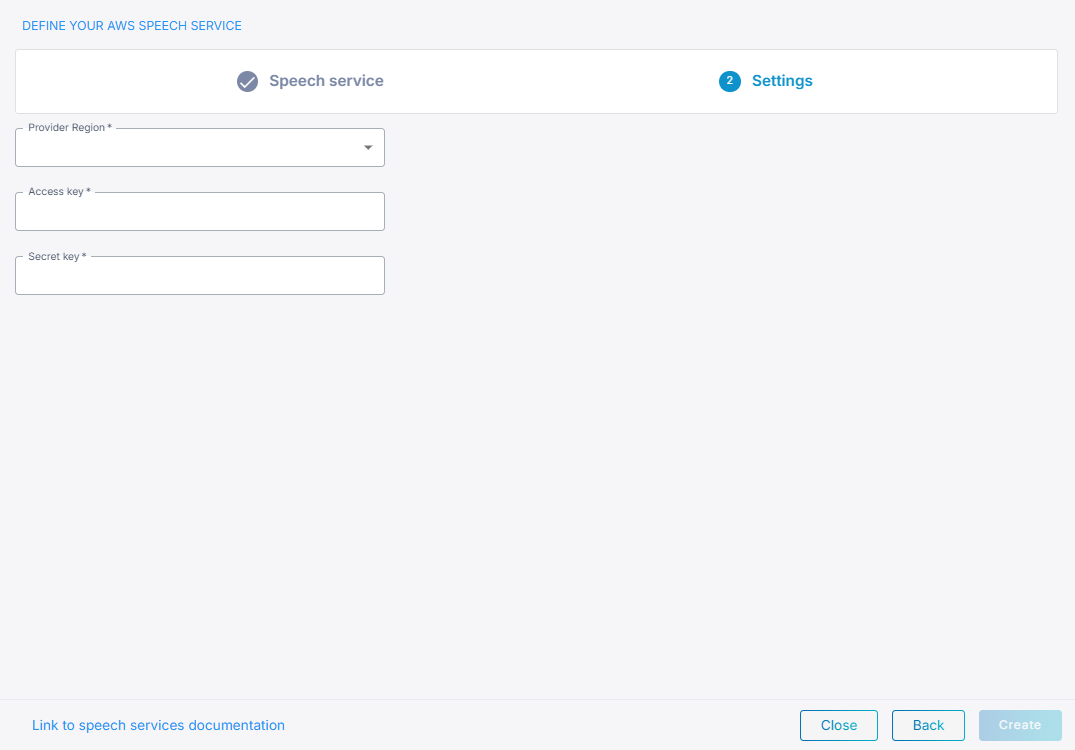
Amazon
If you select Amazon, do the following:
-
From the 'Provider Region' drop-down list, select the region.
-
In the 'Access key' field, enter the Access key.
-
In the 'Secret Key' field, the Secret key.
-
Click Create.
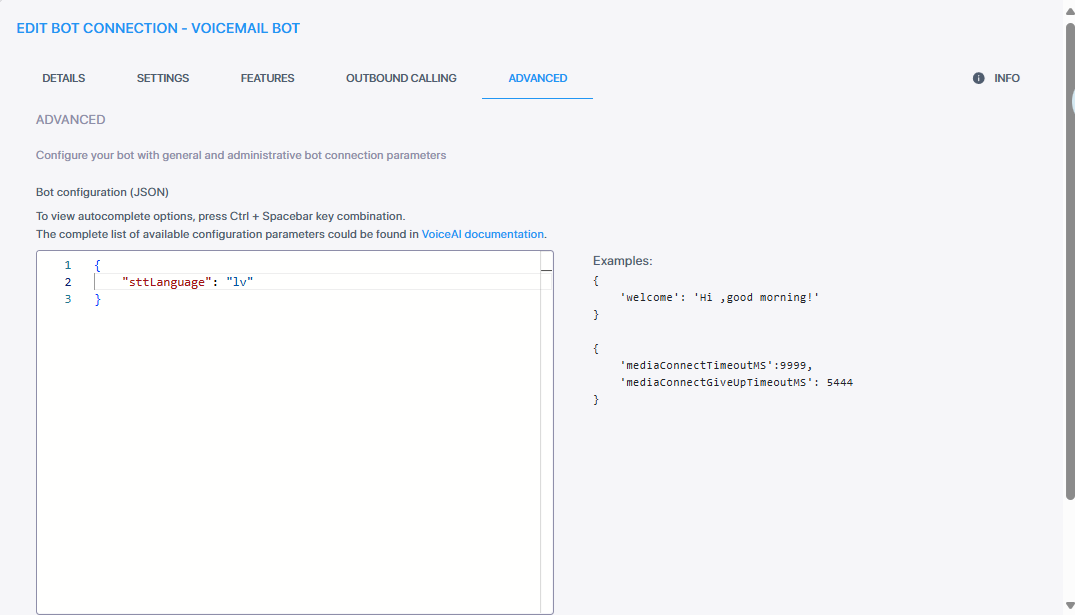
Deepgram
Deepgram supports both Speech-to-Text and Text-to-Speech services, the URLs are pre-configured, unless have a private TTS endpoint, then you must specify its URL.
For the Deepgram speech service, you determine the language in the Advanced tab.
Example of setting language to Latvian:
If you select Deepgram, do the following:
-
In the 'Authentication key' field, enter the Authentication key.
-
Under Advanced, in the 'Text to Speech (TTS) URL' field, enter the TTS URL.
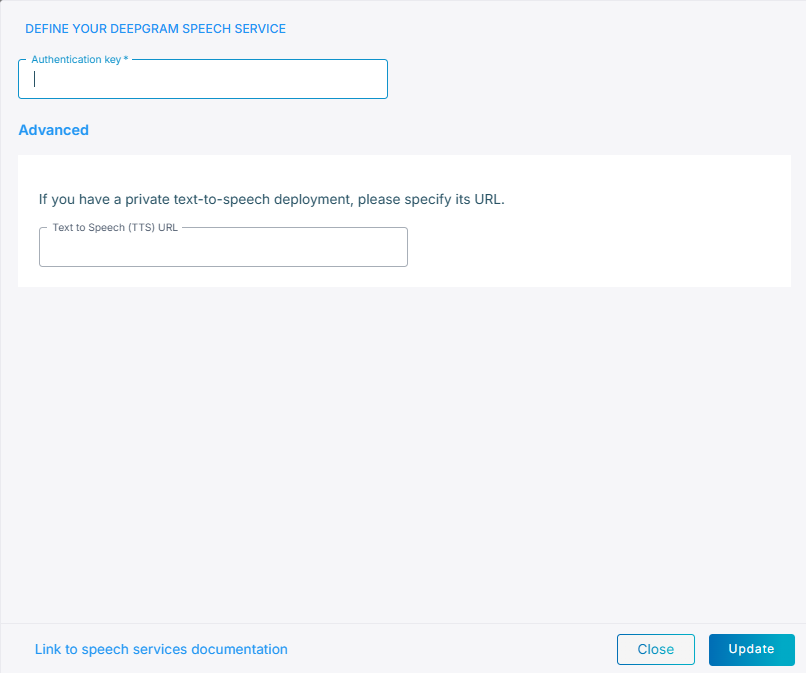
-
Click Create.
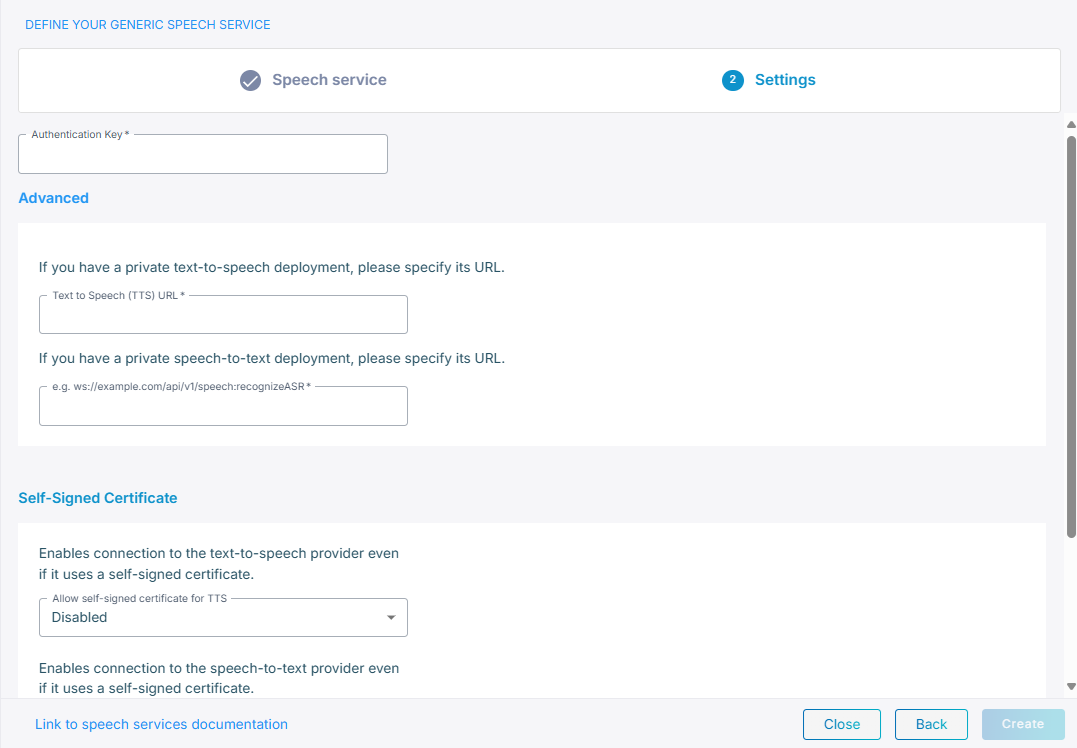
Custom Integration
If you select Custom Integration, do the following:
-
In the 'Authentication key' field, enter the Authentication key.
-
Under Advanced:
-
In the 'Text To Speech (TTS) URL' field, enter the TTS URL.
-
In the 'Speech To Text (STT) URL' field, enter the STT URL.
-
-
Under Self-Signed Certificate:
-
From the 'Allow self-signed certificate for TTS' field, select Enable to enable connection to the text-to-speech provider.
-
From the 'Allow self-signed certificate for STT' field, select Enable to enable connection to the speech-to-text provider.
-
-
Click Create.
Azure OpenAI
Before you begin, you must first create a service in Azure. For details how to create and deploy an Azure OpenAI service, see Create and deploy an Azure OpenAI in Azure AI Foundry Models resource.
If you select Azure OpenAI, do the following:
-
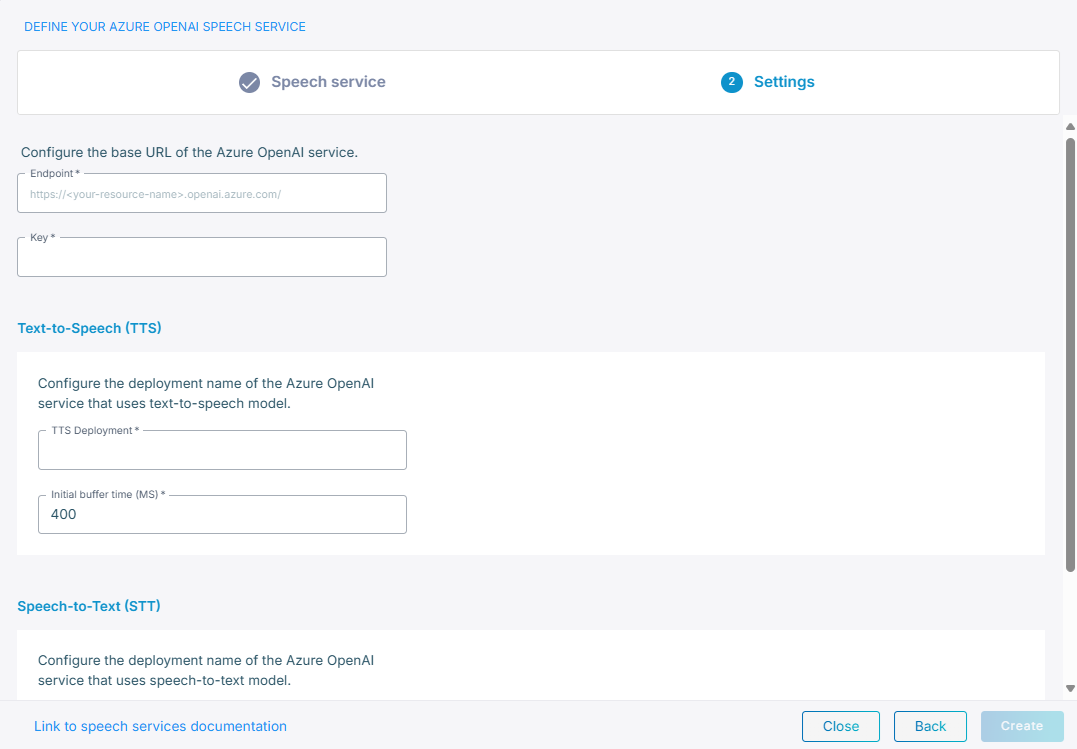
In the 'Endpoint' field, enter the base URL of the Azure OpenAI service.
-
In the 'Key' field, enter the key you received from the service you created in Azure.
-
Under Text-to-Speech (TTS):
-
In the 'TTS Deployment' field, enter the TTS deployment name you gave to the service you created in Azure.
-
In the 'Initial buffer time (ms)' field, specify the wait time in milliseconds before the system begins streaming audio to the user. This buffering helps ensure smooth audio delivery by accommodating initial latency from the text-to-speech provider.
-
-
Under Speech-to-Text (STT):
-
In the 'STT Deployment' field, enter the STT deployment name you gave to the service you created in Azure.
-
From the 'STT Model' drop-down menu, choose your model, for example, gpt-4o-transcribe.
-
-
Click Create.
-
You can also update the ttsinstructions parameter in the Bot connection, 'Advanced' field. For details, see Edit your bot connection.
For example:
{
   “ttsInstructions”: "Speak in a cheerful and positive tone."
}
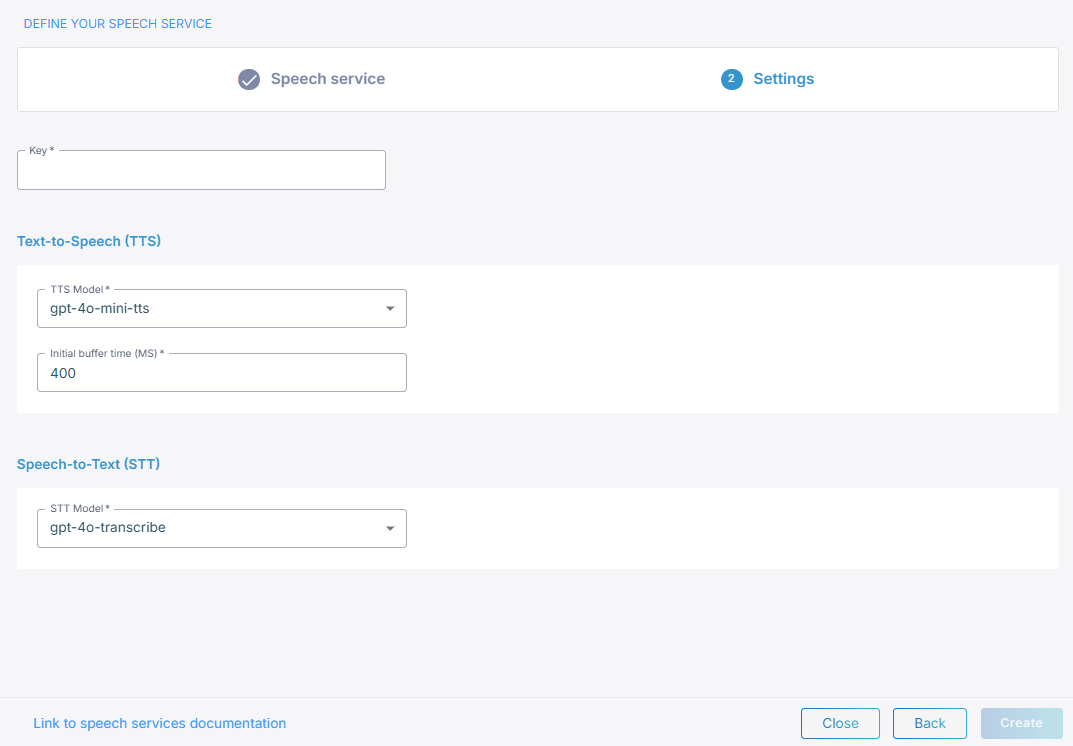
OpenAI
If you select OpenAI, do the following:
-
In the 'Key' field, enter your key.
-
Under Text-to-Speech (TTS):
-
In the 'TTS Model' field, choose your model, for example, gpt-4o-mini-tts.
-
In the 'Initial buffer time (ms)' field, specify the wait time in milliseconds before the system begins streaming audio to the user. This buffering helps ensure smooth audio delivery by accommodating initial latency from the text-to-speech provider.
-
-
Under Speech-to-Text (STT), From the 'STT Model' drop-down menu, choose your model, for example, gpt-4o-transcribe.
-
Click Create.