Using the Zero Touch Setup Wizard to Provision Devices
When plugged in to the enterprise network, phones can automatically be provisioned through the Zero Touch feature.
|
■
|
Zero Touch determines which template the phone will be allocated. |
|
■
|
The template is allocated per phone model and per phone tenant. |
|
■
|
The template determines which firmware file and configuration file the phone will be allocated. |
Zero Touch provisioning accelerates uptime by enabling multiple users and phones to automatically be provisioned and added to the Manager.
You can use the Setup Wizard feature to set up Zero Touch provisioning. The Wizard simplifies deployment of phones in the enterprise for admins. The Wizard's functions were already implemented in versions of Device Manager Pro earlier than Version 7.4, only now they're centralized in a single location for a friendlier deployment experience. Here are the steps to follow to provision phones using the Wizard.
|
➢
|
To provision phones using the Zero Touch Setup Wizard: |
|
1.
|
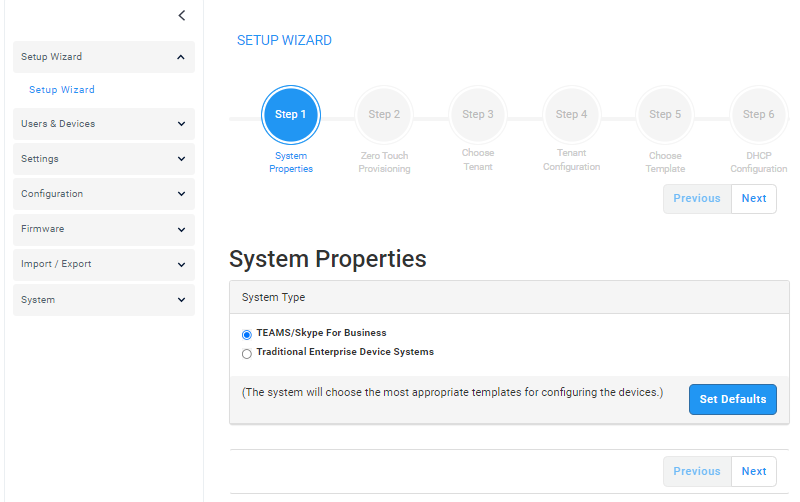
In the main screen, click the 'Setup' menu and then click the Setup Wizard option. |
|
2.
|
Select Skype for Business if it isn't selected already, and then click Next. |
The Setup Wizard will be closed if you intend to use other PBXs besides Skype for Business. The Setup Wizard is intended exclusively for Skype for Business.
|
3.
|
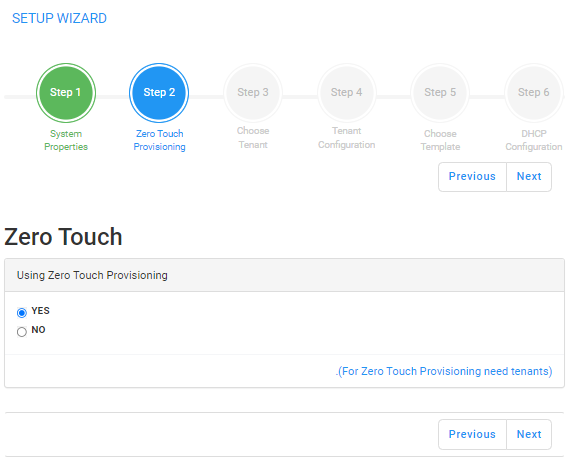
Select Yes and then click Next. |

|
4.
|
Choose an existing tenant from the dropdown and click Next. If a tenant doesn't already exist, click Next and configure one. This is to be able to create a specific configuration for the tenant and configure the URL in DHCP Option 160 so devices will use this tenant. If there's no specific tenant configuration to configure, click Next. |
|
5.
|
Click Next (not shown in the previous figure). |

|
6.
|
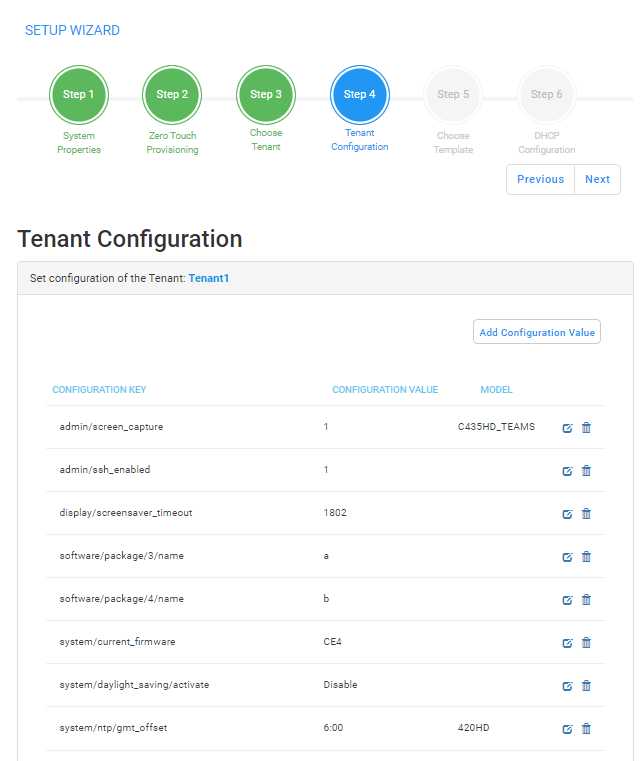
Associate a template according to the MODEL and TENANT. The page displays a mapping table in which you need to map {MODEL + TENANT} to TEMPLATE. |
|
a.
|
Select 'IsDefault'; from this point on, the template chosen will be used. |
|
b.
|
From the 'Phone' dropdown, select the model. |
|
c.
|
From the 'Tenant' dropdown, select the tenant and then click Next. |
|
7.
|
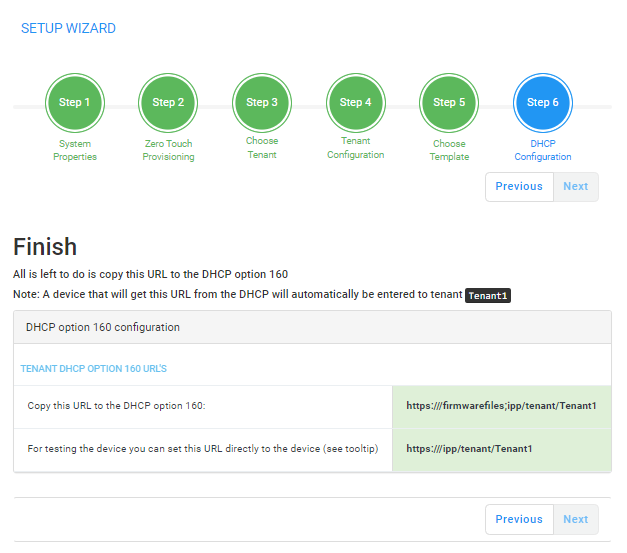
Define the URL in DHCP Option 160. |