Device Configuration Summary
This section provides a summary of the required configuration of the device for OAuth-based user login authentication using Microsoft Entra ID.
|
1.
|
Configure a TLS certificate: |
|
c.
|
Navigate back to the TLS Contexts table, and click the Trusted Root Certificates link at the bottom of the page, and then import the TLS certificates used by Azure. |
|
2.
|
Open the Web Settings page (Setup menu > Administration tab > Web & CLI folder > Web Settings), and then configure the following: |
|
a.
|
Select the 'Local Users Table Can Be Empty' check box: |

|
b.
|
From the 'Secured Web Connection (HTTPS)' drop-down list, select HTTPS Only or HTTPS Redirect. |

|
c.
|
In the 'Web Server Name' field, enter the FQDN assigned to the device's management IP address (assigned to eth0 front-end IP on Internal Load Balancer). |

|
●
|
'Name': Microsoft Entra ID |
|
●
|
'Base URL': https://login.microsoftonline.com/<tenant-id> |
The <tenant-id> should be the 'Directory (tenant) ID' value from the registered application in Microsoft Entra ID (see Registering Application in Microsoft Entra ID) if it is configured to allow access only for users from its organization (single-tenant). The <tenant-id> should be "common" if the application is configured to allow access only for users from all organizations (multi-tenant).
|
●
|
'Network Interface: Select the network interface that has the public IP address (e.g., eth2) |
|
●
|
'Verify Certificate': Enable (requires that you load Microsoft Entra ID CA certificates as trusted roots for TLS Context #0 as described in Step 1 above, or other TLS context configured in TLS Context table) |
|
●
|
'Name': Microsoft Entra ID |
|
●
|
'OAuth Server': Select Microsoft Entra ID (created in previous step) |
|
●
|
'Service Activation': Enable |
|
5.
|
Open the Authentication Server page (Setup menu > Administration tab > Web & CLI folder > Authentication Server), and then from the 'Use OAuth for Login' drop-down list, select Enable with local login. |
|
6.
|
Restart the device to activate the new configuration. |
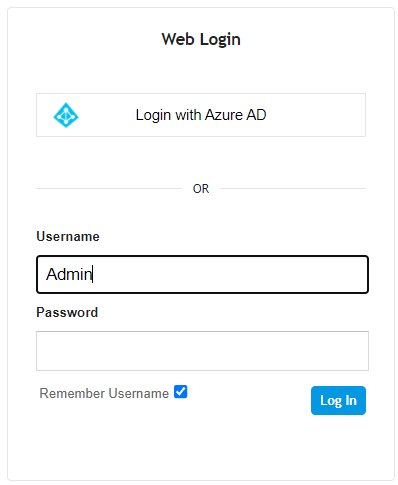
After the device restarts, the Web Login page also displays the Login with Azure AD button. You may log in using your Microsoft Entra ID credentials by clicking this button, or log in using your local (device) credentials by entering your username and password in the 'Username' and 'Password' fields respectively.
|
7.
|
Verify that you can log in through Microsoft Entra ID. |
|
8.
|
(Optional) If your login through Microsoft Entra ID is successful, you can disable the login method using local credentials (Local Users table): |
|
●
|
Open the Authentication Server page (Setup menu > Administration tab > Web & CLI folder > Authentication Server), and then from the 'Use OAuth for Login' drop-down list, select Enable without local login. Upon the next log in, the Web Login page only displays the Login with Azure AD button. |