Restoring to a Point in Time
This procedure describes how to restore the last incremental file containing the point-in-time.
|
1.
|
In Microsoft SQL Server Management Studio, right-click Databases, and click Restore Database. |
|
2.
|
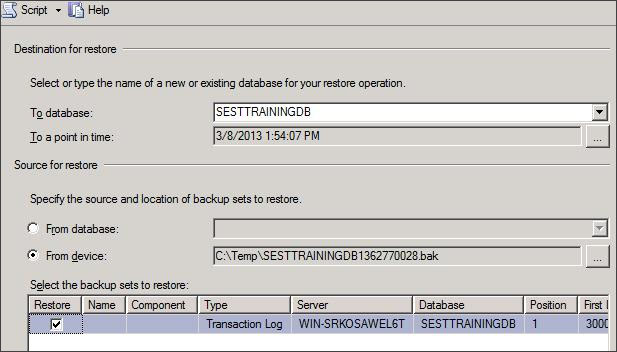
In the Source for restore’ section, select From Device and then click the browse button. |
|
3.
|
Click Add in the Specify Backup window. Browse to the location of your recently restored flat files, select the incremental backup file containing the point-in-time to restore to, and then click OK. |
|
4.
|
Click OK in the Specify Backup window. In the Select the backup sets to restore’ section, check the backup file you added in the previous step. |
|
5.
|
In the ‘Destination for restore section’, select the database to which to restore: |
|
6.
|
In the Destination for restore’ section, click the browse button adjacent to the field ‘To a point in time’; the ‘Point in time restore’ window is displayed. |
|
7.
|
Select a specific date and time and choose the date and time to which to restore: |

|
8.
|
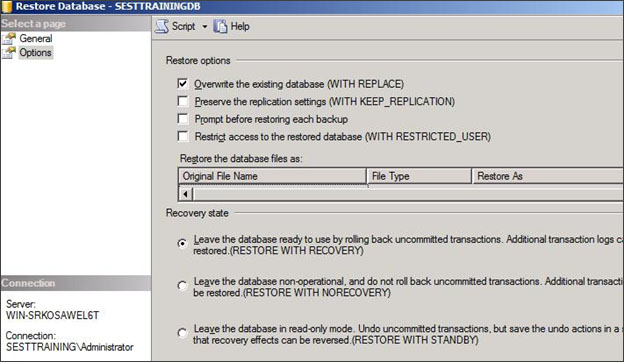
Click OK. In the left pane, click Options and make the following selections: In the ‘Restore options’ section, select Overwrite the existing database and leave the other options unselected. |
|
9.
|
In the Recovery state’ section, select Leave the database ready to use by rolling back uncommitted transactions. Additional transaction logs can be restored. (RESTORE WITH RECOVERY): |
|
10.
|
Click OK to perform the restore. the restored database is displayed with only those changes up to the specified point-in-time. |