Google CX studio (CES)
Google CX Studio Agents (aka Customer Experience Agent Studio - CES - https://ces.cloud.google.com/) is a platform for developing virtual agents.
You can access this platform at https://ces.cloud.google.com/.
This page explains how to integrate your CES agent with VoiceAI Connect Enterprise.
Connecting to Google CX Studio
Google Service Account
To integrate your agent, you must have a service account with the following Google IAM permissions:
-
Enable APIs: In the Google Cloud Console, navigate to APIs & Services > Library and ensure the Dialogflow API is enabled.
-
Create Account: Create a Google service account with the following IAM permissions:
-
Dialogflow API Client
-
Dialogflow Agent Assist Client
-
-
Download Key: Download the JSON key file.
Obtaining a conversation profile ID
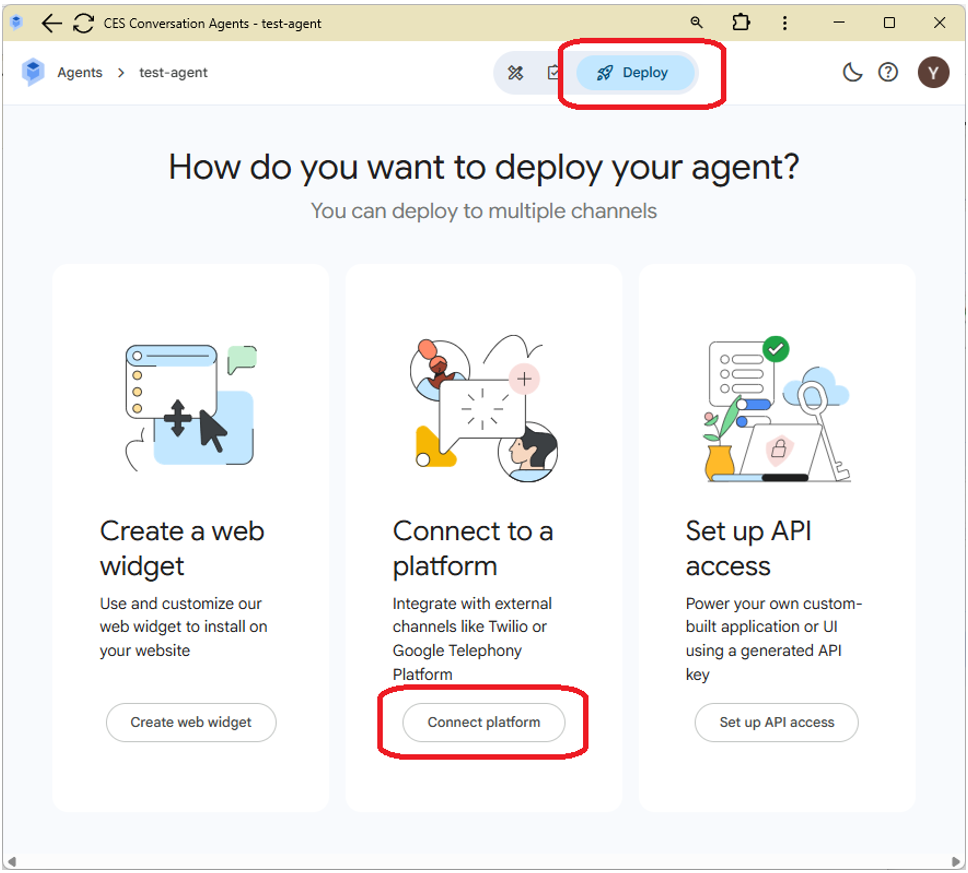
1. On the agent’s page (on https://ces.cloud.google.com/), click the deploy at the top and select “Connect platform”.
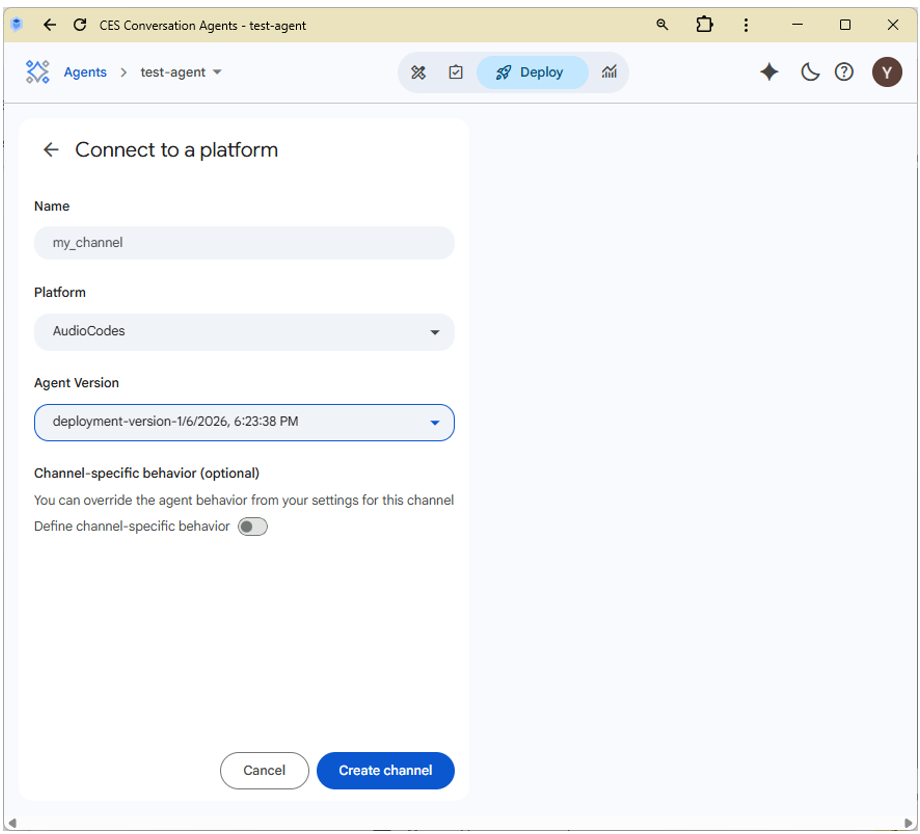
2. Give your connection a name, choose “AudioCodes” platform and select Create a new version.
3. After clicking “Create channel”, a popup appears. Press the copy button to copy the conversation profile.
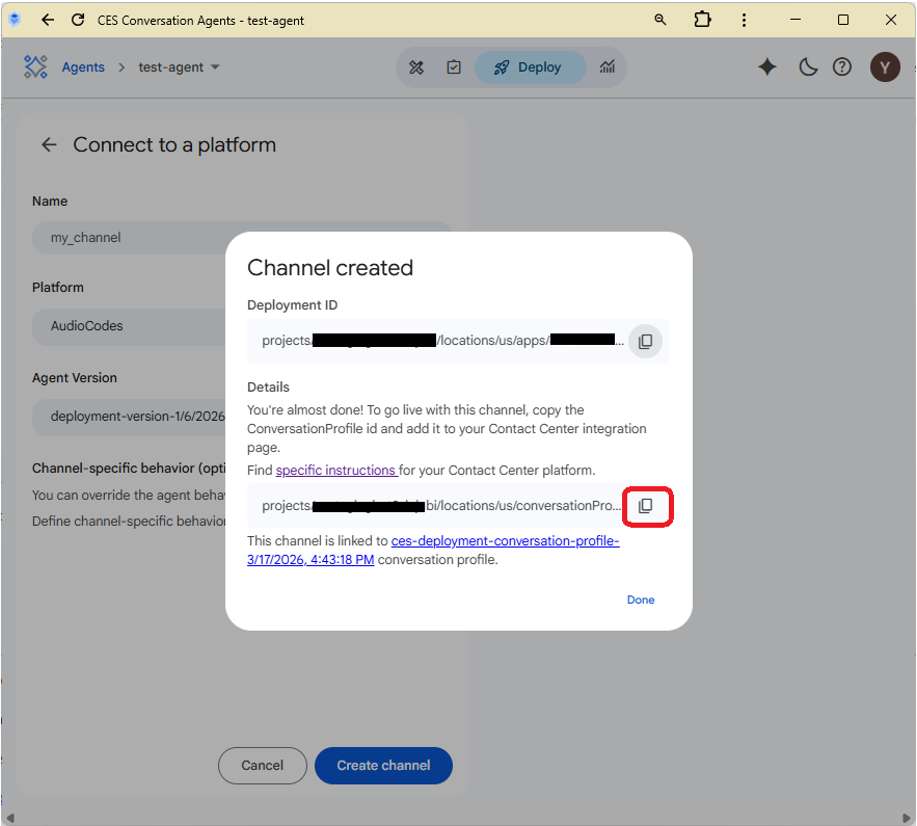
4. Extract the conversation-profile-id from the full conversation profile value, which has the form "projects/<project-id>/locations/<location>/conversation-profiles/<conversation-profile-id>".
Configuring your bot
To connect your CES conversation agent to VoiceAI Connect Enterprise Enterprise, configure the following:
Provider configuration
The provider must be configured like the following:
{
  "name": "provider-name",
  "type": "google",
  "projectId": "<google-cloud-project-id>",
  "region": "<location-of-the-agent>",
  "credentials": {
    "privateKey": "<service-account-private-key>",
    "clientEmail": "<service-account-client-email>"
  }
}
Bot configuration
The bot must be configured like the following:
{
  "name": "bot-name",
  "displayName": "bot-name",
  "directTTS": true,
  "directSTT": true,
  "credentials": {
    "conversationProfileId": "<conversation-profile-id>"
  },
  "provider": "provider-name",
  "speechDetection": "disabled",
  "googleBidiApi": true,
  "persistentRecognition": true,
  "googleStopOnEOSU": true,
  "connectOnPrompt": false,
  "playbackUnderrunTimeoutMS": 0,
  "sendDTMF": true
}
Agent features
Accessing call metadata
All the fields listed How do I use it? are accessible to the bot using agent variables (see Google documentation).
At conversation start, AudioCodes populates the variables with names corresponding to the field names and assigns the appropriate values.
For example, the caller phone number can be accessible by adding the “caller” variable.
Values of proprietary SIP headers can be forwarded using the sipHeadersToBot parameter, as described in Sending CDRs to remote server.
Disconnect
Disconnect is performed using the “end_session” tool.
To pass additional metadata, add the “TELEPHONY_PAYLOAD” field to the “params” parameter of the “end_session” tool. The field should contain an “activityParams” field with parameters listed Event parameters.
For example, the following tool call will add a SIP header to the SIP BYE message:
{
  "reason": "User asked to disconnect.",
  "session_escalated": false,
  "params": {
    "TELEPHONY_PAYLOAD": {
      "activityParams": {
        "hangupSipHeaders": [
          {
            "name": "X-My-Header",
            "value": "my_value"
          }
        ]
      }
    }
  }
}
Transfer (escalate)
To transfer the call, add the field “LIVE_AGENT_HANDOFF” to the “params” parameter of the “end_session” tool.
Example:
{
  "reason": "User asked to escalate.",
  "session_escalated": true,
  "params": {
    "LIVE_AGENT_HANDOFF": {}
  }
}
To add additional metadata, specify an “activityParams” field inside it with parameters listed How do I use it?.
Example:
{
  "reason": "User asked to escalate.",
  "session_escalated": true,
  "params": {
    "LIVE_AGENT_HANDOFF": {
      "activityParams": {
        "transferTarget": "sip:+123456789",
        "transferSipHeaders": [
          {
            "name": "X-My-Header",
            "value": "my_value"
          }
        ]
      }
    }
  }
}