Adding a Report Scheduler
The procedure below describes how to add a new Report Scheduler.
| ➢ | To add a new Report Scheduler: |
| 1. | Open the Report Scheduler page (Reports > Interaction Center Reports > Report Scheduler); the following appears: |
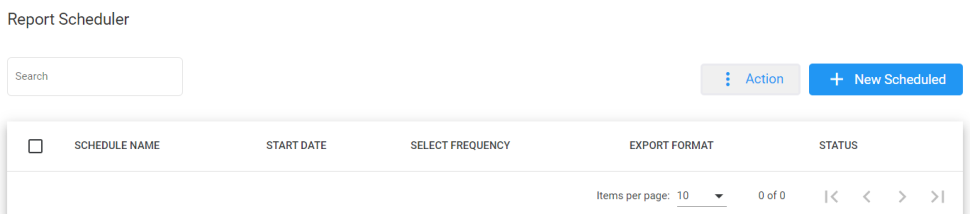
| 2. | The following is a description of all the fields: |
|
Field |
Description |
|---|---|
| Schedule Name | Defines the report scheduler name that was configured. |
| Start Date | Defines the start dates that were configured on the report scheduler. |
| Select Frequency | Defines the frequency that this report is sent. |
| Export Format | Defines the format in which this report is sent. |
| Status | Defines the status of the schedule report. |
| 3. | Click + New Scheduled; the following appears: |
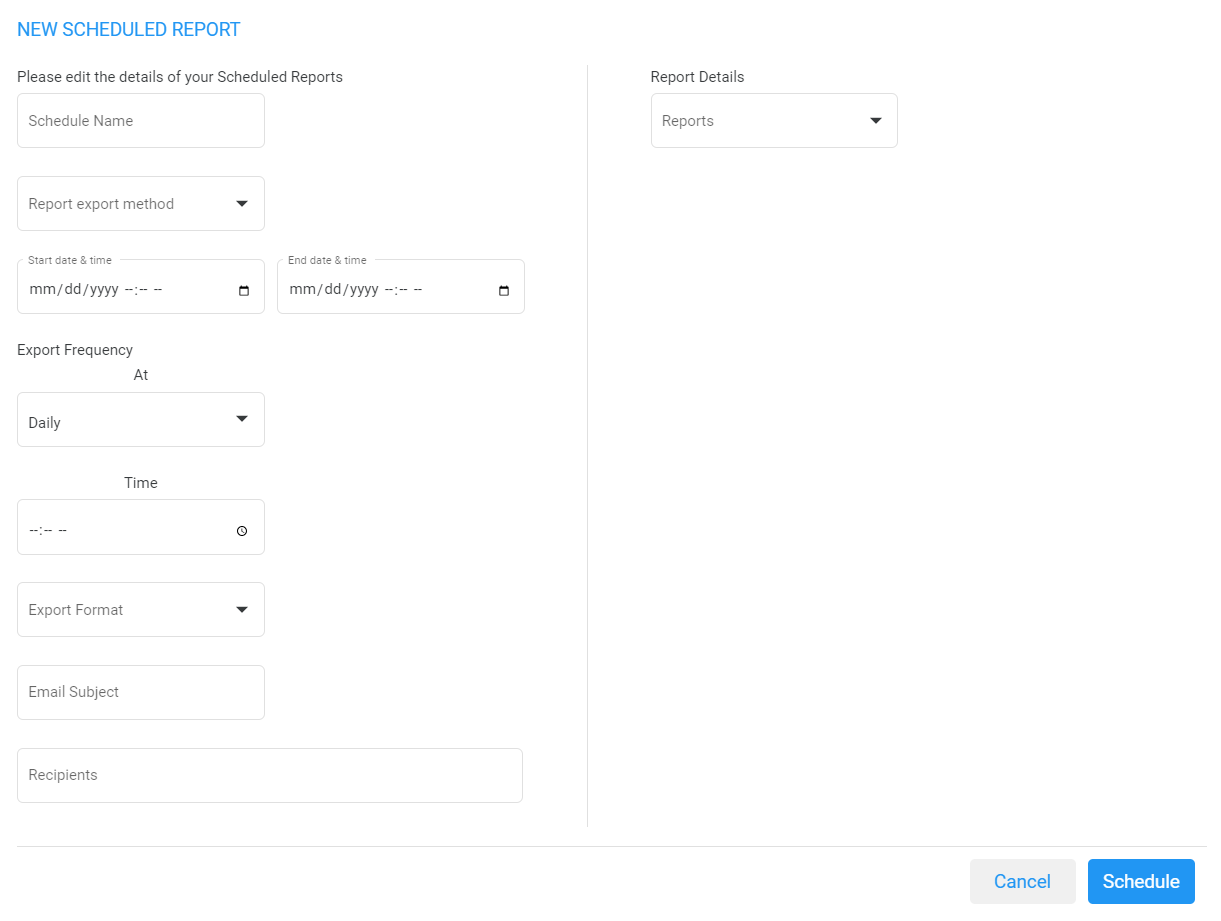
| 4. | The following is a description of the fields that must be entered: |
|
Field |
Description |
|---|---|
| Schedule Name | Defines the name of the scheduled report. |
| Report Export Method | Defines the method that this report is sent. |
| Start Date & Time | Defines the first time that this report is run. The Start Date & Time uses the time zone that is configured at the tenant level. |
| End Date & Time | Defines the last time that this report will be run. The End Date & Time uses the time zone that is configured at the tenant level. |
| Export Frequency | Defines the recurrence pattern for the scheduled report. |
| Time | Defines the time that this report will be generated. |
| Day | Defines the day that this report will be generated. This option is only available when the frequency is set to Weekly. |
|
Range |
Defines a specific time range within the month, or choose a custom day range within the month that the report will be generated. This option is only available when the frequency is set to Monthly. |
|
Export Format |
Defines the format that this report is sent in. |
| Email Subject | Defines the subject name of email that is sent. |
| Recipients | Defines the recipients who will be receiving the email. More than one recipient can be added. |
| Reports | Select the report to be scheduled. |
| 5. | The following is a description of the filter that can be applied for this report: |
|
Field |
Description |
|---|---|
| Queue Name | Filter by a specific queue. If that queue is not selected, it will be considered as any queue. |
| Call Source | Filter by a specific call source. |
| Call Destination | Filter by a specific call destination. |
| Wait Time (sec.) | Filter by Wait Time in seconds. |
| 6. | Click Save Changes. |