Adding a Speech Menu
The procedure below describes how to add an Interactive Voice Response (IVR) speech menu.
|
1.
|
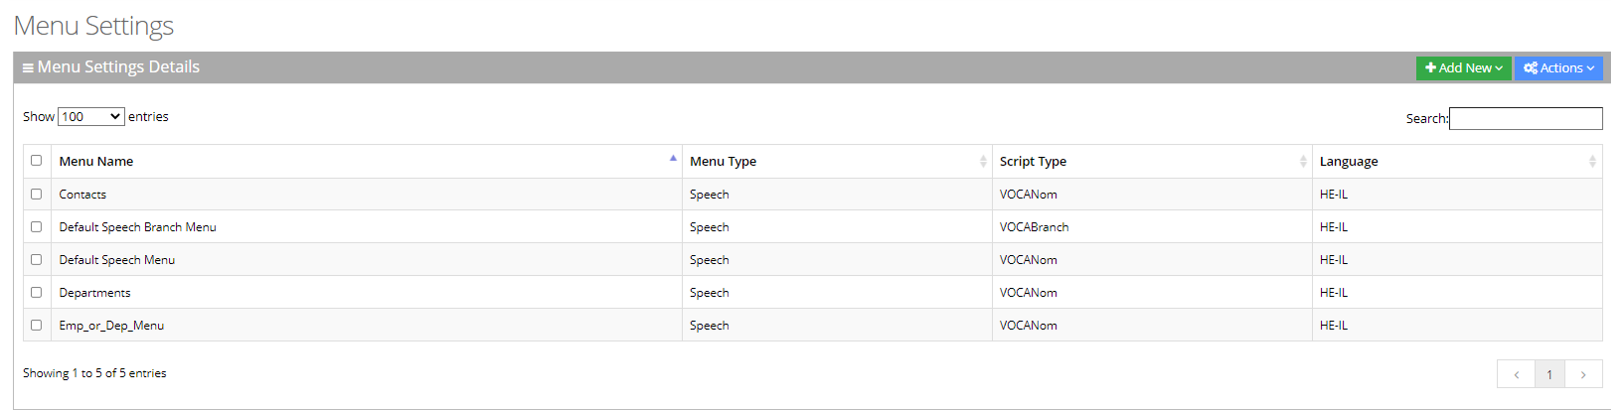
Open the Menu Settings page (Configuration > Menu Settings); the following example appears. |
|
2.
|
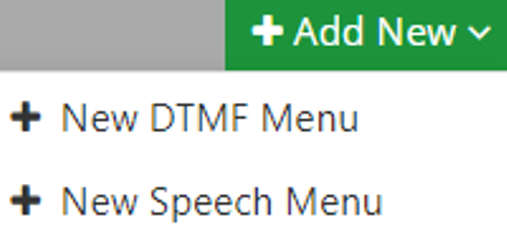
Click the + Add New drop-down menu; the following appears: |
|
3.
|
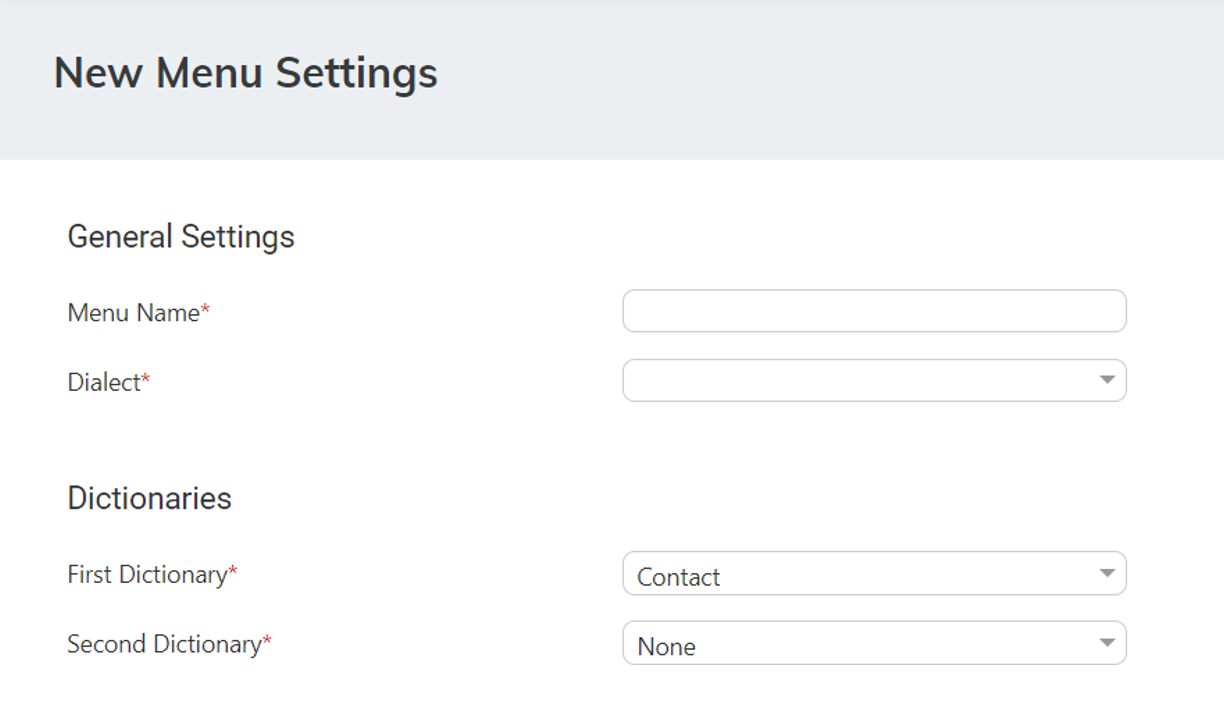
Select the + New Speech Menu; the New Menu Settings page appears: |
|
4.
|
Under the Dictionaries group, select the 'First Dictionary' and 'Second Dictionary' fields to be used for the menu. The 'Second Dictionary' can be set to "None". The Contact dictionary contains Contact Names without departments. The dictionaries are taken from the Dictionary List in the Department setting that you created. |
|
5.
|
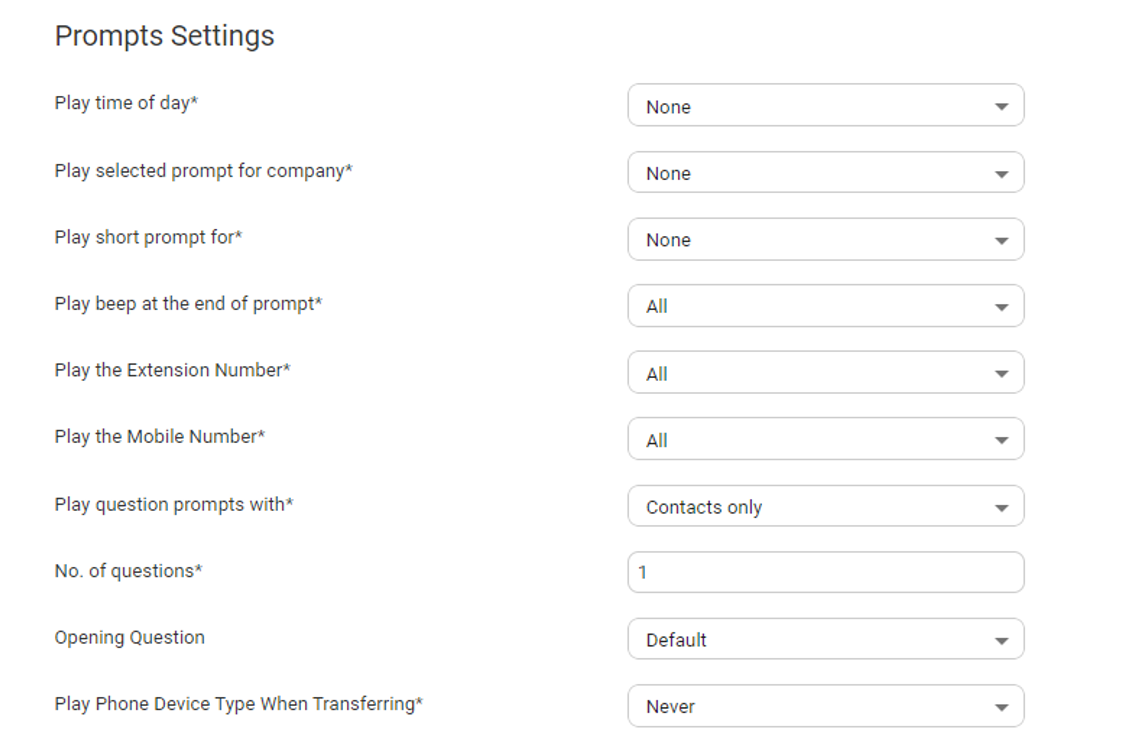
Under the Prompts Settings group, select the prompts to play: |
|
●
|
‘Play time of day’: Select for which group you are playing the time system menu prompts. |
|
●
|
‘Play selected prompt for company’: Select for which group you are playing the selected prompt. |
|
●
|
‘Play short prompt for’: Select for which group you are playing the short prompt. |
|
●
|
‘Play beep at the end of prompt’: Select for which group you are playing the beep prompt. |
|
●
|
‘Play the extension number': Select for which group you are playing this. |
|
●
|
‘Play the mobile number': Select for which group you are playing this. |
|
●
|
‘Play question prompts with': Select for which group you are playing the selected question prompts. |
|
●
|
The number of questions to be asked (1 to 3). This defines how many questions will be asked (opening/second/third questions). |
|
◆
|
'Opening Question': Select Default or any other pre-recorded prompt. |
|
◆
|
'Second Question': Select Default or any other pre-recorded prompt. |
|
◆
|
'Third Question': drop-down list, select Default or any other pre-recorded prompt. |
|
●
|
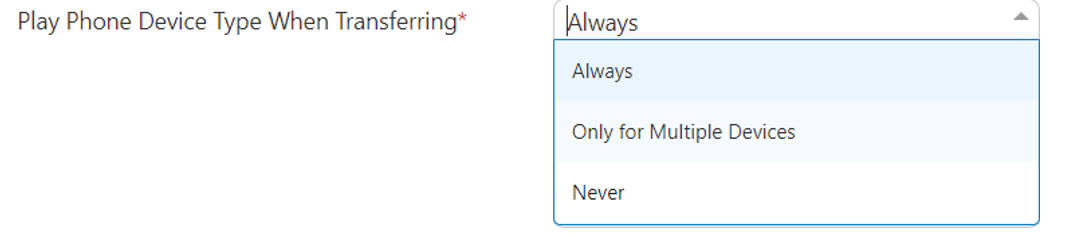
From the 'Play Phone Device Type When Transferring' drop-down list, select the appropriate value. |
|
◆
|
Always: Play the phone device when transferring a call. For example, "Transferring call to John Doe's mobile" even if the caller said "mobile" specifically or this is the only available number for the contact. |
|
◆
|
Only for Multiple Devices: If only a single phone device is available for a contact, do not play the phone device when transferring a call, even if the caller said the phone device (for example," John Doe mobile". Do not play the phone device when transferring). If more than a single phone device is available for a contact, the phone device must be played when transferring a call. |
|
◆
|
Never: Never play with the phone device when transferring a call. |
|
6.
|
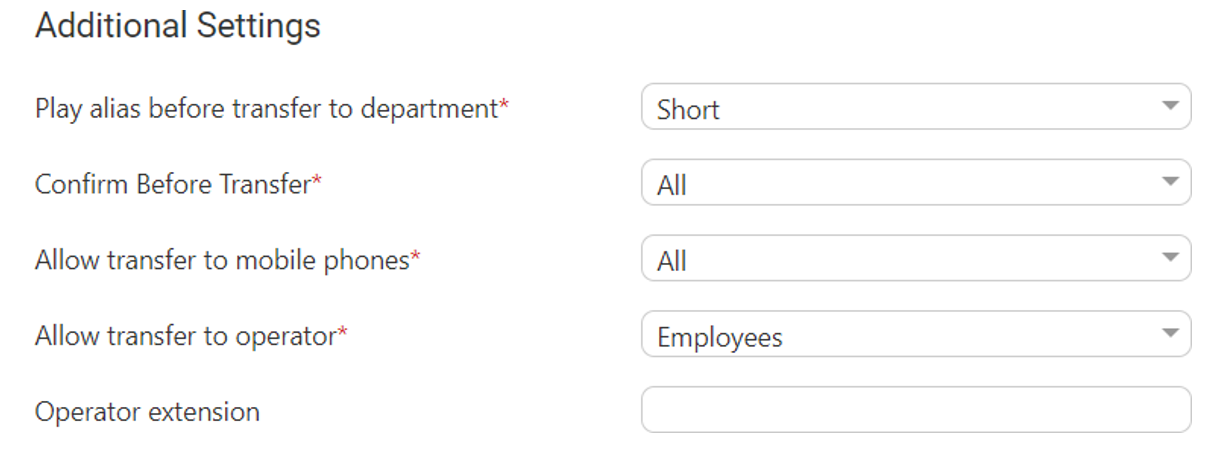
Under the Additional Settings group, select the following: |
|
●
|
'Play alias before transfer to department' field: select one of the following options: |
|
◆
|
Short: If the alias was recognized, the system plays the recognized alias instead of the Department name before the transfer. If there is disambiguation between departments, the alias is played before playing the disambiguation options. |
|
◆
|
Long: If the alias was recognized, the system plays the recognized alias and the department name before the transfer. If there is disambiguation between departments, the alias is played before playing the disambiguation options. |
|
◆
|
Disabled: Plays only the department name before the transfer. If there is disambiguation, only disambiguation options are played. |
|
●
|
'Confirm Before Transfer' field: Select which group you are playing this to. If not 'None', the relevant group is asked to confirm the entity they are going to be transferred to. |
|
●
|
‘Allow transfer to mobile phones’ field: Select which group you are allowing to transfer calls to mobile devices. |
|
●
|
‘Allow transfer to operator for’ field: Select to whom you are allowing to transfer calls to the operator. The 'Operator extension' field appears only if the 'Allow transfer to operator' field is set to one of the following values: |
The 'Operator extension' field is mandatory if you select any of the above values.
|
●
|
'Operator extension’ field: Select the number to dial when the user presses “0” or says “operator”. |
|
7.
|
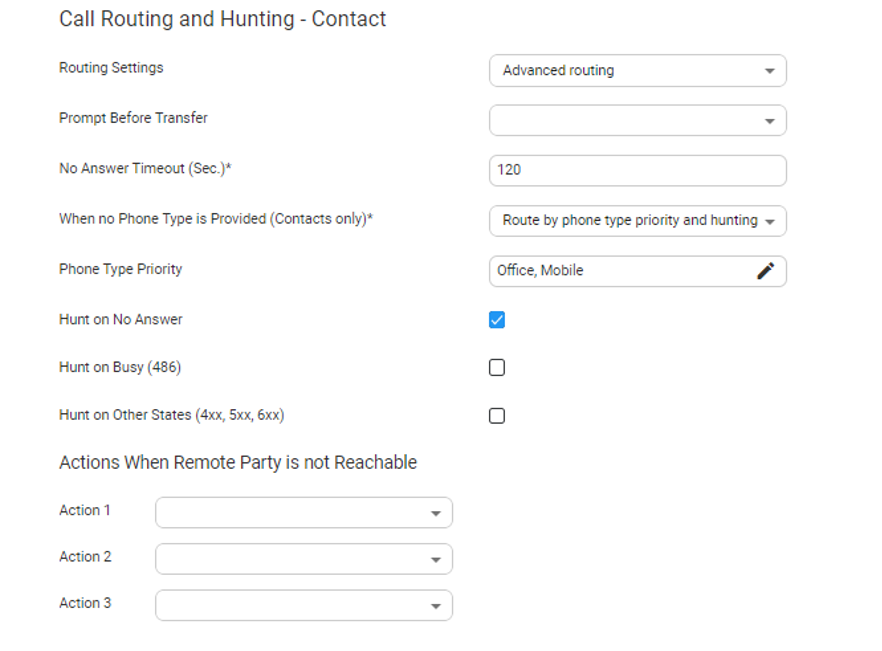
Under the Call Routing and Hunting - Contact group from the 'Routing Settings' drop-down list, select either: |
|
◆
|
Basic routing (default): The call routing process remains as it is currently set. |
|
◆
|
Advanced routing: The call is set according to the following parameters: |
|
●
|
From the 'Prompt Before Answer' drop-down list, select a prompt from a list of available prompts, before the call is transferred. |
|
●
|
In the 'No answer timeout (0-120 secs)' field, set the time you want the system to wait, for the remote side to answer the call before moving to the next phone type, when hunting or doing an action when the remote party is not reachable. |
|
●
|
From the 'When no Phone Type is Provided' drop-down list, select the appropriate action. When the caller says a Contact’s name without requesting a specific phone type, the system can be configured to behave in several different ways: |
|
◆
|
Ask for phone type: The system asks the caller to choose a Phone Type it plays to the caller. Voca transfers the call to the highest priority phone type defined in configuration. If the first priority phone type is not available for a contact, the call is transferred to the second, or third priority. This phone type priority list is configurable. |
|
◆
|
Route by phone type priority and hunting: Voca can perform Call Hunting based on the phone type priority list. |
|
●
|
In the 'Phone Type Priority' choose the priority list that the system should hunt when routing contact and choose which type of hunt you want to enable. |
|
●
|
Voca can perform Call Hunting based on the selected option. Configure which of the following states performs the hunting: |
|
◆
|
Hunt on Other States (4XX,5XX,6XX) |
|
●
|
When Voca transfers a call to a destination, the remote side (whether it is a contact or a department) may not be reachable. In such a case, Voca performs pre-defined actions. Under the Actions when Remote Party is not Reachable group, from the 'Action 1' drop- down list, select the appropriate value. For more information of the possible Actions, see Actions. |
|
8.
|
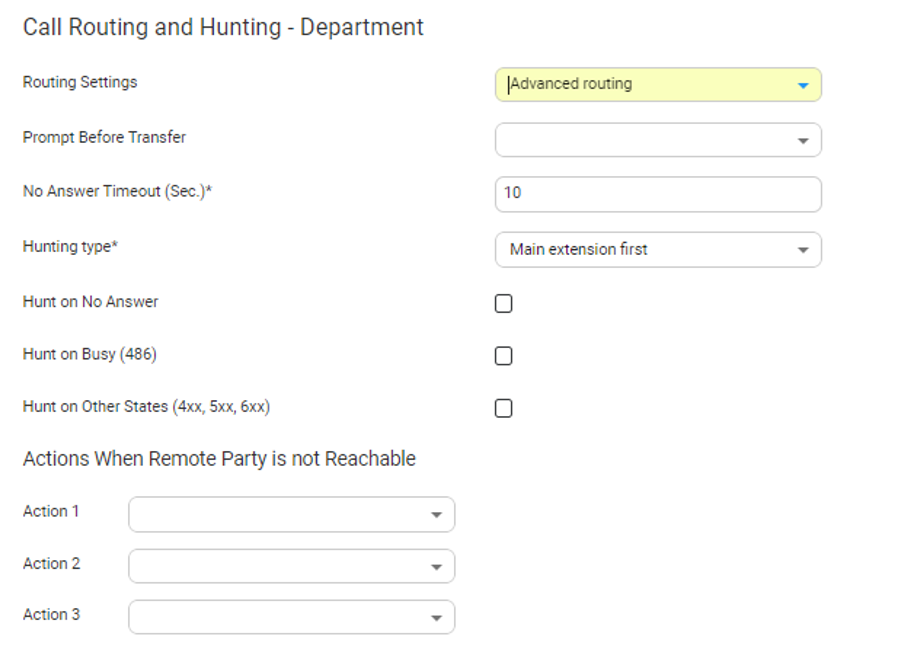
Under the Call Routing and Hunting - Department group and from the 'Routing Settings' drop-down list, select either: |
|
●
|
Basic routing (default): The call routing process remains as it is currently set. |
|
●
|
Advanced: The call is set according to the following parameters: |
|
●
|
From the 'Prompt Before Transfer' drop-down list, select a prompt from a list of available prompts, before the call is transferred. |
|
●
|
In the 'No answer timeout (0-120 secs)' field, set the time you want the system to wait for the remote side to answer the call, before moving to the next phone type, when hunting or doing an action when the remote party is not reachable. |
|
●
|
From the 'Hunting type' drop-down list, select one of the options: |
|
◆
|
Main extension first: Select this option when hunting for a free extension always start from Extension 1. |
|
◆
|
Round robin: Select this option when hunting for a free extension. Always start from the extension following the last one used. |
|
●
|
Voca can perform Call Hunting based on the selected option. Configure which of the following states performs the hunting: |
|
◆
|
Hunt on Other States (4XX,5XX,6XX) |
|
9.
|
Under the Actions when Remote Party is not Reachable group, from the 'Action 1' drop- down list, select the appropriate value. When Voca transfers a call to a destination, the remote side (whether it is a contact or a department) may not be reachable. In such a case, Voca performs pre-defined actions.
For an explanation of the above actions, see Actions. |
|
10.
|
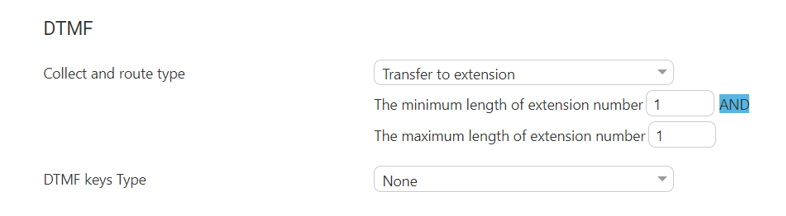
Under the DTMF group, from the 'Collect and route type' drop-down list, select the appropriate value. This is used to collect and route by one or more digits: |
|
●
|
None (default): Functionality is disabled. |
|
●
|
Transfer to extension: Instead of saying a contact/department name, you can enter the entity phone number by DTMF and selecting either: |
|
◆
|
Minimum length of extension number |
|
◆
|
Maximum length of extension number |
|
●
|
Transfer by DTMF routing key: The collected digits are used to route the call to the contact or department tagged with the same DTMF routing key: |
|
◆
|
The minimum length of routing key |
|
◆
|
The maximum length of routing key |
|
11.
|
Under the DTMF group, from the 'DTMF keys Type' drop-down list, select Second Language. This option maps actions for DTMF keys. If this option is activated, the 'Collect and route type' field cannot be configured to collect only one digit. Select one of the following: |
|
●
|
DTMF: Configures the DTMF key that is pressed to trigger the required behavior |
|
●
|
Behavior: Defines the behavior of the DTMF key: |
|
◆
|
Operator: The call is diverted to the operator |
|
◆
|
Go to menu: The call is diverted to another menu |