Editing a Contact
The procedure below describes how to edit a contact.
|
1.
|
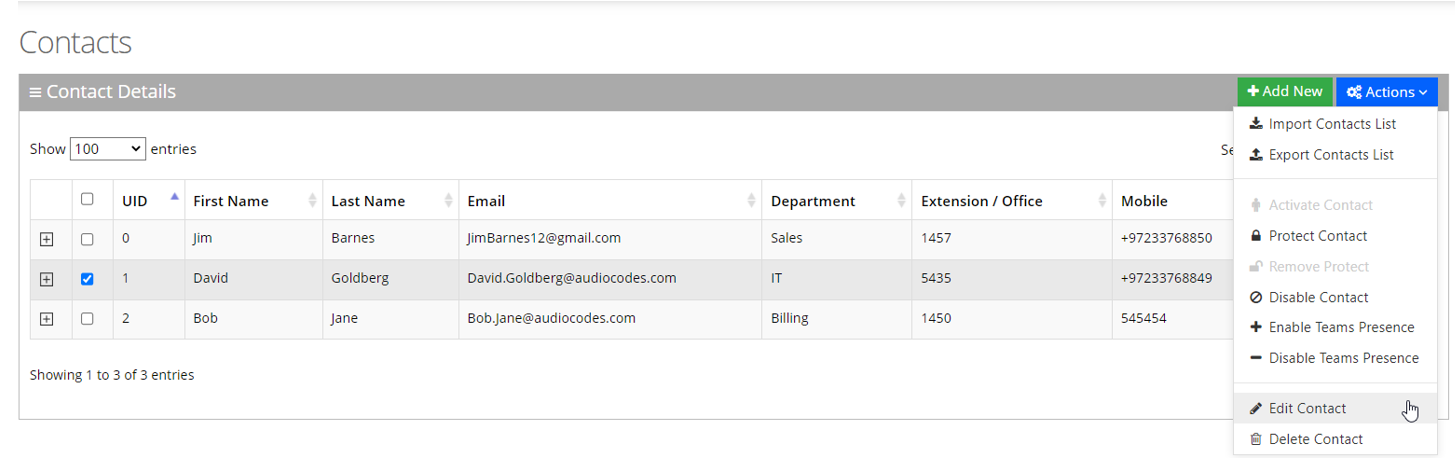
Open the Contact Details screen (Contacts > Contacts List). |
|
2.
|
Select the contact you wish to edit by selecting the corresponding Contact check box. |
|
3.
|
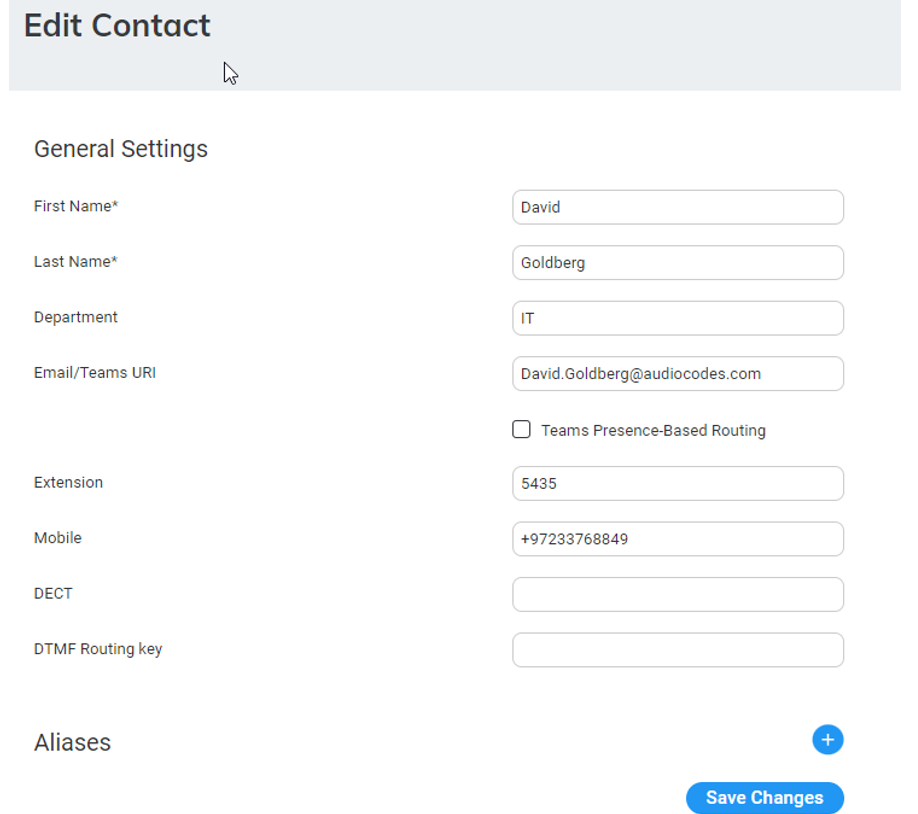
From the ‘Actions’ drop-down menu, choose Edit Contact; the following appears: |
|
4.
|
Select the 'Teams Presence-Based Routing' check box to allow the system to check for presence when transferring to this Contact, if it is selected as a queue member in the member queue. To use this feature two things are required: |
|
●
|
UID: The UID of the contact must be the same as the Object ID of the user in the Azure Portal. |
|
●
|
Teams Presence Routing: This requires additional configuration on the System Setting page. For more information, refer to Teams Presence Routing. |
|
5.
|
In the 'DTMF Routing key' field, enter the DTMF routing key. This key is used to reach this contact when entering this DTMF code in the Speech menu (if Transfer by DTMF routing key is enabled in the menu). The key must be unique within the service. |
|
6.
|
Make your changes on the ‘Edit Contact’ screen, and then click Save Changes; the updated Contact details appear. |