Importing Contact Information
The procedure below describes how to import Contact information.
|
➢
|
To import contact information from a CSV file: |
|
1.
|
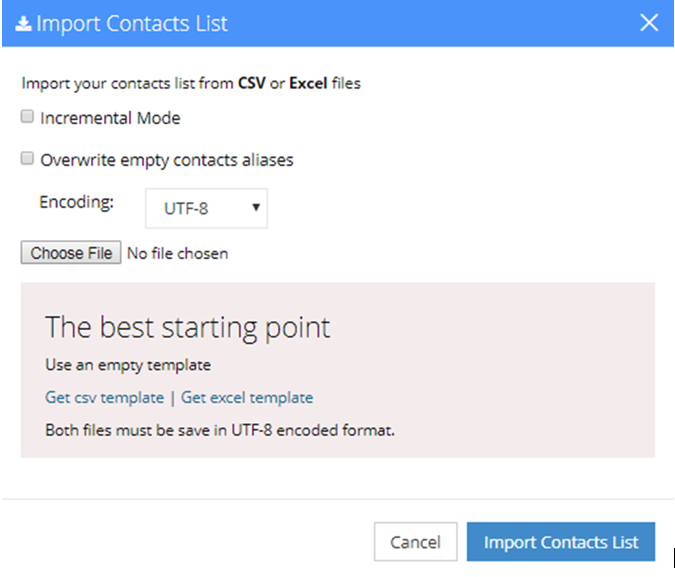
From the Actions drop-down list, on the Contact Details screen, click Import Contacts List. |
|
2.
|
If you select the 'Incremental Mode' check box, only the records that you are importing will be active in your Contacts List. All pre-existing records will be disabled. |
|
3.
|
If you select the 'Overwrite empty contacts aliases' check box, all empty contacts aliases in the imported file are overwritten. |
|
4.
|
From the 'Encoding' drop-down list, select the Encoding type. The recommended value is UTF-8. |
|
5.
|
Click Choose File, and then select the file to be imported. |
|
6.
|
Select the CSV or Excel template. |
|
7.
|
Click Import Contacts List. |
|
8.
|
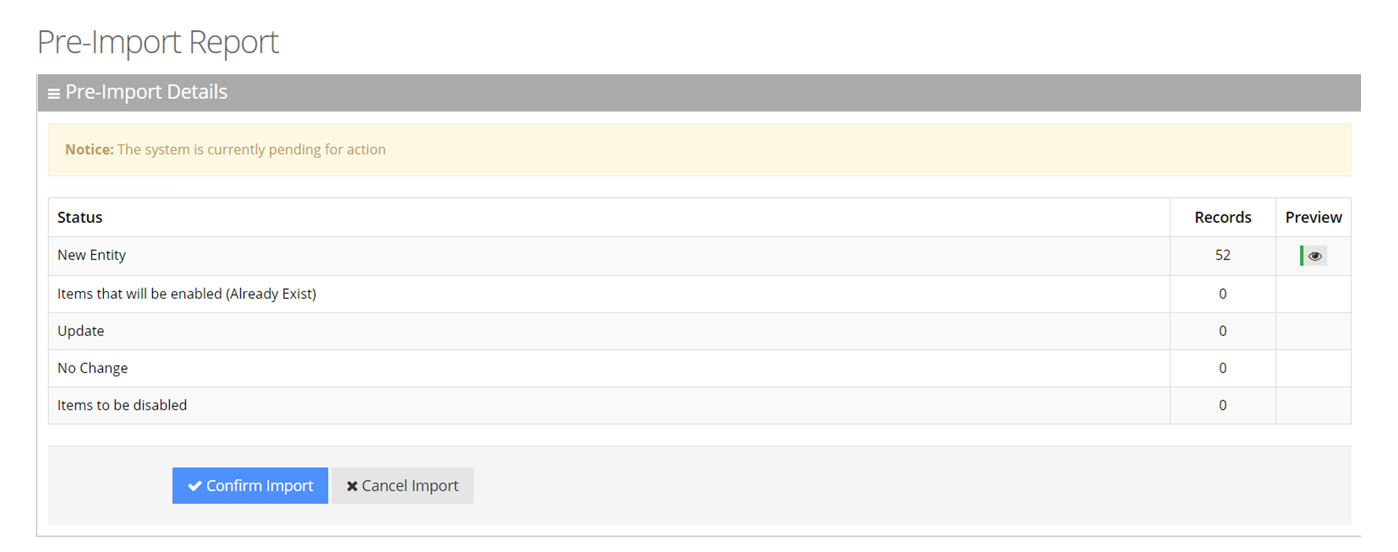
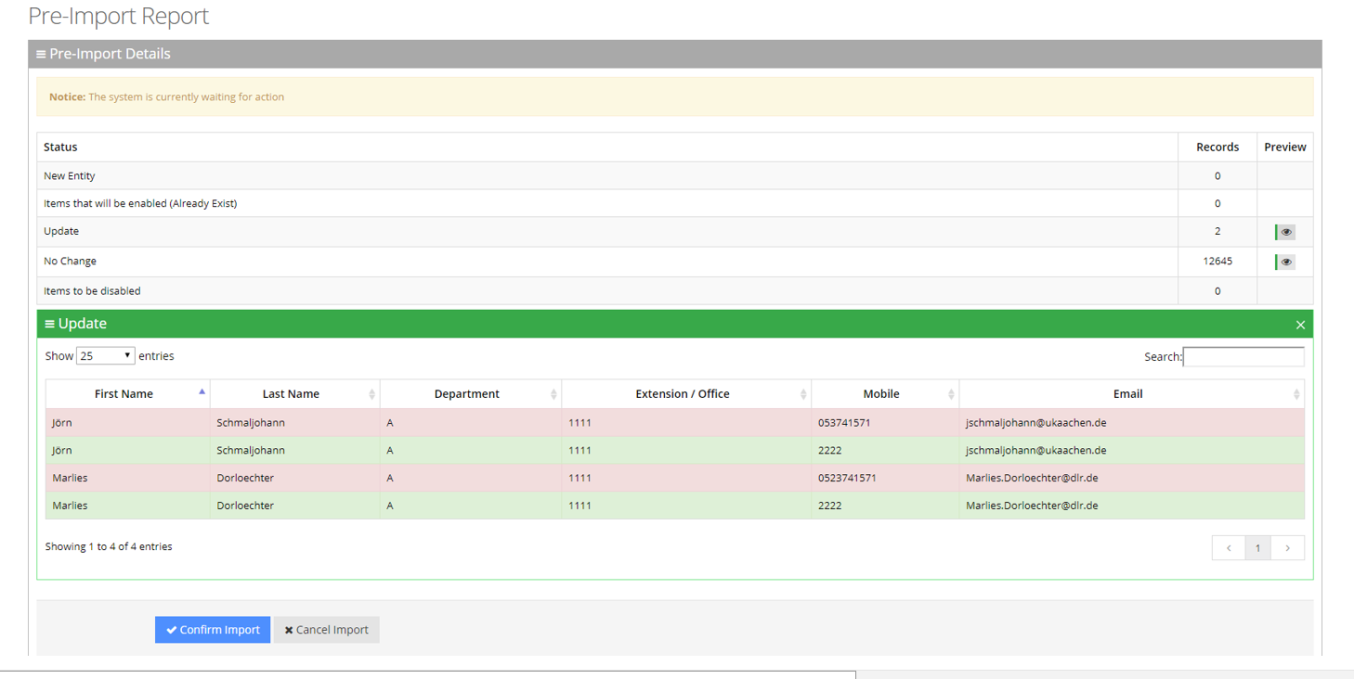
This report lists the status of the contracts to be imported. In the example above, 52 new contacts are ready to be imported. Clicking the Preview icon displays these new contacts before they are imported. If there is an update to an existing contact, click the Preview icon. The contact (before the update) appears with a pink background, while the updated contact appears with a green background. |
|
9.
|
Click Confirm Import to import the contacts. If you wish to cancel the import process, click Cancel Import. |
If you do not click Confirm Import or Cancel Import, or you switch to another tab, the actual import will be pending and all contacts will be disabled.
The same behavior applies for Contacts that have been disabled.
|
10.
|
You can return to the Confirm Import or Cancel Import processes by clicking on the here link. |

|
11.
|
The CSV file to be imported should contain the following: |
|
●
|
UID (mandatory) - an employee ID or any unique number, name or both. |
|
●
|
First Name Aliases separated by ";" |
|
●
|
Last Name Aliases separated by ";" |
|
●
|
Full Name Aliases separated by ";" |
|
●
|
It is highly recommended that the CSV file will be saved in UTF-8 encoding format (Unicode Text). Use Notepad++ to view CSV files. |
|
●
|
You can import a new contact with an existing UID in the same tab. For example, you can import a new contact from the Contacts > Import/Export. The imported contact overwrites the existing contact with the same UID. However, if you import a new department with a UID that is already in use by an existing contact or branch, an error appears with the following message: "Upload has failed. One or more of the UIDs already exist in contacts or branches list! [UID number]". |
The Excel file can be imported according to the following layout.
