Configuring Azure AD
The process below describes what is required when synchronizing between Voca tenant with Azure Active Directory.
The organization Administrator (Microsoft 365) should grant tenant-wide admin consent to “Directory and Presence” applications on behalf of the organization, this is done through an app registration process:
|
1.
|
Enter the Azure tenant details in the required fields below. |
|
2.
|
Click Consent to initiate the integration. |
|
3.
|
An Azure Global Administrator must approve the request to register the application with the necessary permissions. |
|
4.
|
Once approved, the application is created in Azure, granting Voca access to the requested data— the organization's contact list. |
The consent process is required once for Azure AD sync and once for Teams Presence.
|
1.
|
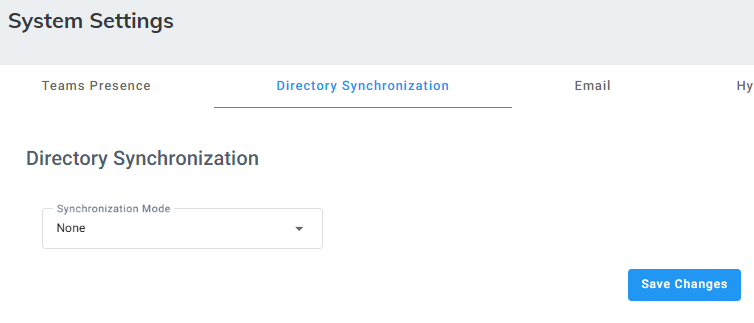
Open the System Settings page (Configuration > System Settings > Directory Synchronization); the following appears: |
|
2.
|
Under the Directory Synchronization group, from the 'Synchronization Mode' drop-down list, select Azure AD; the following appears: |
|
3.
|
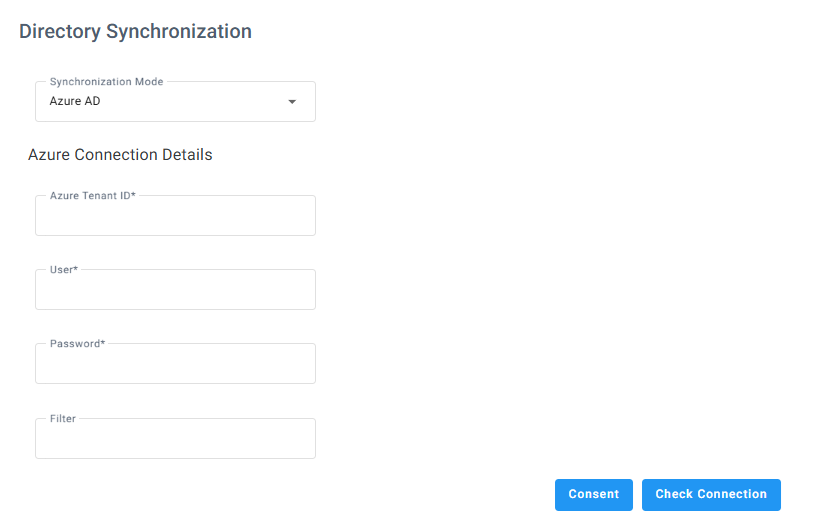
In the 'Azure Tenant ID' field, enter the Azure Tenant ID from which to request the presence. |
|
4.
|
In the 'User' field, enter the name of the user defined on the Azure tenant with permissions to access the presence. |
|
5.
|
In the 'Password' field, enter the user’s password. |
|
6.
|
In the 'Filter' field, enter the filter configuration. For example: |
"(startsWith(givenName, 'V') OR endsWith(mail,'@outlook.com')) AND businessPhones/any(p:p le 'a') AND surname ne null and NOT(surname eq 'Last')"
"department in ('Retail', 'Sales') AND givenName le 'zzz' AND mobilePhone ge '9'"
To check connectivity to Azure AD, click Check Connection.
|
8.
|
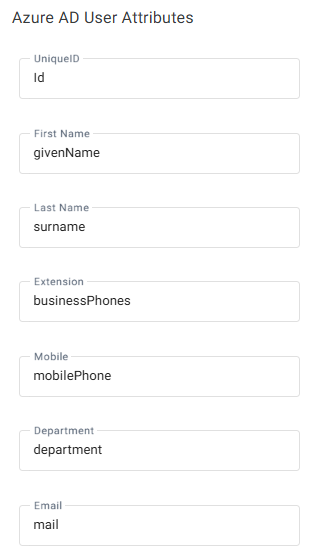
Under the Azure AD User Attributes group, enter the following: |
|
a.
|
In the 'Unique ID' field, enter "Id". |
|
b.
|
In the 'First Name' field, enter "givenName". |
|
c.
|
In the 'Last Name' field, enter "surname". |
|
d.
|
In the 'Extension' field, enter "businessPhone". |
|
e.
|
In the 'Mobile' field, enter "mobilePhone". |
|
f.
|
In the 'Department' field, enter "department". |
|
g.
|
In the 'Email' field, enter "mail". |
|
9.
|
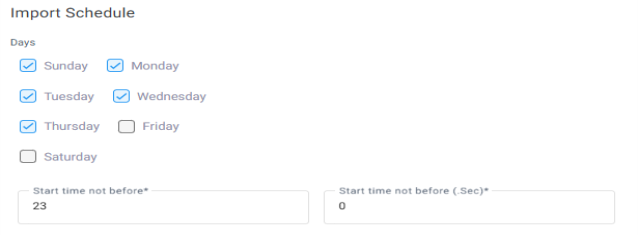
Select the following fields for when you want to import contacts from the Azure AD server: |
|
●
|
Start time not before (Sec) |
|
10.
|
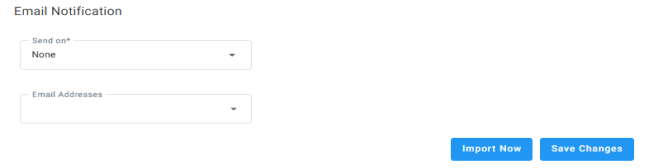
From the 'Email Notification' drop-down list, select one of the following to indicate when notification emails should be sent: |
|
12.
|
Click Import Now to import contacts from the Azure AD server immediately (Optional). |