Filling in the ‘New Meeting Insights Tenant’ Form
The instructions here show how to fill in the fields in the 'New Meeting Insights Tenant' form. After the form is filled in, the tenant is deployed.
| ➢ | To complete the 'New Meeting Insights Tenant' form: |
| 1. | Fill in the fields shown in the figure below using the table below it as reference. |
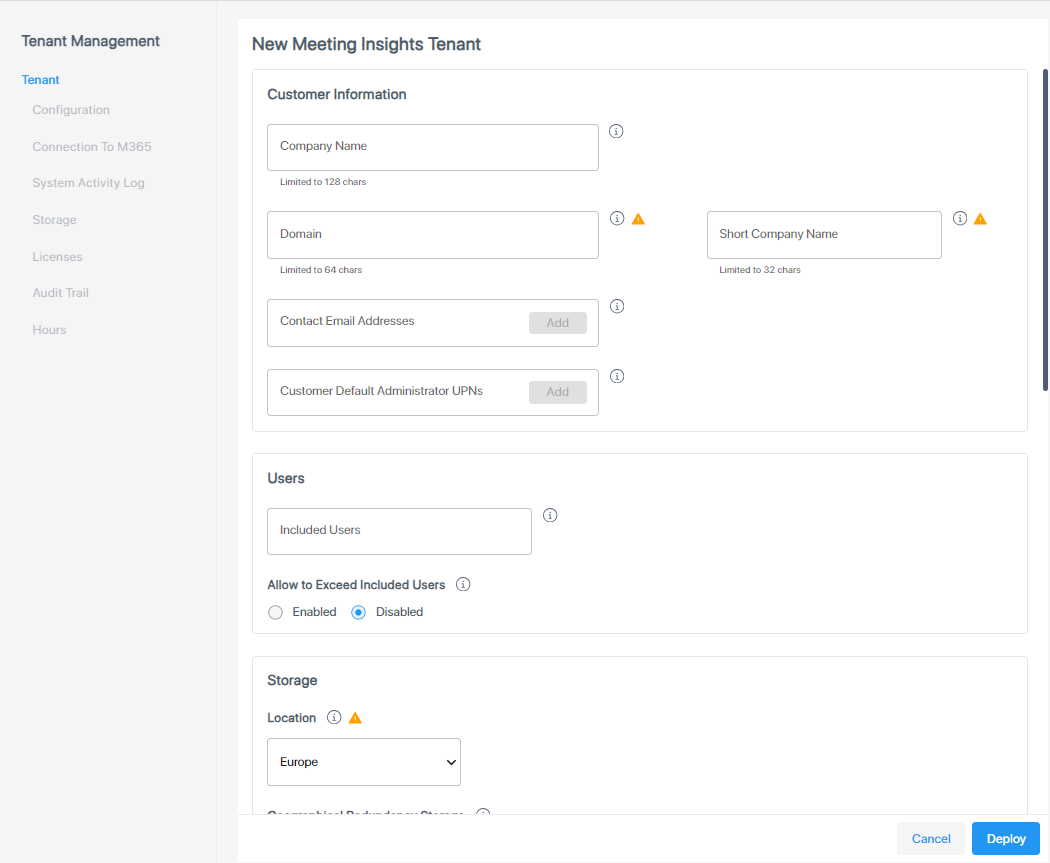
The icon ![]() indicates that the field is not editable so configure it carefully! If you err, you'll need to delete the tenant and create a new one.
indicates that the field is not editable so configure it carefully! If you err, you'll need to delete the tenant and create a new one.
|
Parameter |
Description |
|||||||||||||||
|---|---|---|---|---|---|---|---|---|---|---|---|---|---|---|---|---|
|
Customer (M365 Tenant) Name |
Enter the name, that is, a unique name per Microsoft 365 Tenant. Limited to 128 characters. |
|||||||||||||||
|
Domain |
Unique domain Example: companyname.com Limited to 256 characters |
|||||||||||||||
|
Short Company Name |
Unique name Example: CN.com Note the following rules:
|
|||||||||||||||
|
Contact Email Addresses |
Enter the email addresses of those in the enterprise who can be contacted and will receive the email notifications. |
|||||||||||||||
|
Customer Default Administrator UPNs |
Enter User Principal Names. Each comprises: UPN prefix (the user account name) and UPN suffix (a DNS domain name). The prefix is joined with the suffix using the "@" symbol. For example, "someone@example.com". For the full access default administrator, users are able to access the Meeting Insights application and set it up for the organization. Click Add after each entry. |
|||||||||||||||
|
Included Users |
Enter the number of licensed users to include in the tenant. The Purchase Order (PO) indicates the number. |
|||||||||||||||
|
Allow to Exceed Included Users |
Optionally, it's possible to start with 'Disabled' and later change to 'Enabled'. See also the related chapter 'Synchronizing Meeting Insights Users with AAD' in the Next Generation Meeting Insights Administrator's Guide. |
|||||||||||||||
|
Storage: Location |
From the dropdown, select the storage location you require: Europe, United Kingdom, Switzerland, Norway, Germany, France, Sweden or Israel. |
|||||||||||||||
|
Geographical Redundancy Storage (GRS) |
|
|||||||||||||||
|
GRS Storage Included (GB) |
From the dropdown, select the GRS storage in Gigabytes. |
|||||||||||||||
|
Bring Your Own Blob Storage(BYOS) |
|
|||||||||||||||
|
STT Engines: MSFT |
The configuration is editable. It's possible to later add a language (for example). |
|||||||||||||||
|
Internal (Hebrew) |
|
|||||||||||||||
|
Hebrew Premium Transcription |
|
|||||||||||||||
|
AI Settings: AI Technology |
|
|||||||||||||||
|
AI Hours |
Configure AI hours.
|
|||||||||||||||
|
Meeting Analytics Dashboard |
|
| 2. | After filling in the form, click Deploy. |
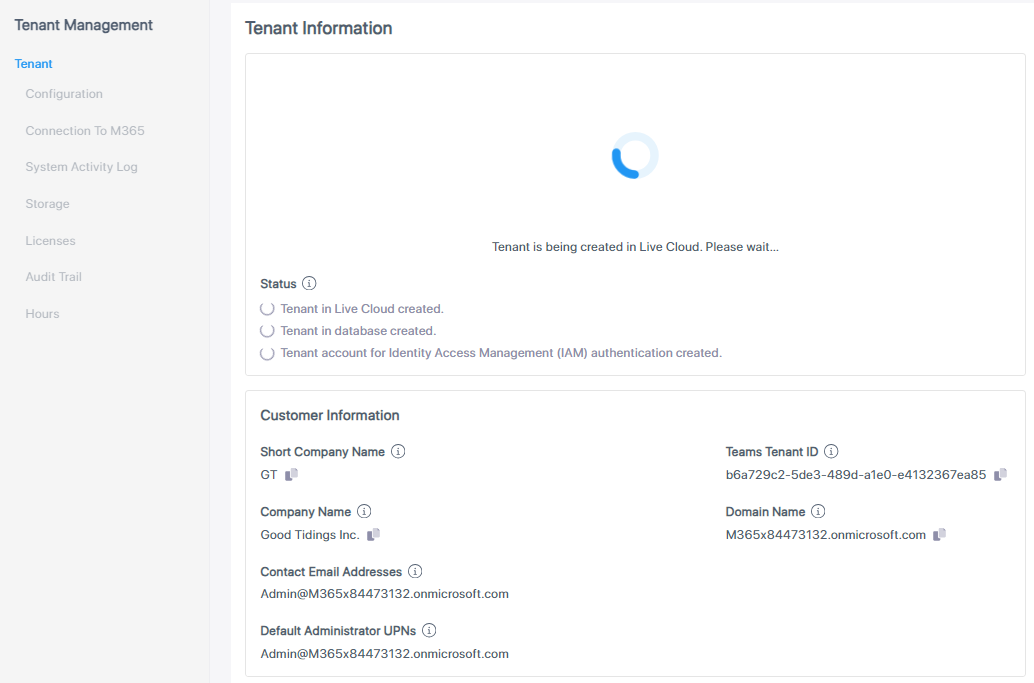
| 3. | View the statuses updating, indicated by the green font. |
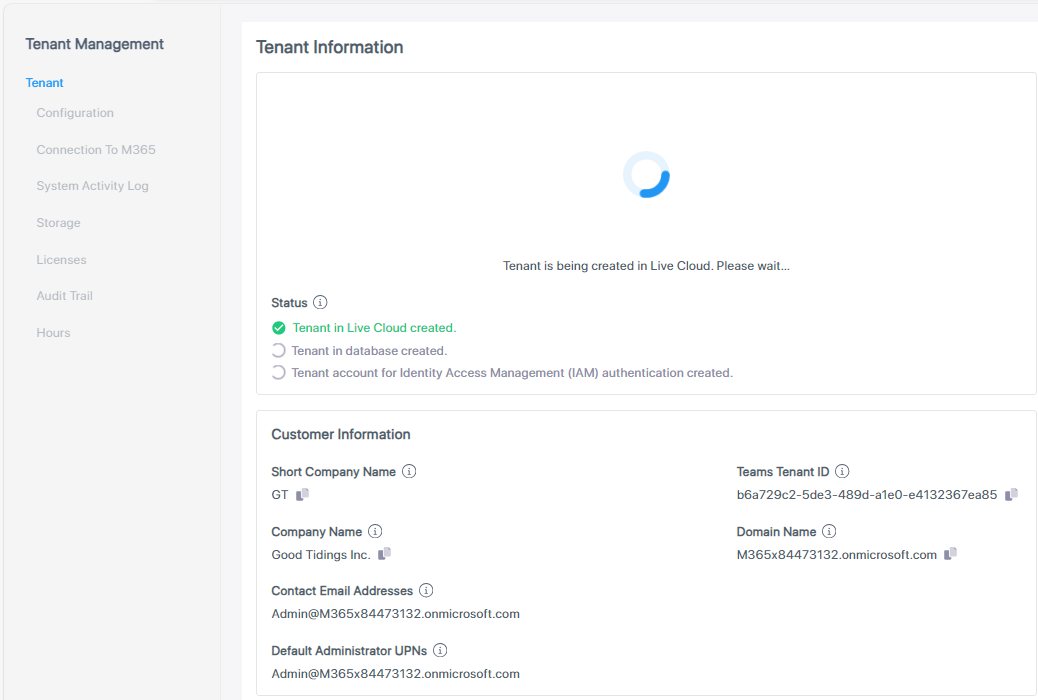
| 4. | Wait for all statuses to update and then view the following: |
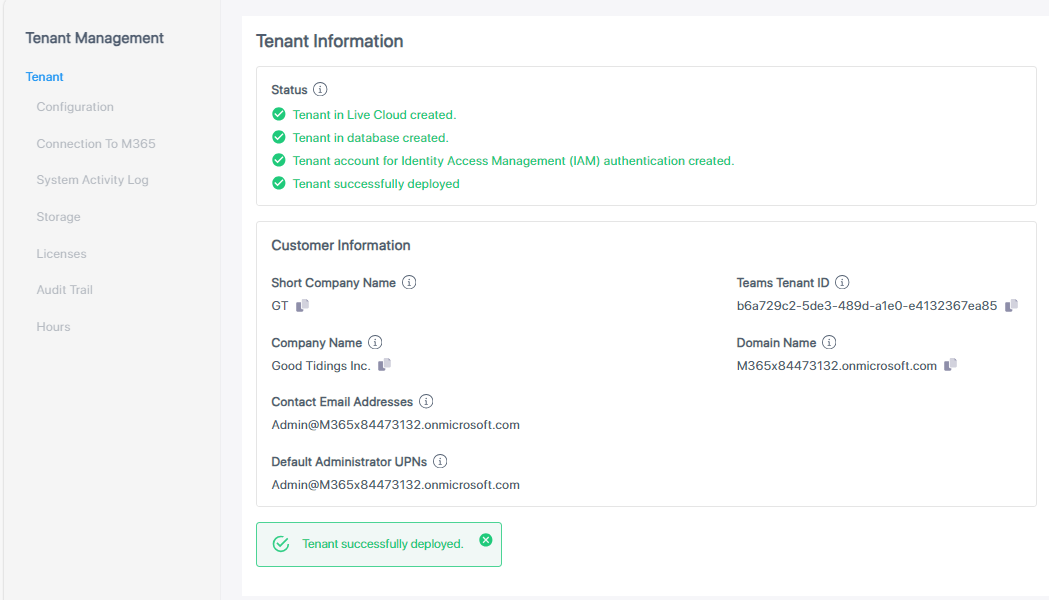
| 5. | Click Close; an email is sent informing that Meeting Insights is ready for use and that three steps remain for correct app operation. See here for more information. |