Operator Connect Number Management using SBC
This section describes how to manage numbers that have been assigned to customers and are managed using SBC dial plans. You can perform the following actions on numbers:
| ■ | Filtering and Mass Provisioning |
| ■ | Release Numbers |
| ■ | Approve Deletion by customer on their Teams admin center |
| ■ | Reactivate Numbers that have been marked for removal |
| ■ | Export Numbers to CSV file |
| ➢ | To manage customer numbers: |
| 1. | In the Services page, from the Operator Connect drop-down, choose Open Number Management Page. |
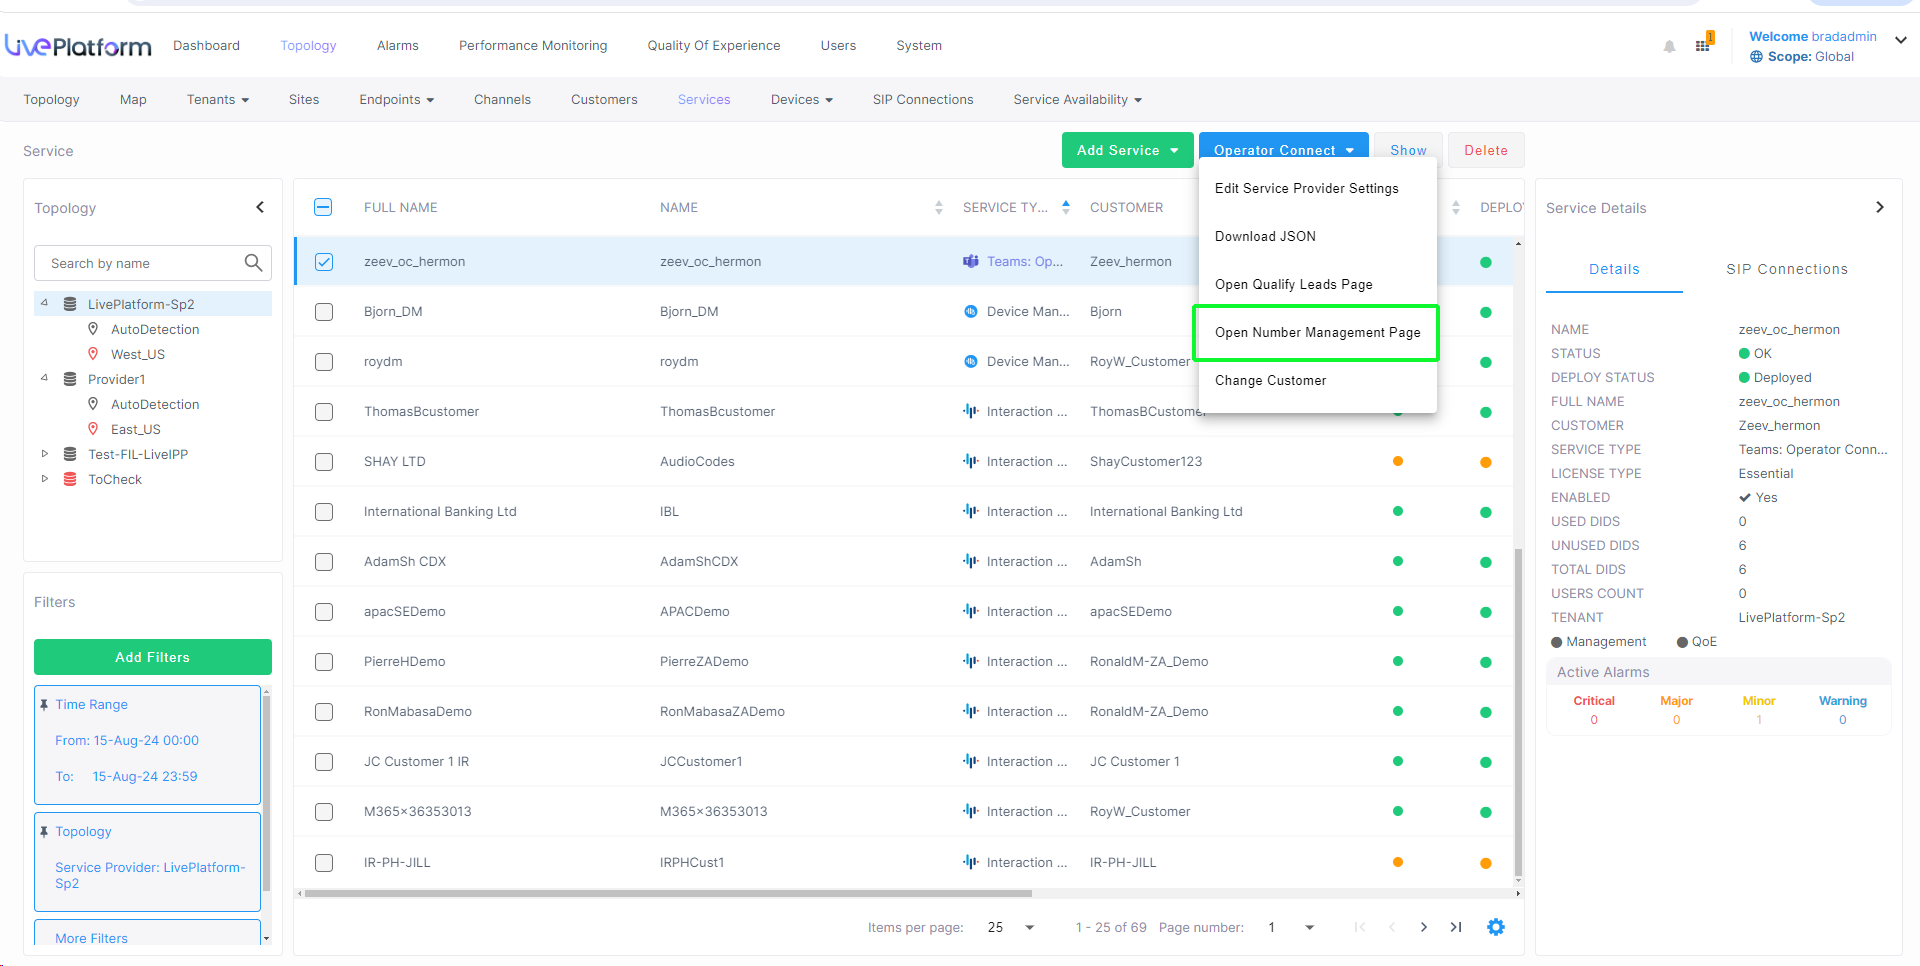
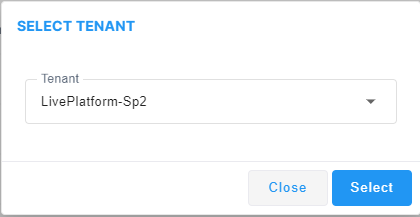
| 2. | Select the Service Provider operator. |
The OC Number Management page lists all the managed phone numbers:

|
Action |
Description |
||||||||||||||||||
|---|---|---|---|---|---|---|---|---|---|---|---|---|---|---|---|---|---|---|---|
|
Number |
Phone number |
||||||||||||||||||
|
Service Full Name |
The name of the customer tenant. |
||||||||||||||||||
|
Country |
Country name abbreviation |
||||||||||||||||||
|
MS Tenant ID |
Tenant ID of the operator. |
||||||||||||||||||
|
Emergency Address |
Operators’ address in the event of an emergency. |
||||||||||||||||||
|
OC SIP Connection |
The OC SIP Connection that is attached to a specific Calling Profile. This parameter is only displayed for services with IP Group-based SIP Connections (see Create OC Essential Service with an SBC IP Group-based SIP Connection). |
||||||||||||||||||
|
Calling Profile ID |
The Calling Profile ID that is configured for the OC SIP Connection. |
||||||||||||||||||
|
Source |
|
||||||||||||||||||
|
MS Job ID |
Job ID |
||||||||||||||||||
|
Assignment |
The number assignment type configured in the Teams admin center:
|
||||||||||||||||||
|
Acquired Date |
Date when the phone number was acquired by the system. |
||||||||||||||||||
|
Display Number Details |
|

| 3. | Select the Emergency Address tab to view the list of emergency numbers. |
| 4. | Select the Released Number tab to view released numbers. |
The following table describes the actions that you can do on the OC Number Management page.
|
Action |
Description |
||||||||||||||||||
|---|---|---|---|---|---|---|---|---|---|---|---|---|---|---|---|---|---|---|---|
|
Status filter |
Filters the list of numbers by:
|
||||||||||||||||||
|
Right-click Actions |
|||||||||||||||||||
|
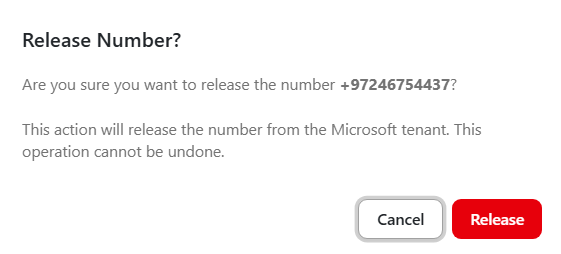
Release/Delete Selected Number |
Lets you release a number from Live Platform. Once the number is released, no further action is required by the customer and the number is moved to the Released Numbers table (see Release Numbers). You can either select multiple entries and then click the Release/Delete Selected button or select an individual entry from the right-click menu.
|
||||||||||||||||||
|
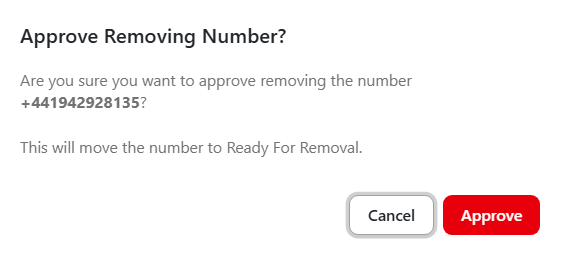
Approve Remove Selected Numbers |
Lets you approve removal of numbers that were deleted in M365 tenant Microsoft Teams admin center and move them to "Ready for Removal". You can either select multiple entries and then select the Approve Remove Selected Numbers button or approve an individual entry from the right-click menu. (see Approve Number Deletion by Microsoft Teams Admin Center).
|
||||||||||||||||||
|
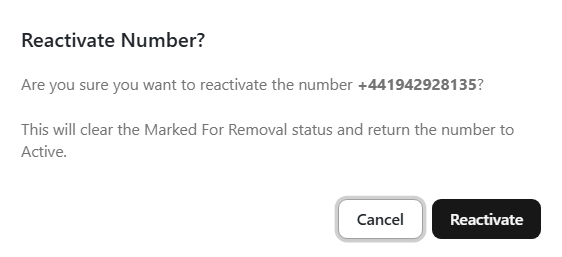
Reactivate Selected |
Lets you clear the "Marked for Removal" status of a number and return it to "Active" status. You can either select multiple entries and then select the Reactivate Selected button or reactivate an individual entry from the right-click menu. See Reactivate Numbers.
|
||||||||||||||||||
|
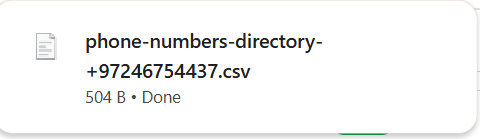
Export to CSV |
Lets you export all phone entries to a CSV file. You can either export all of the entries in the table or select an individual entry and then in the right-click menu, select Export to CSV (see Export Phone Numbers).
|
||||||||||||||||||
|
Import Numbers button |
Imports a list of numbers from a CSV file (see Import Numbers). |
||||||||||||||||||