Create a Generic SIP connection
If your specific provider is not displayed in the SIP Connection wizard, then follow the procedure described in this section to create your SIP Connection. (If your provider is listed in the wizard, then click here for configuration.)
Generic provider configuration requires advanced knowledge and familiarity with SIP and Voice-over-IP concepts. If you need assistance, please contact AudioCodes support.
To create a SIP Connection for generic SIP trunk, contact center or UC:
-
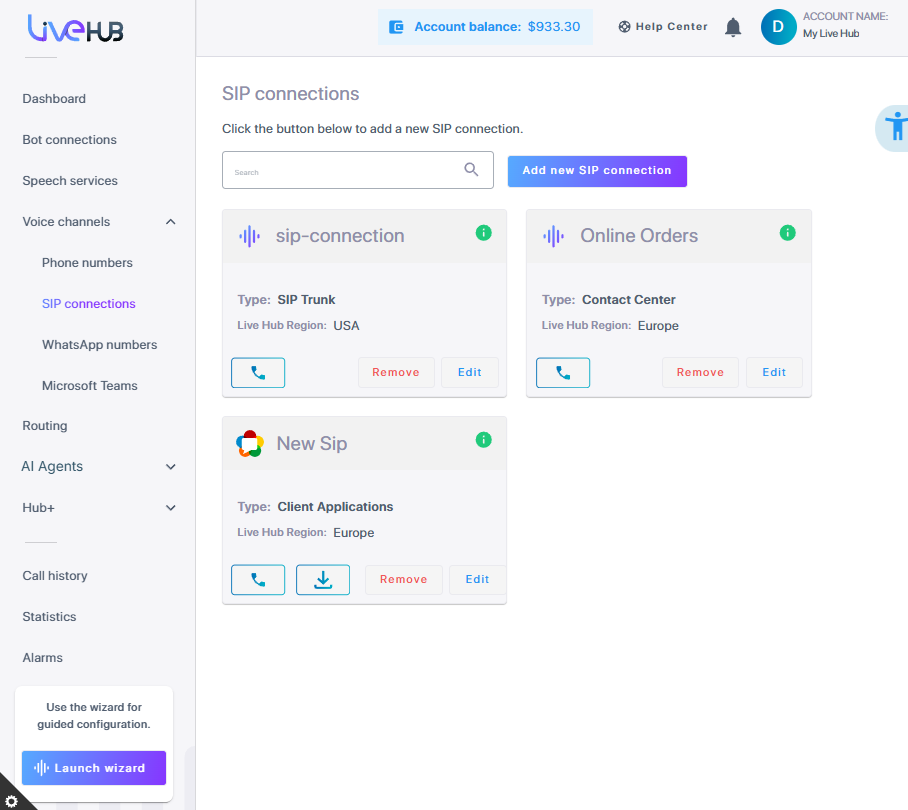
In the Navigation pane, expand Voice channels, and select SIP Connections; the following appears:
-
Click Add new SIP connection to add a new SIP Connection; the following appears:
-
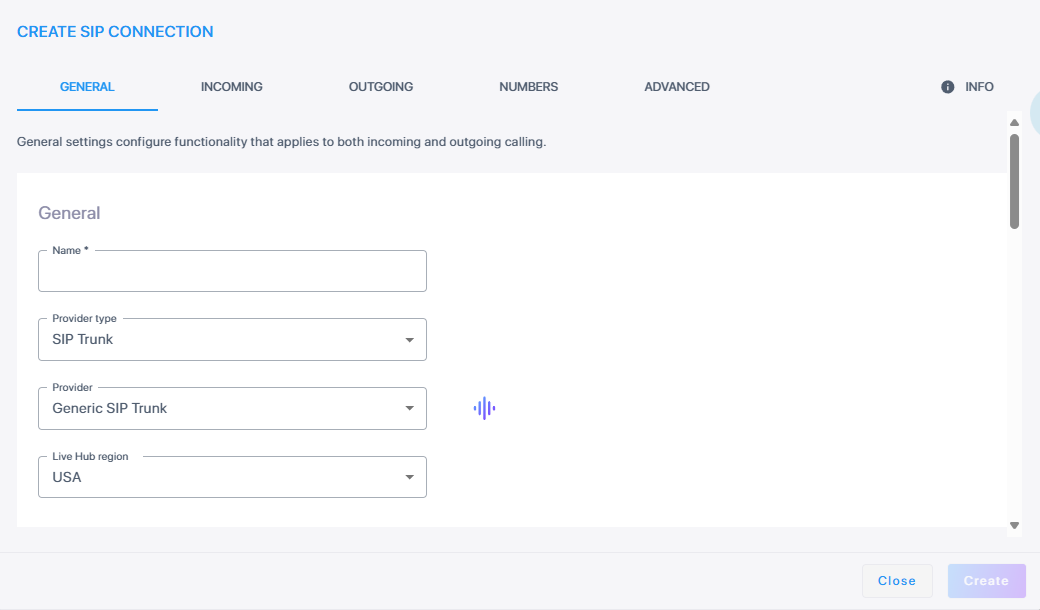
Under General:
-
In the 'Name' field, enter the SIP Connection ID.
-
From the 'Provider Type' drop-down list, select the type of provider:
-
SIP Trunk
-
Contact Center
-
UC Platform
-
From the 'Provider' drop-down list, select one of the following:
-
If 'Provider Type' is SIP Trunk, select Generic SIP Trunk.
-
If 'Provider Type' is Contact Center, select Generic Contact Center.
-
If 'Provider Type' is UC Platform, select Generic Unified-Communication Platform.
-
-
-
From the 'Live Hub region' drop down list, select the geographical location (region) in which Live Hub voice infrastructure is deployed.
-
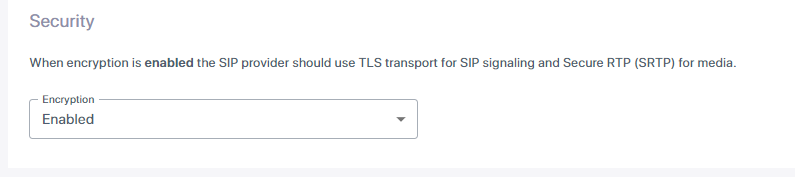
Under Security,
-
From the 'Encryption' drop-down list, select the encryption method you need.
-
-
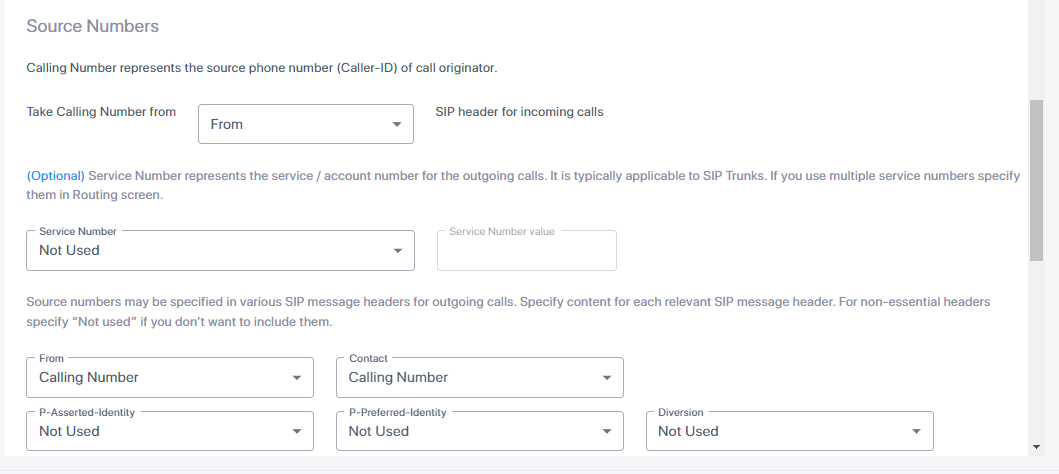
Under Source numbers,
Note the following:
-
The Calling Number represents the source phone number (Caller-ID) of call originator.
-
The Service Number represents the service / account number for the outgoing calls. It is typically applicable to SIP Trunks. If you use multiple service numbers, specify them in the Routing screen. (Optional)
-
Source numbers may be specified in various SIP message headers for outgoing calls. Specify the content for each relevant SIP message header. For non-essential headers specify “Not used” if you don’t want to include them.
-
From the 'Take Calling Number from' drop-down list, select the SIP header from where you want to obtain the calling number (Diversion, P-Asserted-Identity, or P-Preferred Identity).
-
From the Service Number drop-down list, select if the service number is used. If the service number is set to “Not used”, the value becomes read-only. It is still possible to select “Service Number” or “Service Number” entry for any of the headers – but when user clicks Create/Modify he will receive an error stating “Invalid value for header XXXXX – service number is not used”
-
Specify for each SIP header if the source number (calling number or service number) is used, or not used at all. The service number value can be up to 64 alphanumeric characters.
-
-
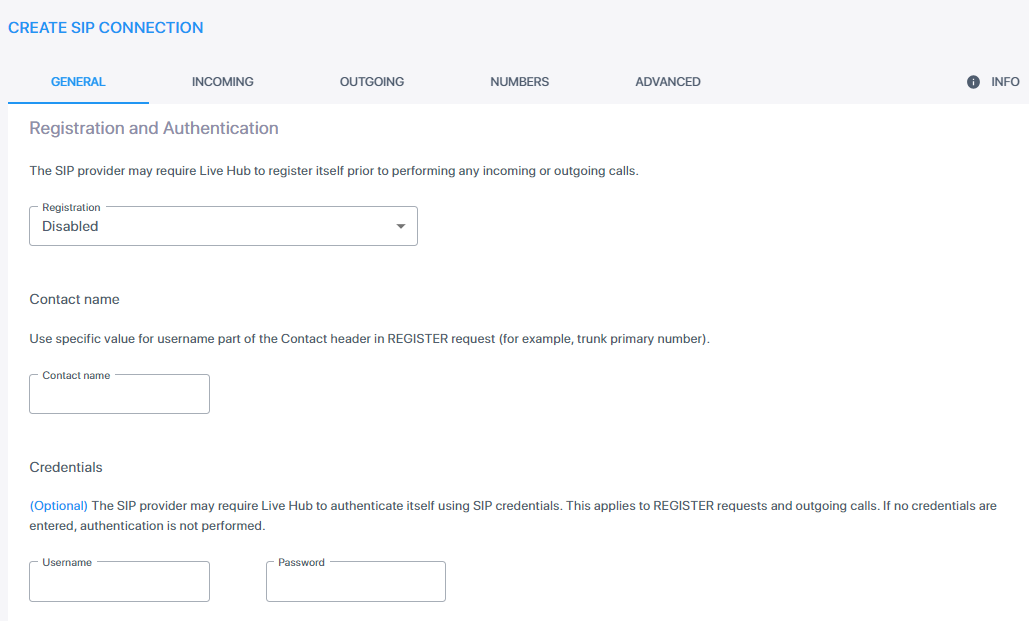
Under Registration and authentication, do the following:
-
From the 'Registration' drop-down list, select the registration type you need.
-
Under 'Contact name', in the 'Contact name' field, enter the Contact name. When the Contact name has been entered, it is used for a specific value for the username part of the Contact header, in any outgoing SIP message towards this SIP connection (e.g., trunk primary number). Note that the 'Contact name' field can be used even if the 'Registration' field is set to Disabled.
-
Under 'Credentials', in the 'Username' and 'Password' fields, enter your credentials.
-
-
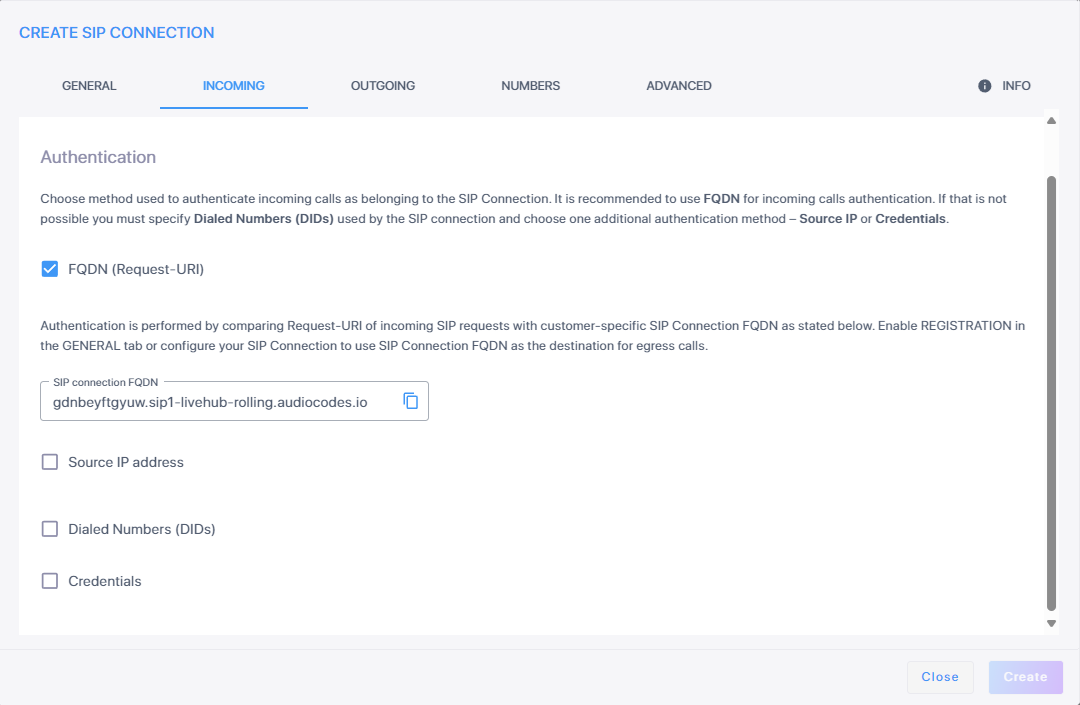
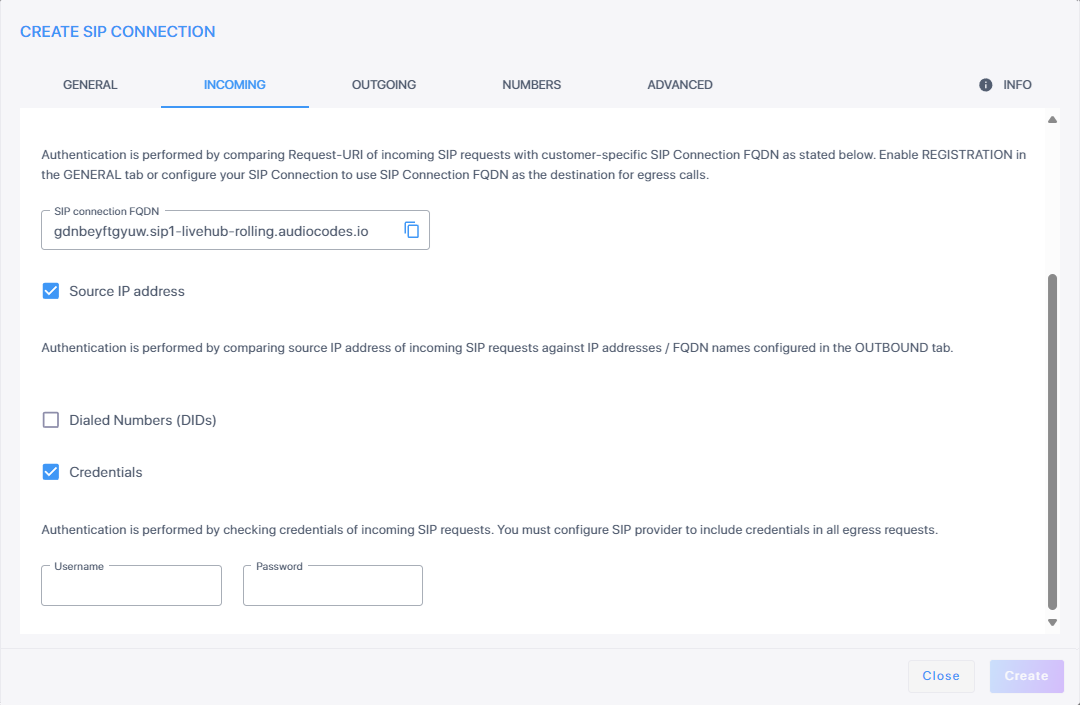
Click the Incoming tab, and then configure calls from the SIP Connection to the AudioCodes Communication Platform. Under Authentication, choose the methods to authenticate inbound calls as belonging to the SIP Connection. There are four authentication methods: FQDN (Request-URI), Source IP address, Dialed Numbers (DIDs), Credentials.
Select either FQDN or Dialed Numbers (DIDs). If you choose DIDs, also choose either Source IP or Credentials.
-
FQDN (Request-URI): If you select "FQDN (Request-URI)," the SIP connection FQDN is automatically filled in with the same value displayed when you click the INFO icon in the top right corner.
-
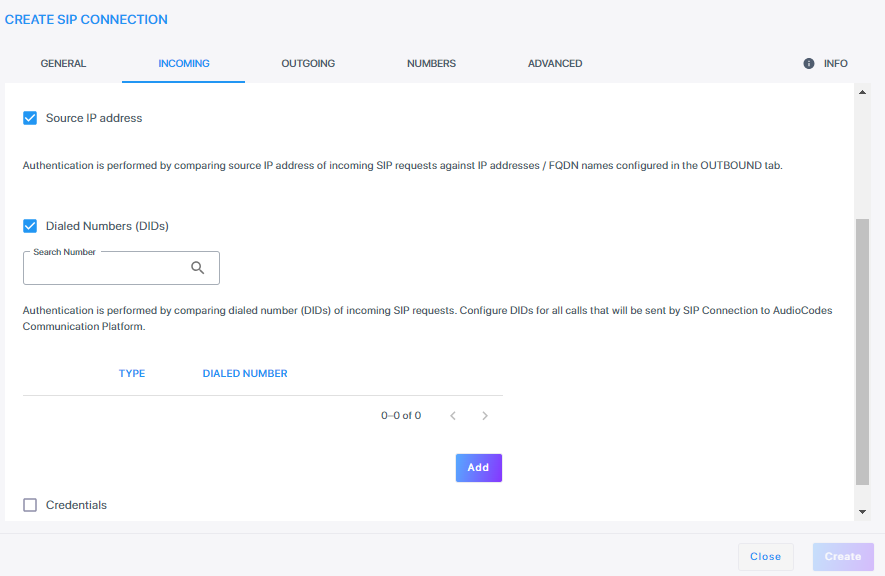
Source IP address: If you select Source IP address, the authentication is performed by comparing source IP address of incoming SIP requests against IP addresses / FQDN names configured in the OUTBOUND tab.
-
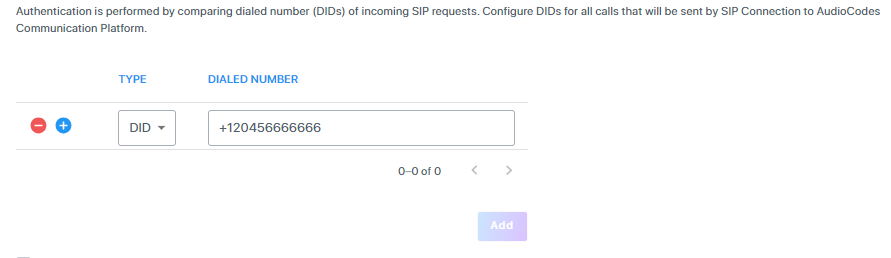
Dialed Numbers (DIDs): If you select 'Dialed Numbers (DIDs)', you can search for a specific number or a list of dialed numbers. The DIDs table supports 150 records.
-
Click Add.
-
From the 'Type' drop-down list, select the type (DID, Pattern, Range, Text).
-
In the 'Dialed Number' field, enter the dialed number, and then click
 . Use the pagination buttons to scroll through the numbers list.
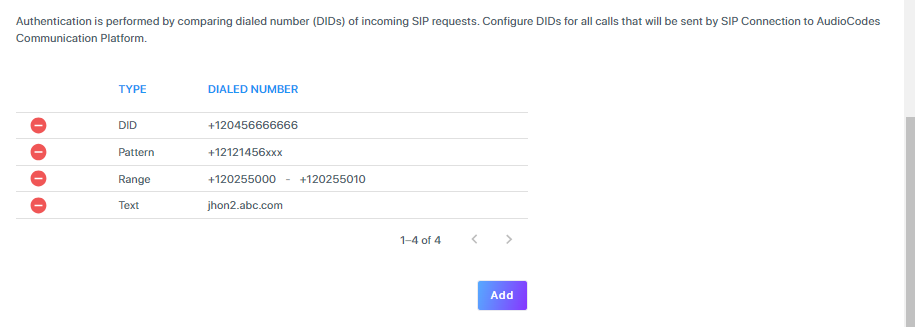
-
Credentials: If you select Credentials, enter your user name and password.
-
-
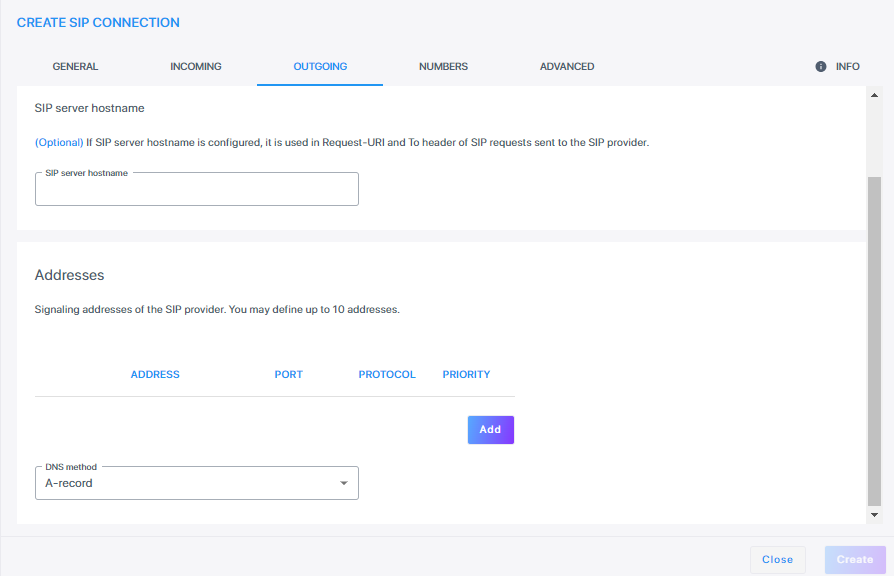
Click the Outgoing tab, and then configure calls from the AudioCodes Communication Platform to the SIP Connection.
-
Under the Outgoing group, in the 'SIP Server Hostname' field, enter the SIP server hostname.
-
Under Addresses, click Add.
-
From the 'DNS method' drop-down list, if you select A-record, enter the 'Address', 'Port', 'Protocol' and 'Priority' fields.
-
From the 'DNS method' drop-down list, if you select SRV, enter the 'Address' and 'Protocol' fields.
-
From the 'DNS method' drop-down list, if you select NAPTR, enter the 'Address' field.
We recommend you use TCP or TLS protocols. If you use the UDP protocol, make sure that your SIP messages do not exceed the maximum supported UDP packet size (1,500 bytes).Changing DNS methods, deletes all existing records in the ADDRESSES table.
-
-
-
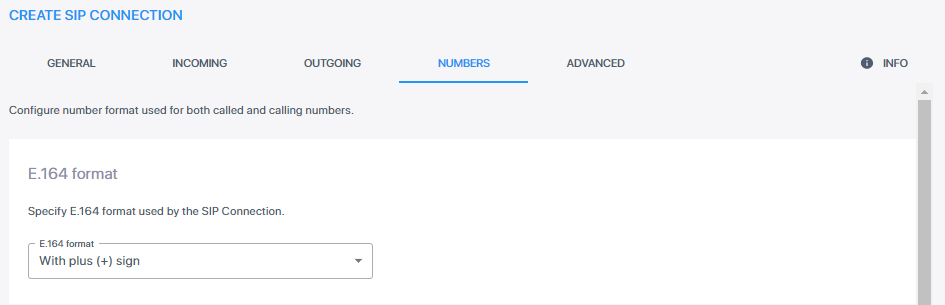
Click the Numbers tab, and then configure the number format used for both called and calling numbers.
-
Under the E.164 format group, from the 'E.164 format' drop-down list, select the E.164 format used by the SIP connection:
-
With plus (+) sign
-
Without plus (+) sign
-
Starts with 0
-
Starts with 00
-
-
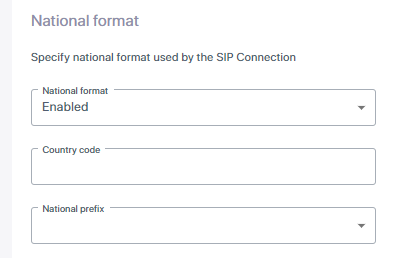
Under the National format group, from the 'National format' drop-down list, select the appropriate option.
-
If you enable 'National format' numbers that belong to the specified country code, it is sent in the National Format (instead of E.164).
-
For USA: If you enable 'National format', set the Country Code as “1” and leave the National Prefix as “not used”. If so, when you dial the American number, the called number is set to “2024561111” instead of “+12024561111”.
-
For Israel: If you enable 'National format', set Country Code as “972” and set 'National prefix' as ”0”. If so, when you dial the Israeli number, the called number is set to “026753333” instead of “+97226753333”.
-
-
-
Click the Advanced tab, and then configure advanced configuration parameters.
-
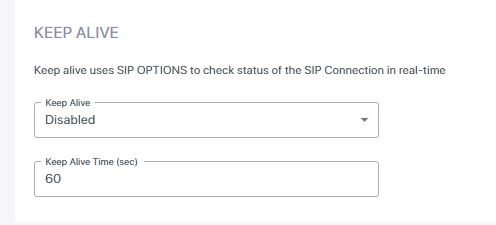
Under the Keep Alive group, do the following:
-
From the 'Keep Alive' drop-down list, select the setting you need.
-
In the 'Keep Alive Time' field, enter the Keep Alive time in seconds.
-
-
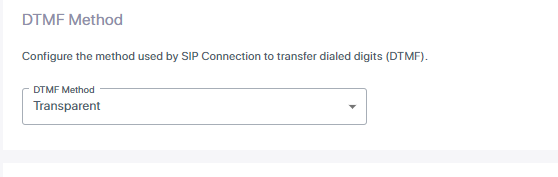
Under the DTMF method group, do the following:
-
From the 'DTMF method' drop-down list, select the setting you need.
-
Under the Call Transfer group, do the following:
-
From the 'Transfer Method' drop-down list, select the setting you need.
-
From the 'Transferred by Indication' drop-down list, select the setting you need.
-
From the 'Delayed offer' drop-down list, select the setting you need. This defines if the sent SIP INVITE request contains the SDP body.

-
-
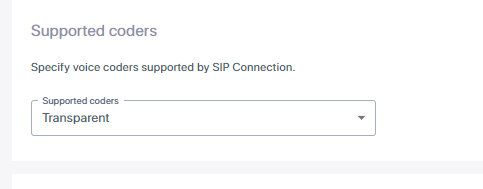
Under the Supported coders group,
-
From the 'Supported Coders' drop-down list, select the setting you need.
-
-
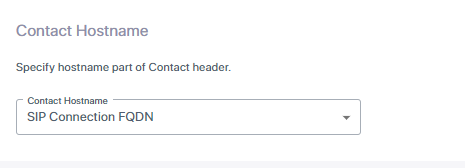
Under the Contact hostname group, from the 'Contact Hostname' drop-down list, select the option you need.
-
Under the Max call duration group, in the 'Max call duration' field, enter the maximum duration (in minutes)
of a call. If the call has not ended by the time this duration elapses, it ends the call. The valid value is 0 to 43200. The default value is determined by the System parameter setting. It is presently set to “0” (i.e., unlimited).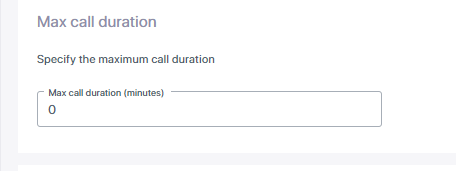
The maximum call duration configured for your account can't be exceeded (see Configure maximum call duration). For example, if you configured a maximum call duration of 30 minutes for your account and you configure a maximum call duration of 40 minutes for this SIP Connection, Live Hub applies a maximum call duration of 30 minutes to the SIP Connection (instead of 40).
-
You can view and configure parameters that are defined as 'hidden' by selecting the Enhanced Configuration check box. This displays the SIP connection parameters configured in special scenarios. Most of the time these parameters will not change. Each 'hidden' parameter is displayed in the relevant tab.

-
-
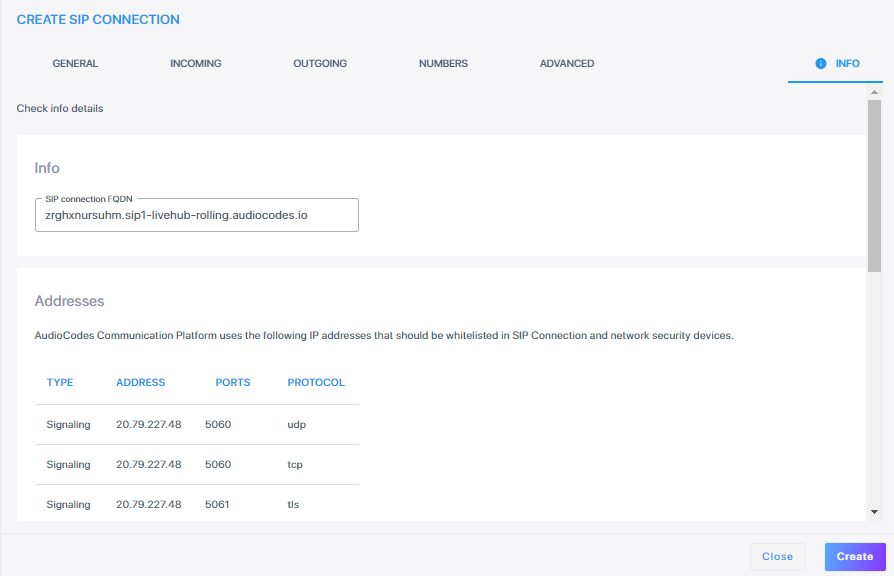
Click the Info tab to configure customer information.
-
Under the Certificate group, you can display the certificate used by the AudioCodes Communication Platform. This should be imported into the SIP Connection’s trusted CAs list. This certificate can be downloaded by clicking Download.

-
Under the Limits group, do the following:
-
In the 'Call establishment rate (per sec)', enter the rate per seconds.
-
In the 'Number of concurrent calls' field, enter the number of concurrent calls.
-
-
To increase the limits, click the click here link.

-
-
Click Create.