Adding Meeting Recap in Live Panel
During a meeting recording in the Live Panel, you can add meeting recap items.
|
●
|
The Owner of the meeting recording can add all recap types; participants can add only notes. |
|
●
|
Only one summary can be added to the meeting recording. |
|
●
|
Action items, decisions and the summary are always public and therefore, visible to everyone that has access to the meeting recording. You can make notes private or public. |
The Live Panel provides flexibility in how you want to add recap items:
|
■
|
Using the microphone to record your recap (applicable only to Teams desktop client). |
|
■
|
Using the text box to type the recap text. |
|
➢
|
To add meeting recap items in Live Panel: |
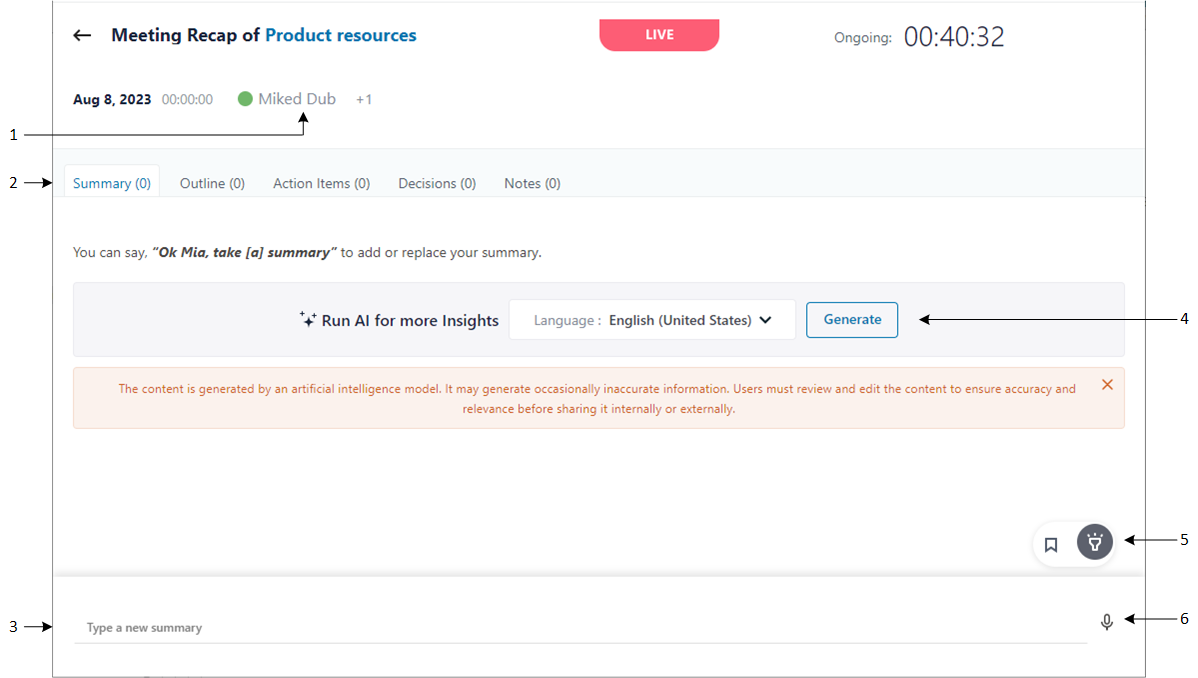
The following shows an example of the Live Panel:
|
2.
|
Recording your recap with the microphone:
|
|
a.
|
Select the type of recap (#2 in figure) that you want to add. |
|
b.
|
Click the microphone icon (#6 in figure), and then say your recap; Meeting Insights records your voice (and the microphone icon is replaced by the recording in-progress and stop icon). |
|
c.
|
When you want to end your recap, click the stop recording icon; Meeting Insights adds the transcription of your recorded voice to the relevant recap group (and the stop icon is replaced by the microphone icon). |
|
3.
|
Typing your recap in the text box:
|
|
a.
|
Select the type of recap (#2 in figure) that you want to add. |
|
b.
|
In the text box (#3 in figure), type the recap. |
|
i.
|
If you want to assign the action item to a specific participant, click  , and then from the drop-down list, select the participant. , and then from the drop-down list, select the participant. |
|
ii.
|
If you want to assign a due date to the action item, click  , and then select the date from the calendar. , and then select the date from the calendar. |

|
d.
|
(Notes Only): To make the note visible only to you (private) or visible to everyone (public), toggle the Private / Public button. |
|
e.
|
Click  . . |