Creating Self-Signed Certificates for TLS Contexts
You can assign a certificate that is digitally signed by the device itself to a TLS Context (i.e., self-signed certificate). In other words, the device acts as a CA. The Issuer (e.g., "Issuer: CN=ACL_5967925") and Subject (e.g., " Subject: CN=ACL_5967925") fields of the self-signed certificate have the same value.
|
●
|
The device is shipped with a default TLS Context (Index 0 and named "default"), which includes a self-generated random private key and a self-signed server certificate. The Common Name (CN or subject name) of the default certificate is "ACL_nnnnnnn", where nnnnnnn denotes the serial number of the device. |
|
●
|
If the default self-signed certificate is about to expire (less than a day) or has expired, the device automatically re-generates a new self-signed certificate. |
You can configure each TLS Context with the following:
|
➢
|
To assign a self-signed certificate to a TLS Context: |
|
1.
|
Before you begin, make sure of the following: |
|
●
|
You have a unique DNS name for the device (e.g., dns_name.corp.customer.com). The name is used to access the device and therefore, must be listed in the server certificate. |
|
●
|
No traffic is running on the device. The certificate generation process is disruptive to traffic and should be done during maintenance time. |
|
3.
|
In the table, select the required TLS Context index row, and then click the Change Certificate link located below the table; the Change Certificates page appears. |
|
4.
|
Under the Certificate Signing Request group, in the 'Common Name [CN]' field, enter the fully-qualified DNS name (FQDN) as the certificate subject. Alternatively (or in addition), if you want to generate a self-signed SAN certificate (with multiple subject alternate names), then from the 'Subject Alternative Name [SAN]' drop-down list, select the type of SAN (e-mail address, DNS hostname, URI, or IP address), and then enter the relevant value. You can configure multiple SANs, using the 1st to 5th 'Subject Alternative Name [SAN]' fields. |
|
5.
|
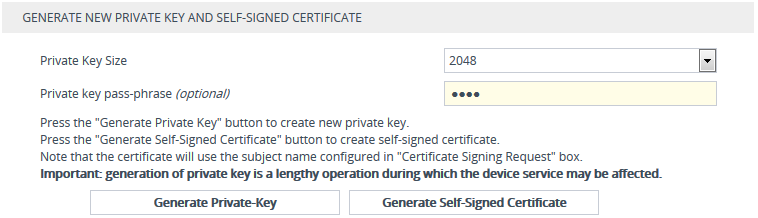
Scroll down the page to the Generate New Private Key and Self-signed Certificate group: |
|
6.
|
Click Generate Self-Signed Certificate; a message appears requesting you to confirm generation. |
|
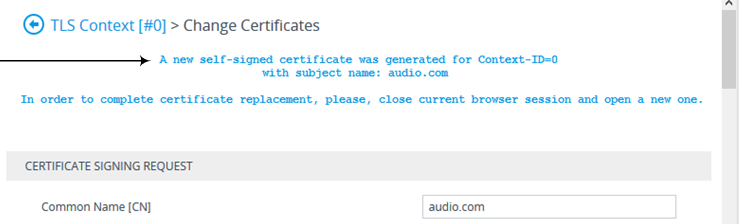
7.
|
Click OK to confirm generation; the device generates a new self-signed certificate displaying the new subject name, indicated by a message in the Certificate Signing Request group: |
|
8.
|
Save the configuration with a device reset for the new certificate to take effect. |