Mounting in a 19-inch Rack using Front and Rear Brackets
The device can be mounted in a 19-inch rack by attaching the chassis directly to the rack frame, using the supplied front-mounting brackets and orderable rear-mounting brackets.
Warnings:
| ● | At least two people are required to mount the device in the 19-inch rack. |
| ● | When attaching the chassis to the rack, it is mandatory to connect it using both the front-mounting brackets and the rear-mounting brackets (supplied). |
Avertissements:
| ● | Au moins deux personnes sont nécessaires pour monter l’appareil dans le bâti 19 pouces. |
| ● | En fixant le châssis au bâti, il est impératif de le connecter à l’aide de supports de montage avant et de supports de montage arrière.réglables (fournis). |
You can order the following rear-mounting kits, each suited for a specific rack depth:
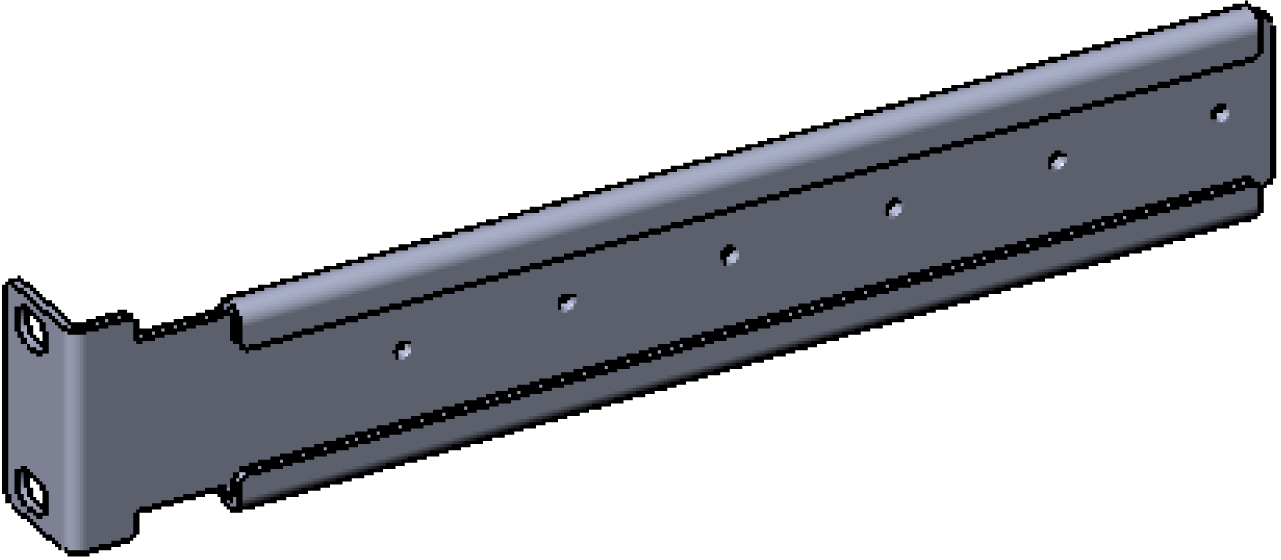
| ■ | Rear-mounting brackets suited for rack depths of approximately 60 cm (CPN for ordering is FRU/M26-83/REARRMK60): Adjustable rear-mounting bracket whose length can be adjusted from 59.3 to 62.7 cm (23.3 to 24.6 in.) to suit the distance between the chassis and the rear post. |
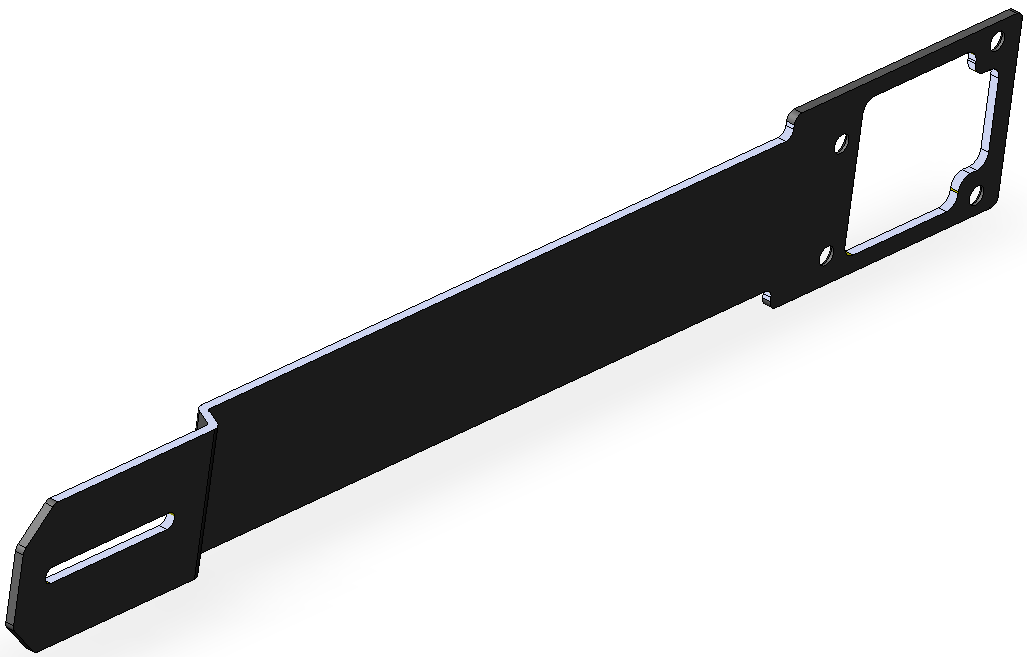
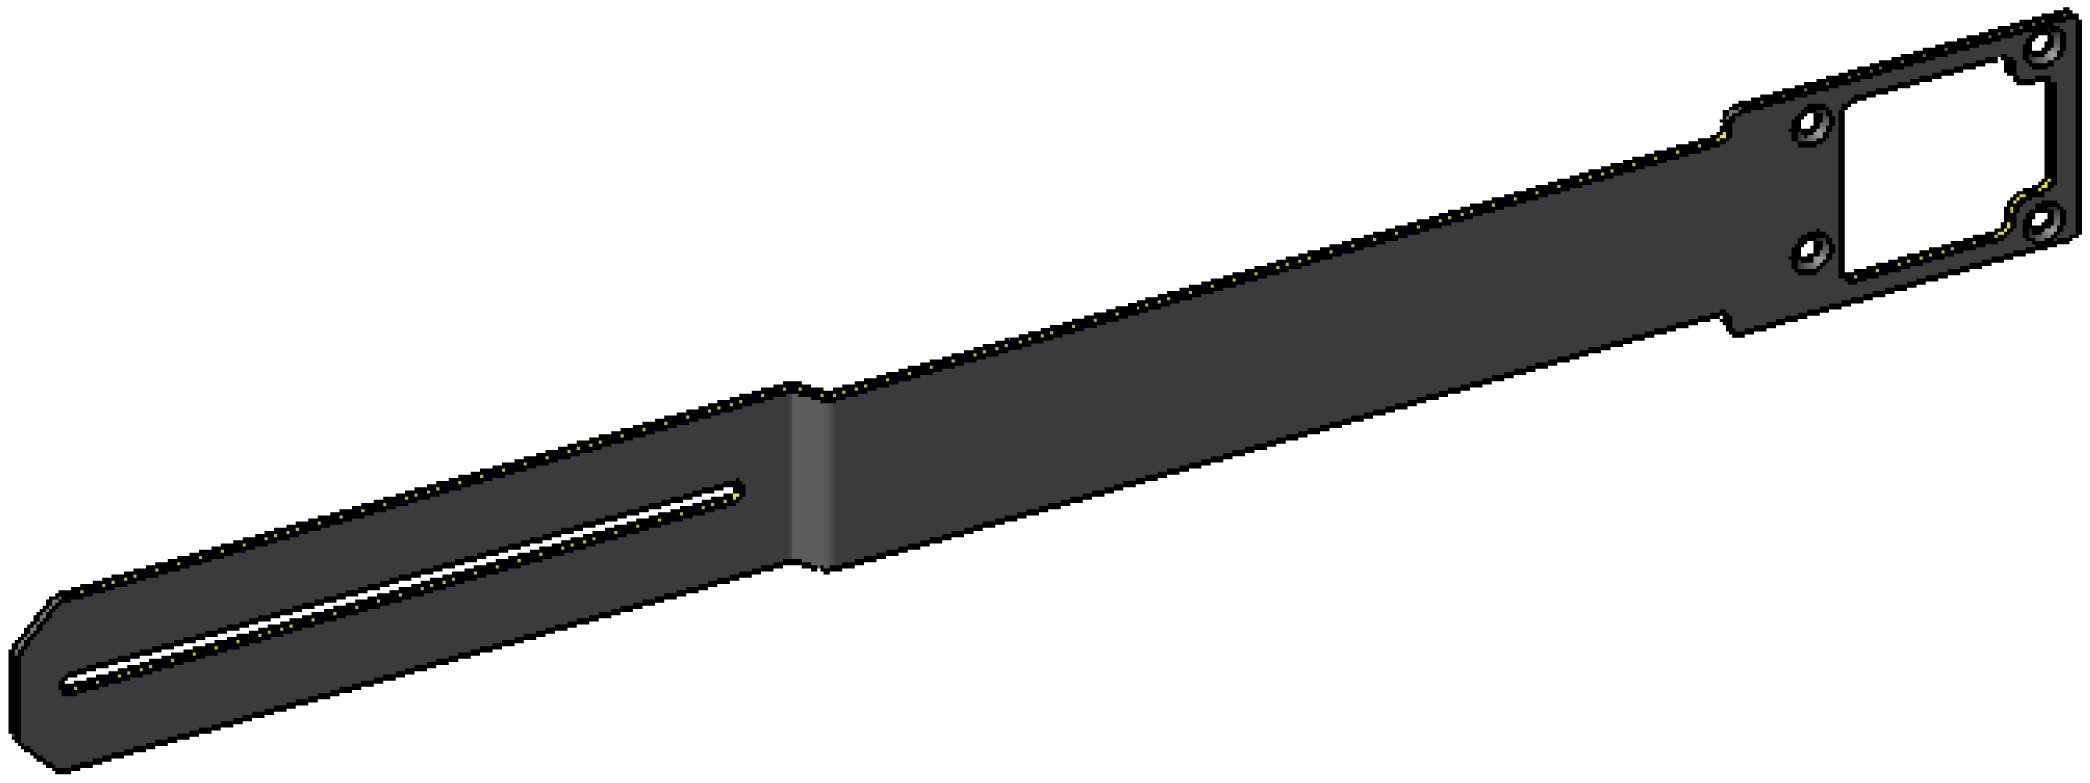
| ● | Rear-Mounting Brackets (x2) and screws (x2): |
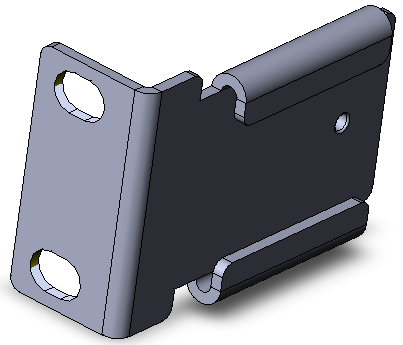

| ● | Rear-Mounting Flanges (x2) and screws (x6): |
| ■ | Rear-mounting brackets suited for rack depths of approximately 80 cm (CPN for ordering is FRU/M26-83/REARRMK80): Adjustable rear-mounting bracket whose length can be adjusted from 77 to 83 cm (30.3 to 32.6 in.) to suit the distance between the chassis and the rear post. |
| ● | Rear-Mounting Bracket (x2) and screws (x6): |
| ● | Rear-Mounting Flange (x2) and screws (x6): |
| ➢ | To mount the device in a 19-inch rack using front- and rear-mounting brackets: |
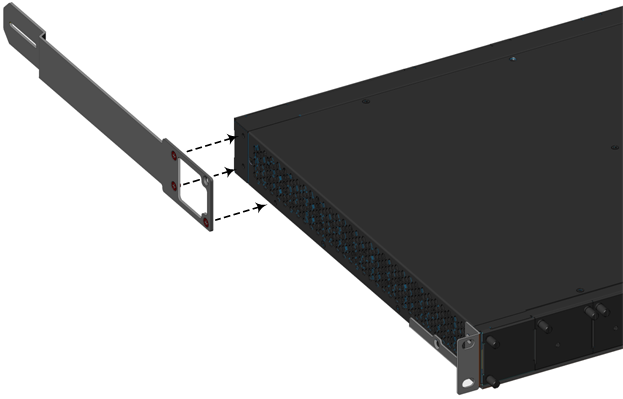
| 1. | Attach the front-mounting brackets (supplied) to the chassis, using the supplied screws. |
| 2. | Open the Rear Mounting Bracket kit and remove its contents. Make sure that all the items are included in the kit (see above). |
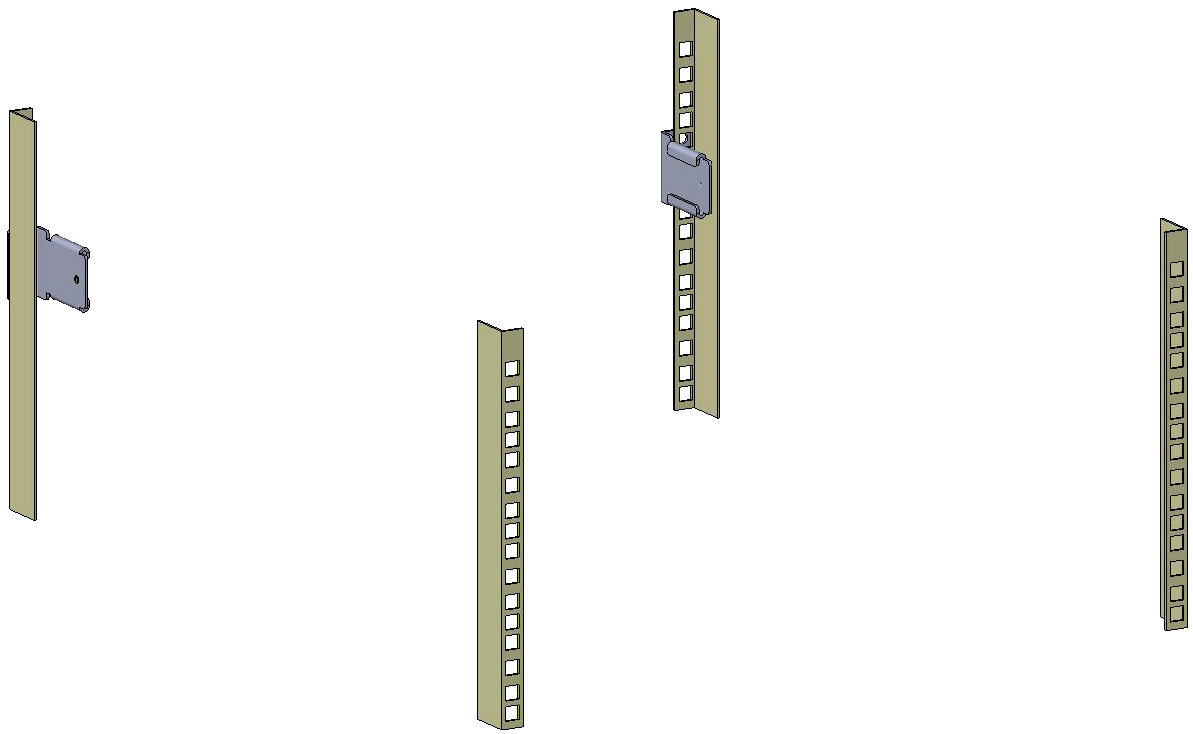
| 3. | Attach the two rear-mounting brackets to the two-rear rack posts, using two screws (not supplied) per bracket. Make sure that you attach the brackets at the same height level in the rack. See the following figure for correct orientation of the brackets when attaching them to the posts. |
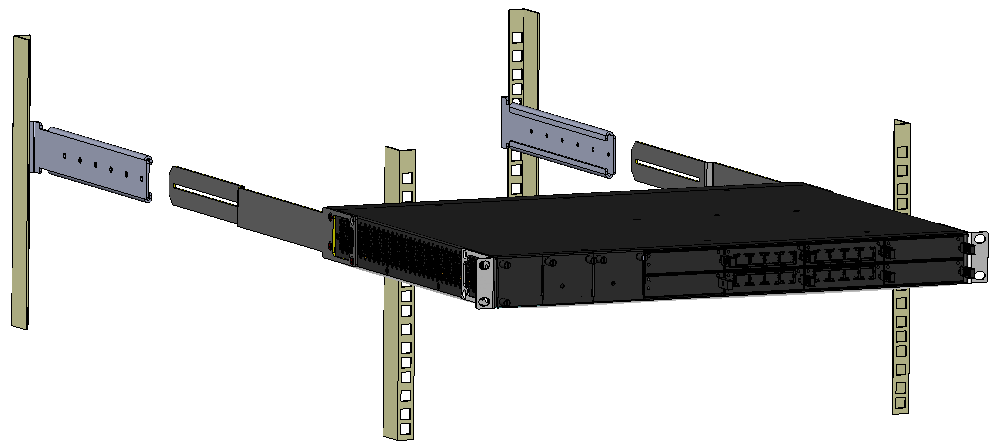
Rear-Mounting Brackets Attached to Rear-Rack Posts (60 cm)
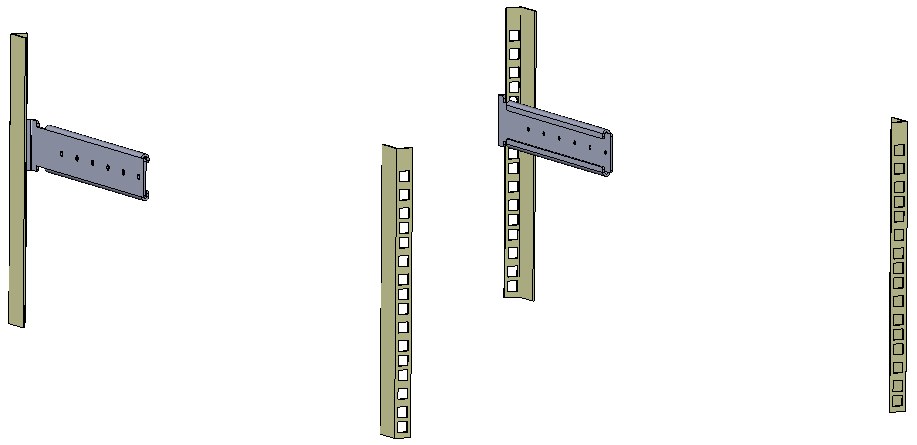
Rear-Mounting Brackets Attached to Rear-Rack Posts (> 70 cm)
| 4. | Attach the rear-mounting flanges to the rear sides of the chassis, using three screws (supplied) per flange. |
Attaching Rear-Mounting Flange to Chassis' Rear-Side Mounting Holes (60 cm)
Attaching Rear-Mounting Flange to Chassis' Rear-Side Mounting Holes (> 70 cm)

| 5. | With two people, lift the chassis into the rack from the front of the rack. |
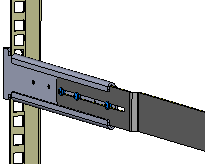
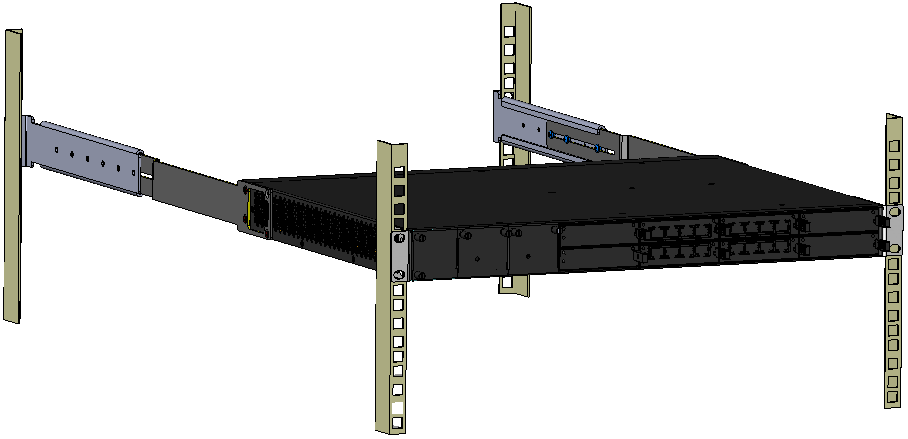
| 6. | Slide the two rear-mounting flanges into the slide rails of the rear-mounting brackets that you previously attached to the rear posts. |
Sliding Rear-Mounting Flanges into the Rear-Mounting Brackets (60 cm)
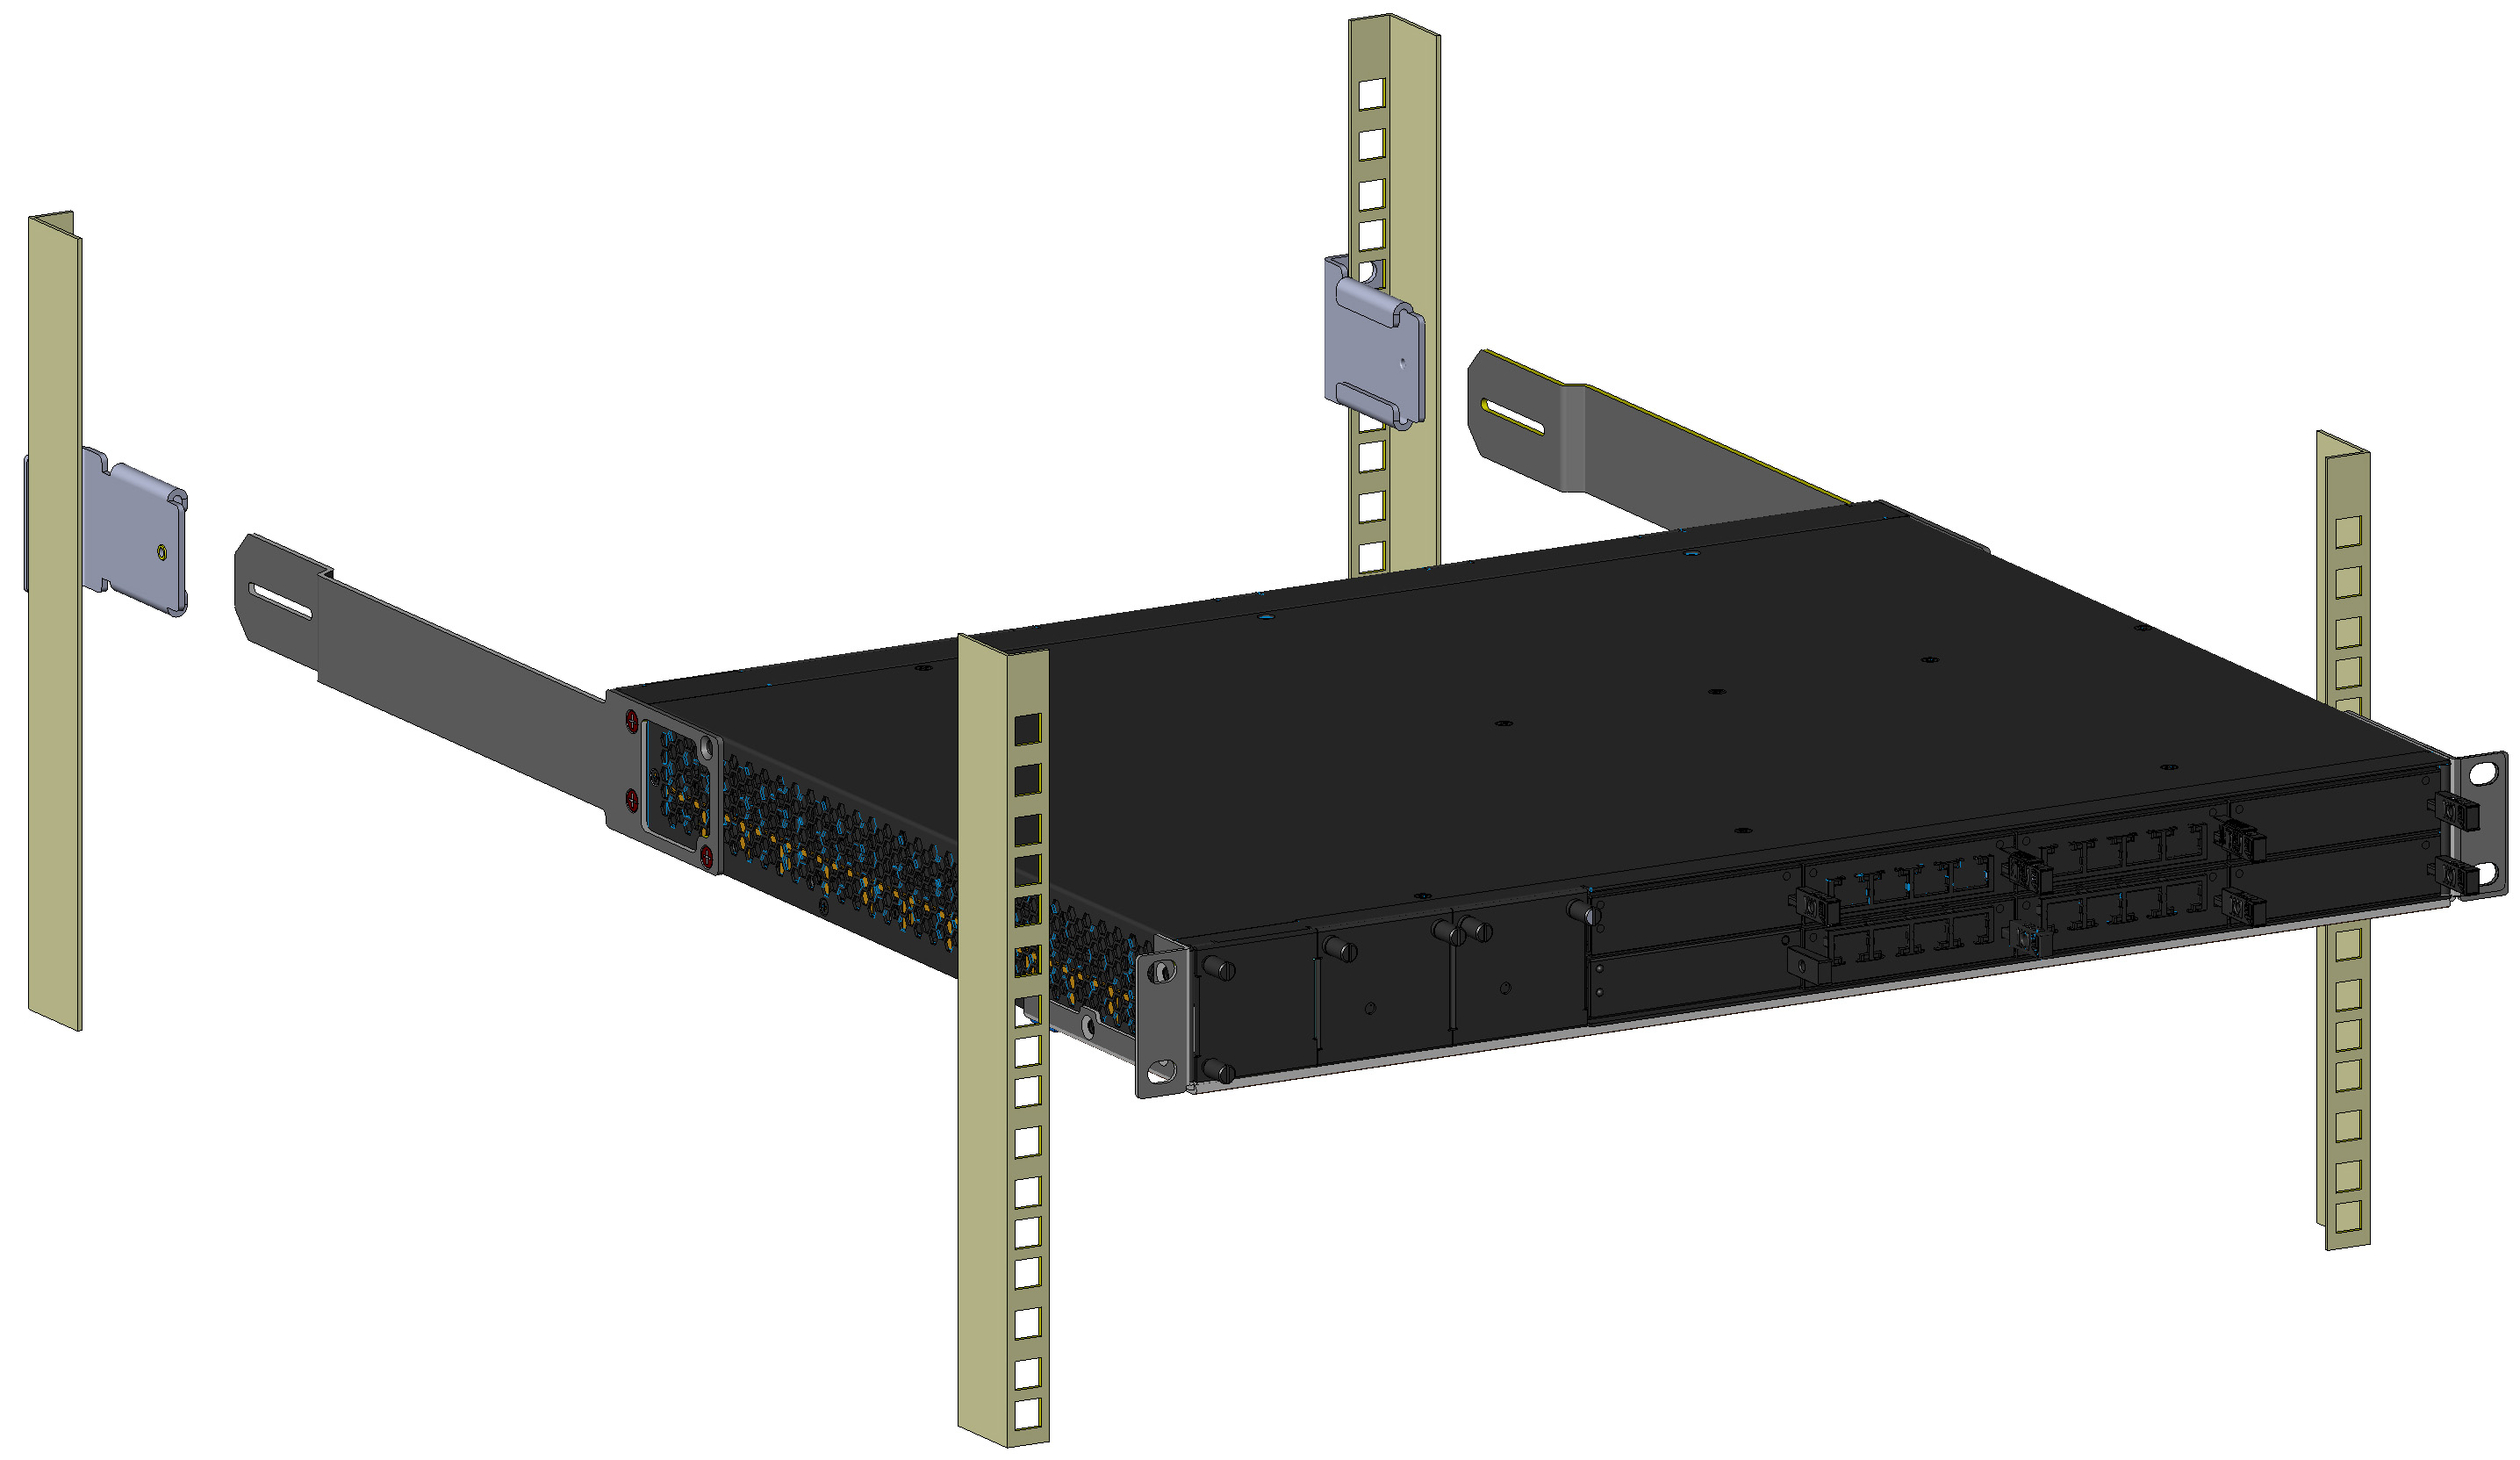
Sliding Rear-Mounting Flanges into the Rear-Mounting Brackets (> 70 cm)
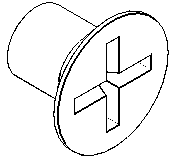
| 7. | Hold the chassis in position while the second person secures the rear-mounting flanges to the rear-mounting brackets. Insert the supplied screws (6-32 x 5/16 inch) from the inside of the rack, through the flange's grid and into the screw hole on the rear-mounting bracket. Finger-tighten the screws but make sure that the screws are NOT fully tightened and that the flange can freely move on the slide rails of the rear-mounting bracket. |
Fastening Rear-Mounting Flange to Rear-Mounting Bracket (60 cm)
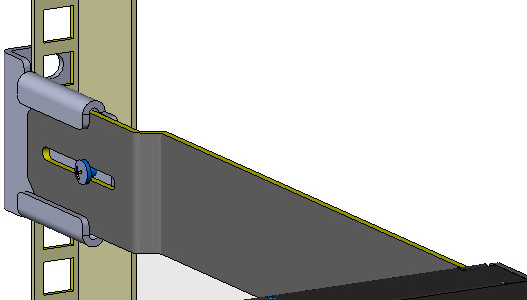
Fastening Rear-Mounting Flange to Rear-Mounting Bracket (> 70 cm)
| 8. | Hold the chassis for support while the second person positions the chassis so that the front-mounting brackets are flush against the front-rack posts and that the holes of the front-mounting brackets align with the holes on the front-rack posts. |
Front-Mounting Brackets Flush and Aligned with Front-Rack Posts (60 cm)
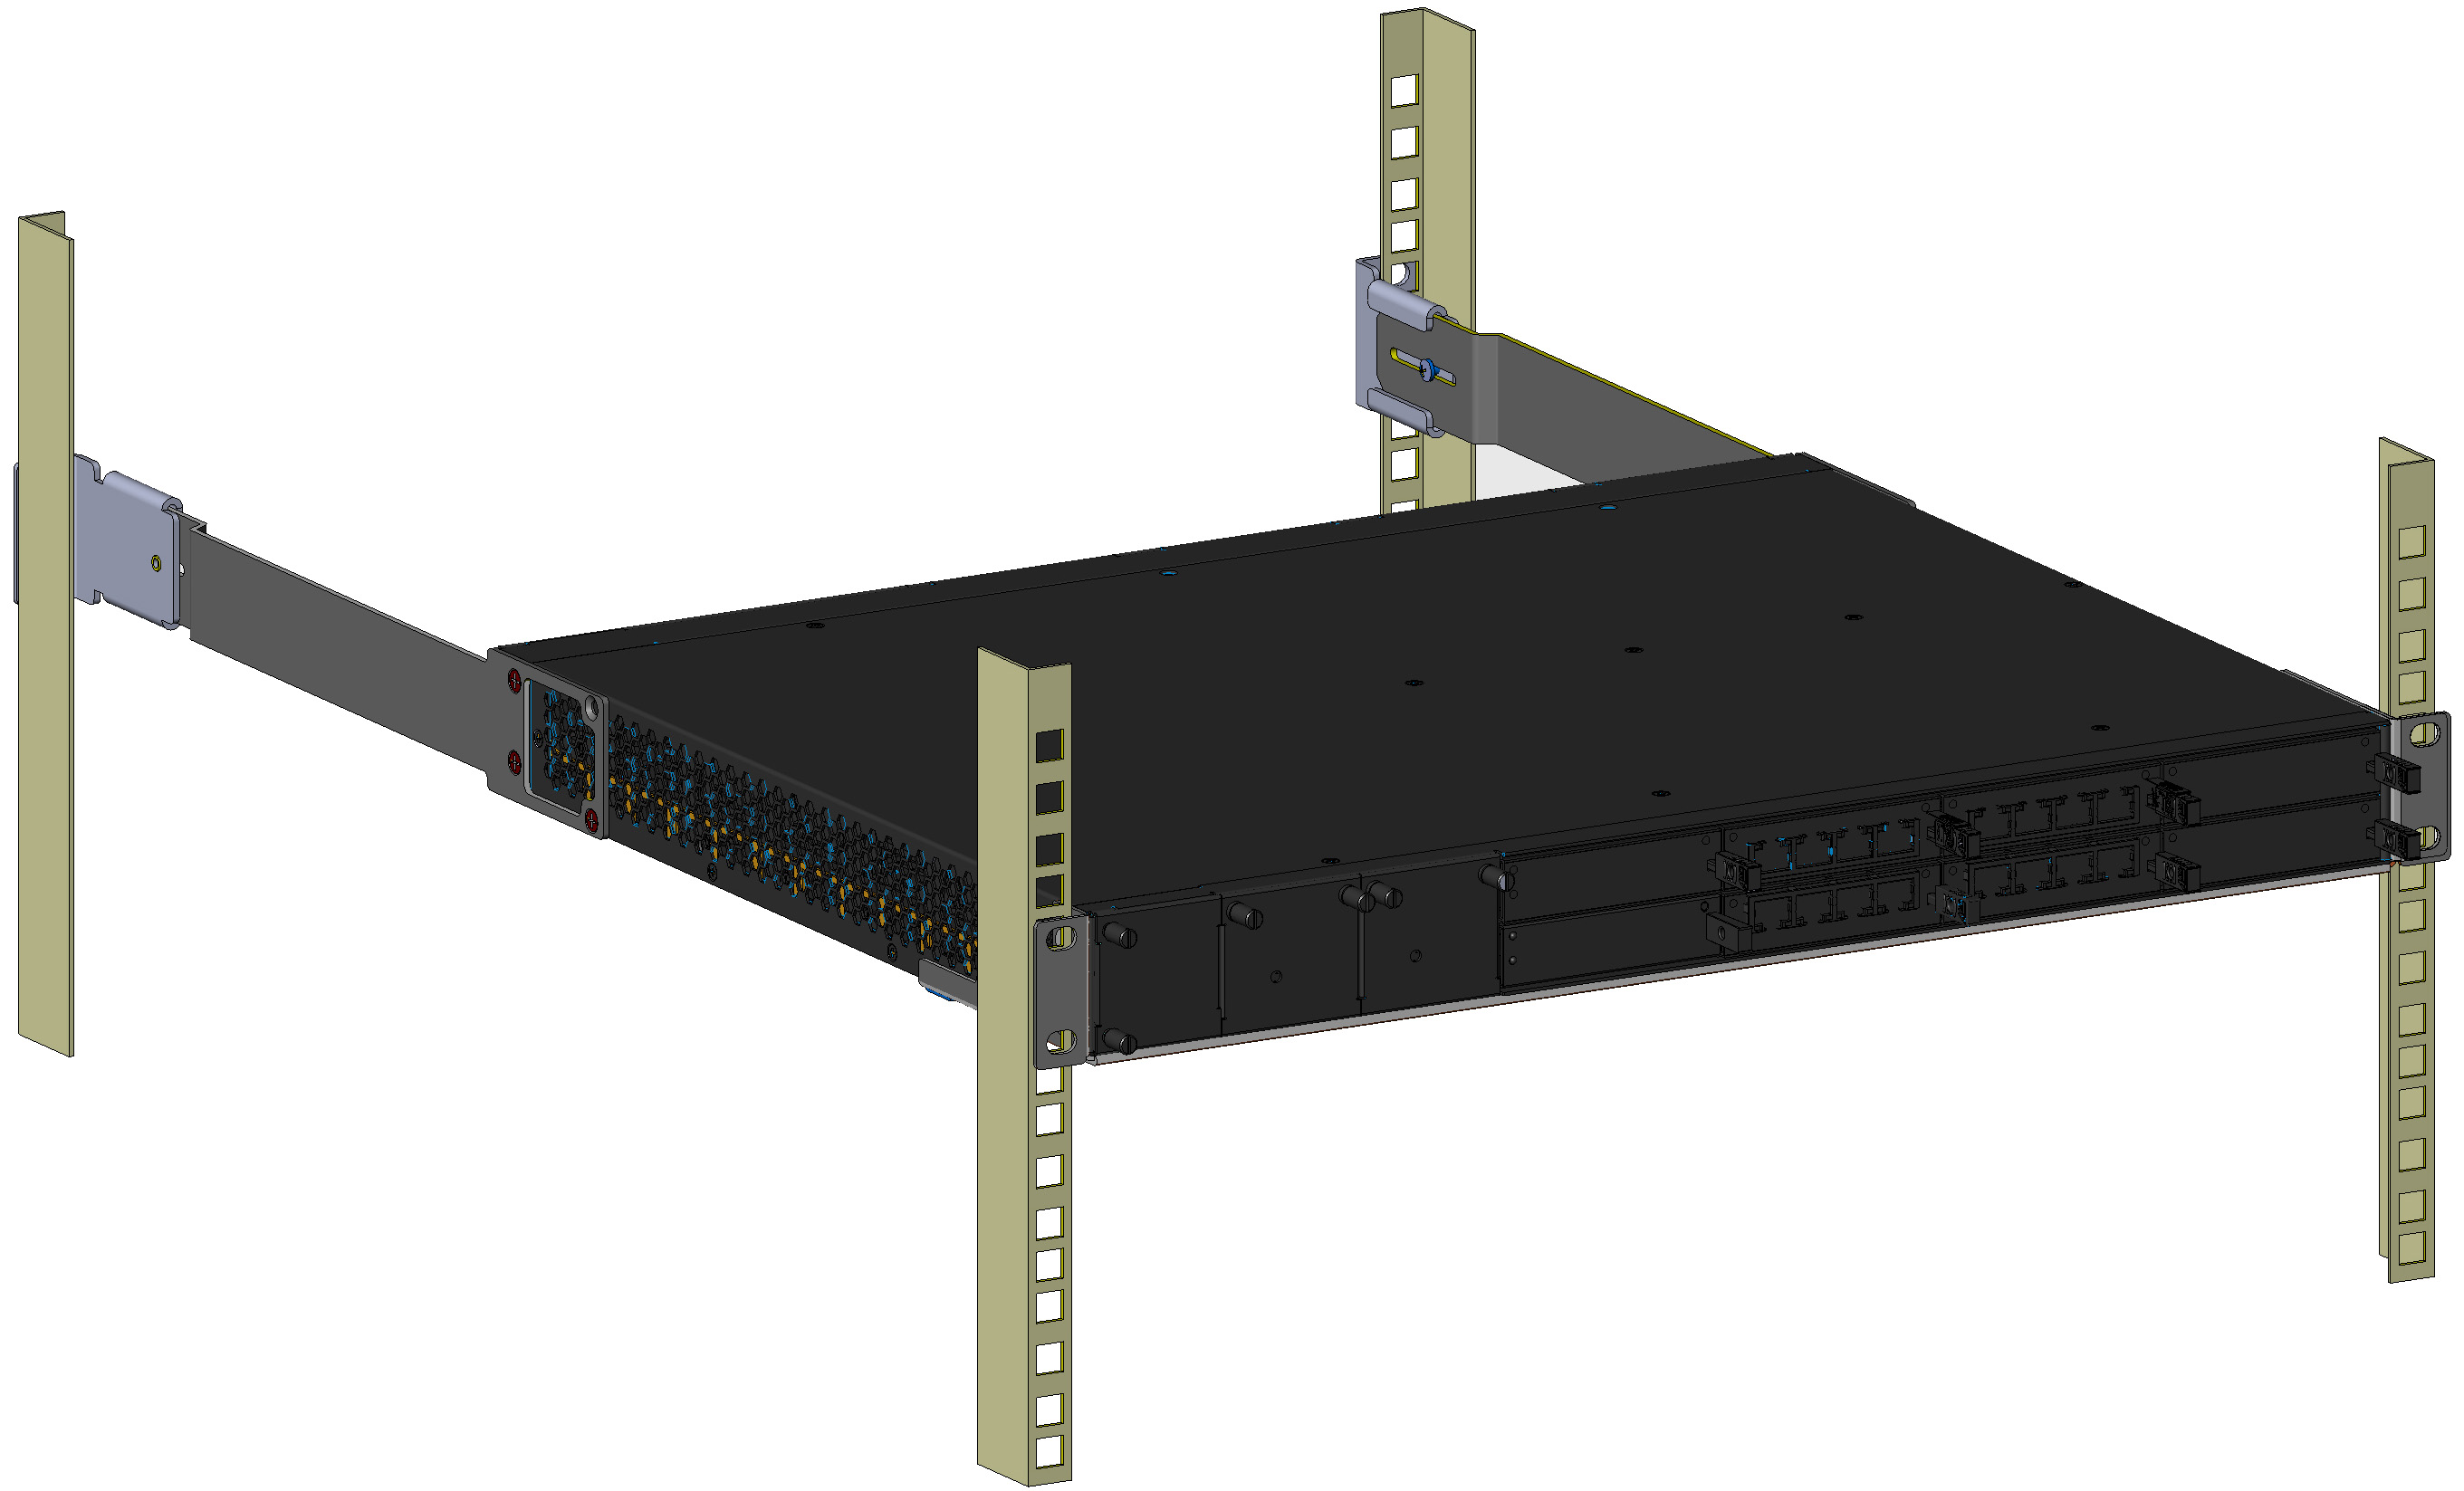
Front-Mounting Brackets Flush and Aligned with Front-Rack Posts (> 70 cm)
| 9. | Hold the chassis in position while the second person secures the two front-mounting brackets to the front posts, by finger-tightening 19-inch rack bolts (not supplied) to the rack posts. |
| 10. | Tighten the bolts on the front-mounting brackets. |
| 11. | With a Philips screwdriver, tighten the screws securing the rear-mounting flanges to the rear-mounting brackets. |
| ● | Make sure that all the mounting brackets are attached at the same level to the mounting posts so that the chassis is supported in a horizontal position. |
| ● | If the depth of the rack exceeds the maximum length of the adjustable rear-mounting brackets, install an additional side rack post to accommodate the length of the rear-mounting bracket. |