Registering Application in Entra ID
To enable login through Entra ID, you need to first register an application for the device's authentication login feature in your Entra ID portal.
|
➢
|
To register an app in Entra ID: |
|
1.
|
Sign in to the Entra ID portal using your organization's Microsoft account. |
|
2.
|
If your account gives you access to more than one tenant, click the Directories + subscriptions filter  icon on the toolbar to select the tenant in which you want to register an application. icon on the toolbar to select the tenant in which you want to register an application. |
|
3.
|
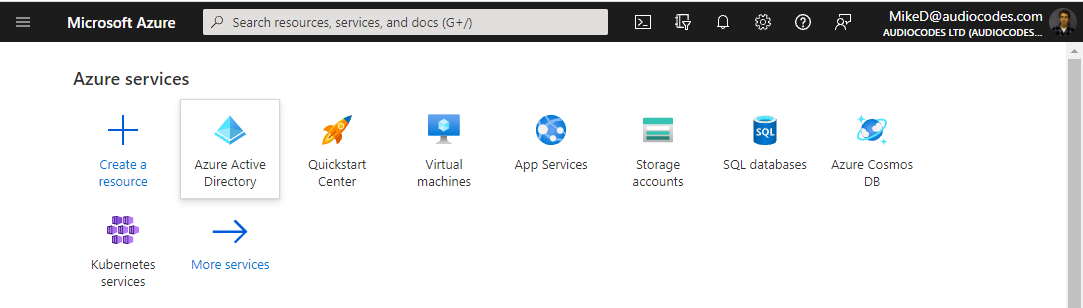
Search for and select the Azure Active Directory service  icon: icon: |
|
4.
|
From the Navigation pane, select  App registrations, and then click New registration: App registrations, and then click New registration: |
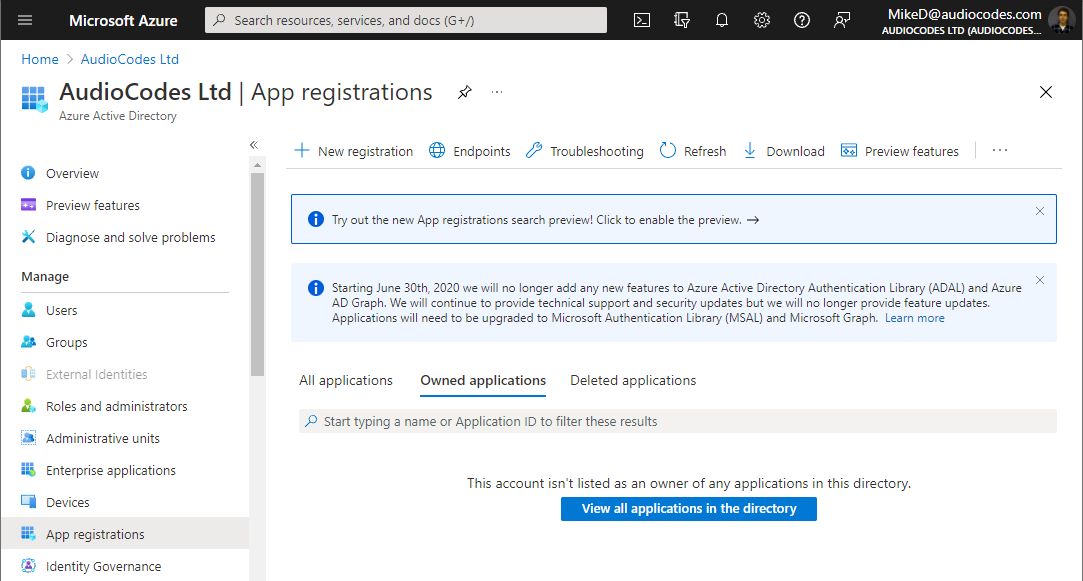
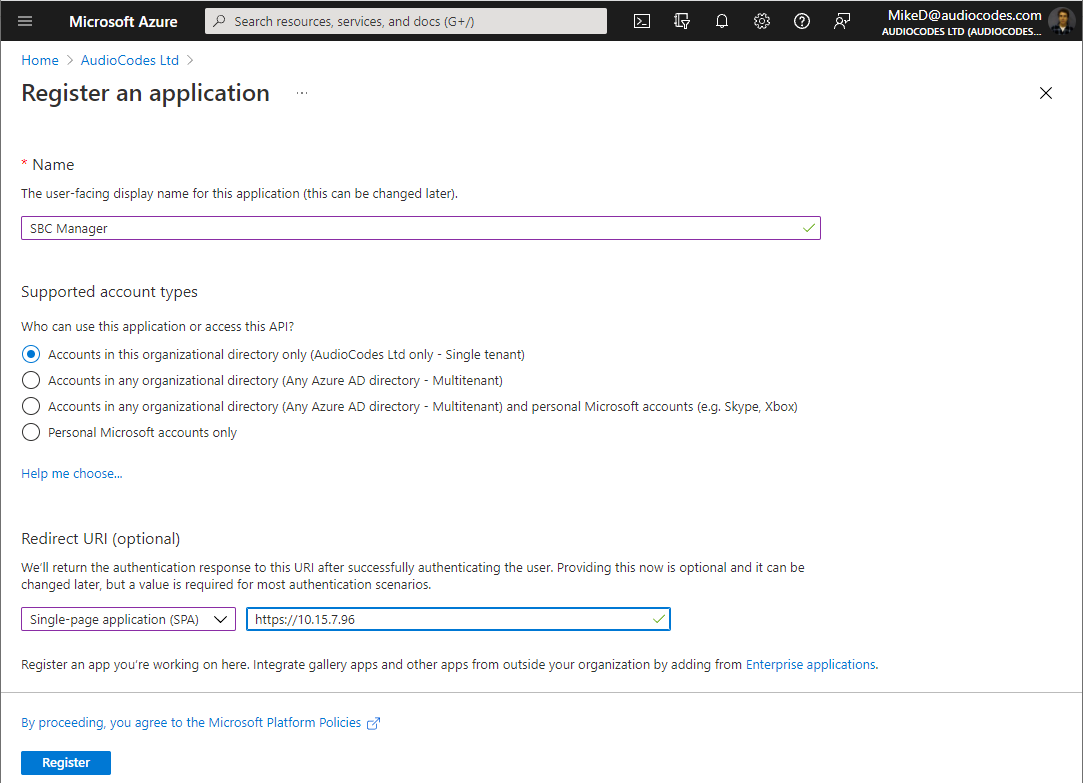
The Register an application page appears:
|
a.
|
Under the Name group, enter a meaningful name for the application (e.g., "SBC Manager"). |
|
b.
|
Under the Supported account types group, select which accounts you would like your application to support: |
|
❖
|
If you want to allow users from your organization only to access the application, choose Accounts in this organizational directory only. |
|
❖
|
If you want to allow users from any organization to access the application, choose Accounts in any organizational directory.
|
|
a.
|
Under the Redirect URI group, select Single-page application (SPA) from the drop-down list, and then enter the redirect URI in the format, https://<FQDN or IP address of device>. Upon successful authentication, this is the address to which the user is redirected (i.e., the device). |
|
b.
|
Click Register; Entra ID assigns a unique application (client) ID to your app. |
|
6.
|
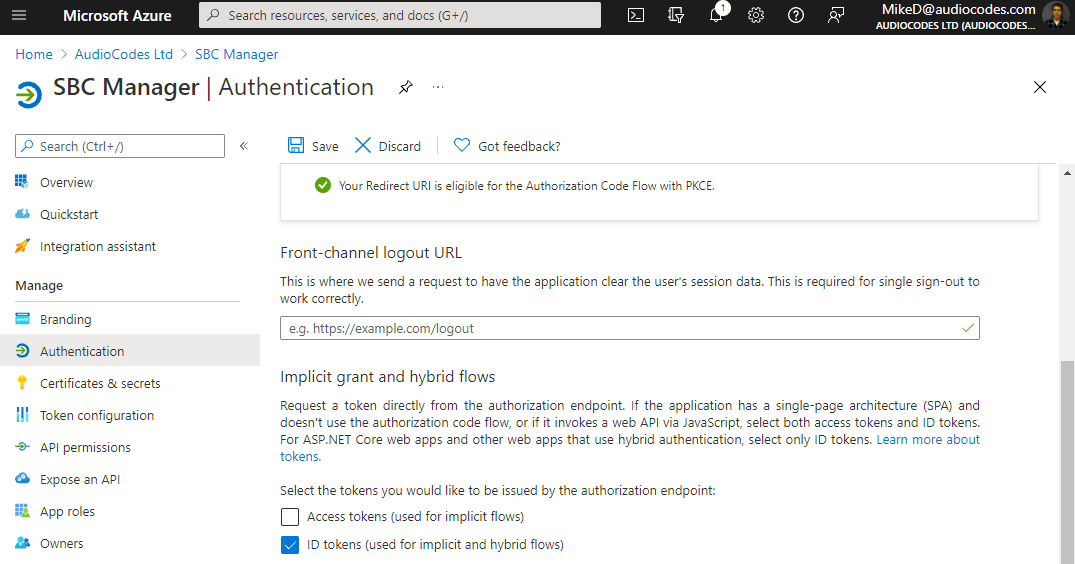
From the Navigation menu, select  Authentication, and then under the Implicit grant and hybrid flows group, select the ID tokens check box, and then click Save: Authentication, and then under the Implicit grant and hybrid flows group, select the ID tokens check box, and then click Save: |
|
7.
|
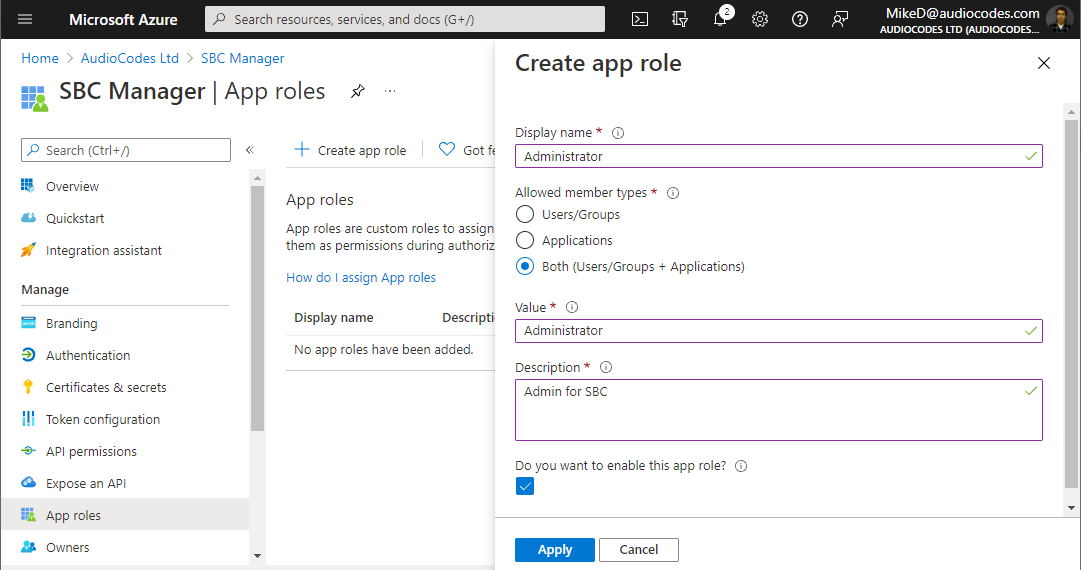
From the Navigation menu, select  App roles, and then click Create app role; the Create app role page appears: App roles, and then click Create app role; the Create app role page appears: |
|
8.
|
Create the roles you have in your device (Monitor, Administrator, and Security Administrator):
|
|
●
|
'Display name': Define a meaningful display name for each role
|
|
●
|
'Allowed member types': For each role, select Both (Users/Groups + Applications) |
|
●
|
'Value': Enter the following value for the appropriate role: |
|
●
|
'Description': Define a meaningful description for each role |
Select the Do you want to enable this app role check box, and then click Apply.
The following step enables programmatic access to the device through REST API. If you don’t need such access, skip this step.
|
9.
|
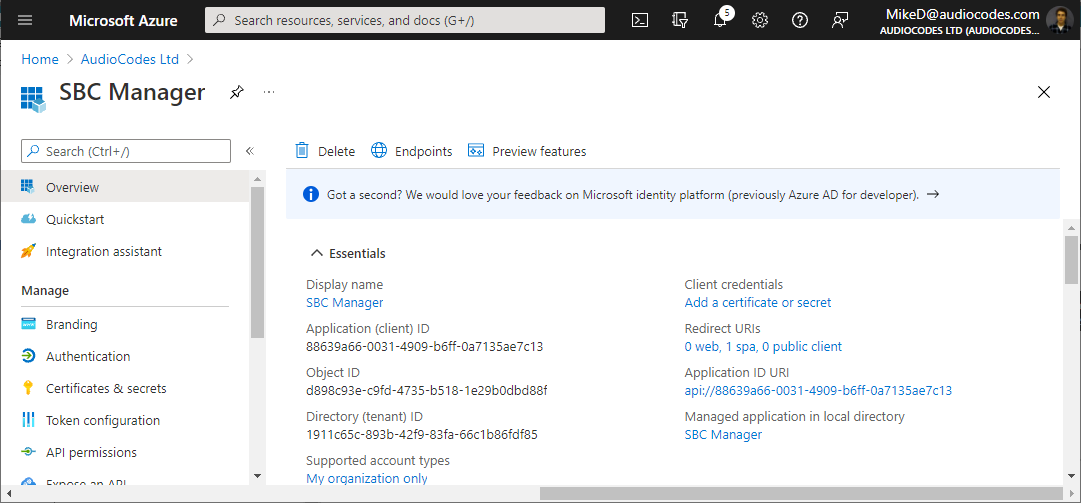
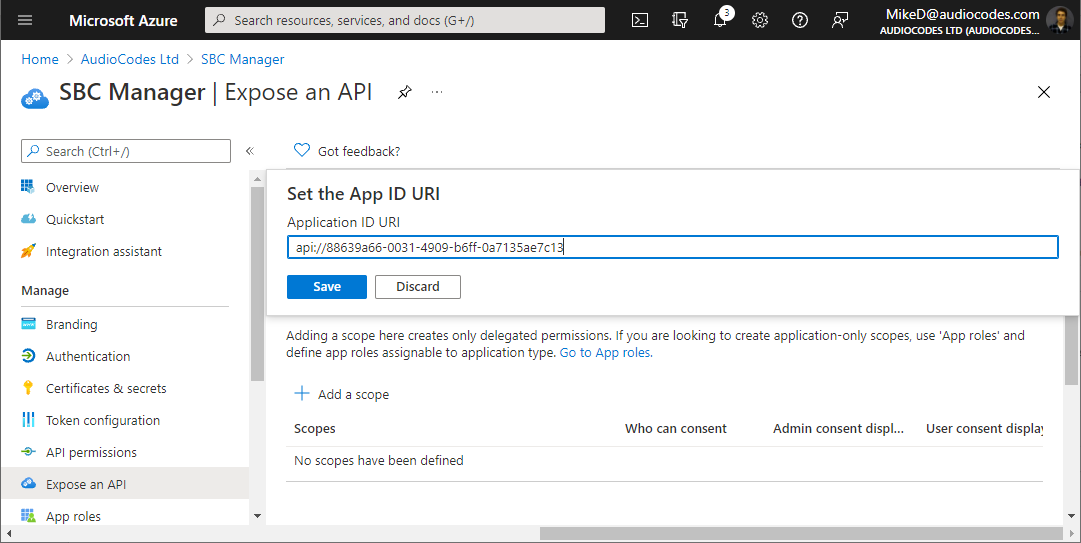
From the Navigation menu, select  Expose an API. If an Application ID URI is not configured yet, click Set, and then enter the following value: api://<client ID> (replace <client ID> with Entra ID application’s 'Application (client) ID', which you can obtain from the Overview page), and then click Save: Expose an API. If an Application ID URI is not configured yet, click Set, and then enter the following value: api://<client ID> (replace <client ID> with Entra ID application’s 'Application (client) ID', which you can obtain from the Overview page), and then click Save: |
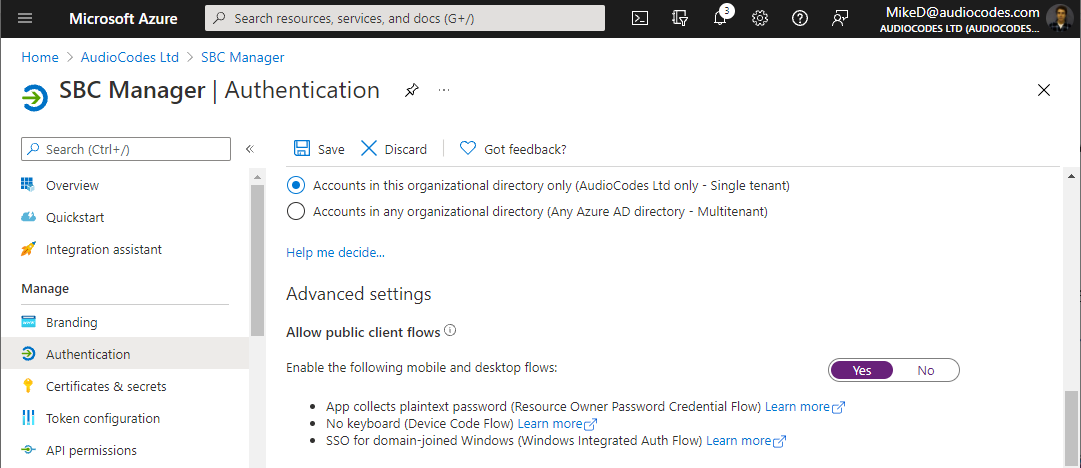
The following step enables CLI access to the device through the serial console or SSH. If you don’t need such access, skip this step.
|
10.
|
From the Navigation menu, select Authentication, and then under the Allow public client flows group, enable the mobile and desktop flows, by clicking Yes, and then clicking Save: |
|
11.
|
From the Navigation menu, select Overview, and then make a note of the 'Application (client) ID' and 'Directory (tenant) ID' values; you will need them when you configure the device. |