Wall Mounting
The device can be mounted on a wall using side mounting brackets (separate orderable item).
To ensure proper cooling and prevent over-heating of internal components:
|
●
|
Do not place any equipment directly on top of the device. |
|
●
|
The side panels of the chassis, where the air vents are located, must remain unobstructed to ensure adequate airflow through the chassis. Make sure that clearance from the ventilation openings is at least 13 cm. |
|
➢
|
To mount the device on a wall: |
|
1.
|
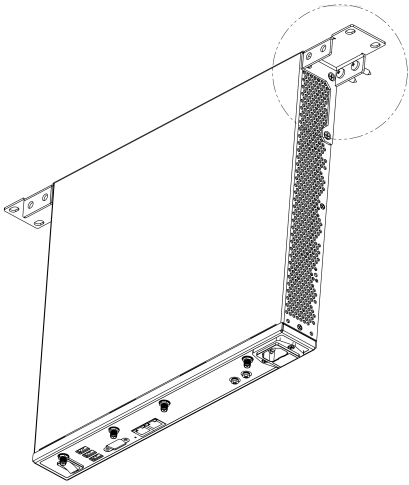
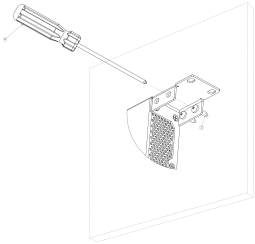
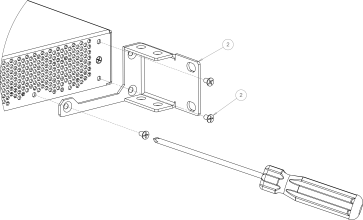
Using a Philips-head screwdriver, attach the mounting brackets (supplied) to both sides of the chassis using the screws (supplied), as shown in the following figure. Each bracket is secured to the chassis using three screws. |
Attaching the Mounting Brackets to Chassis
|
2.
|
Mark the drilling locations of the four mounting holes on the wall. You can use the chassis with the attached wall-mounting brackets as a template. For this two people are needed, one to hold the chassis and one to mark the holes. Hold the chassis so that the mounting brackets are flush against the wall. Make sure that the orientation of the chassis is correct –front panel facing up (toward the ceiling). Make sure that the chassis is horizontal with the floor (you can use a level). With a pencil, stencil the mounting brackets' keyholes on the wall. |
|
3.
|
Remove the chassis and place it on a horizontal surface. |
|
4.
|
Drill holes in the wall where you marked the keyholes. |
|
5.
|
Insert wall anchors (not supplied) of appropriate size into each drilled hole. |
|
6.
|
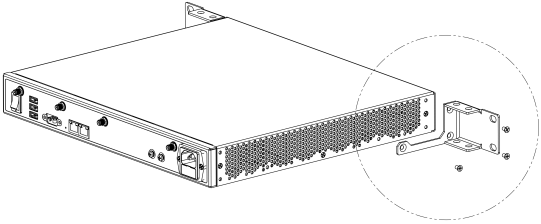
With one person holding the chassis flush against the wall with the mounting brackets' keyholes aligned with the wall anchors, Philips pan-head wood screws of 20-mm length (not supplied) to secure the brackets to the wall. |
Attaching the Chassis with Mounting Brackets to Wall