Changing OAMP Address through CLI
You can change the default OAMP IP address through the device's CLI. The procedure uses the regular CLI commands. Alternatively, you can use the CLI Wizard utility to set up your device with the initial OAMP settings. The utility provides a fast-and-easy method for initial configuration of the device through CLI. For more information, refer to the document CLI Reference Guide.
|
➢
|
To configure the OAMP IP address through CLI: |
|
1.
|
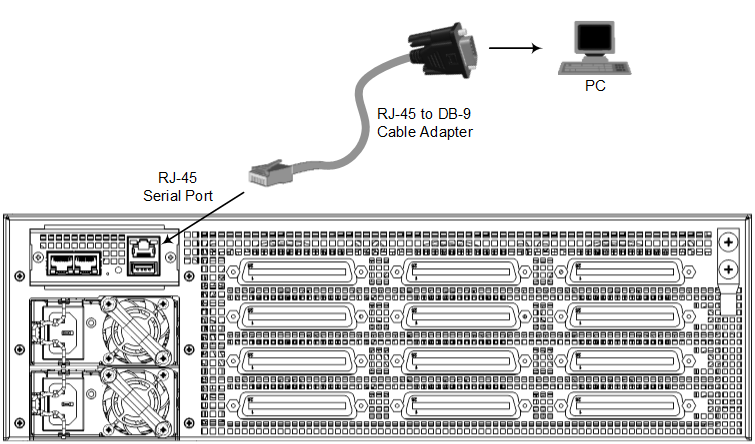
Connect the RS-232 port of the device to the serial communication port on your computer. For more information, refer to the device's Hardware Installation Manual.
|

|
2.
|
Establish serial communication with the device using a terminal emulator program such as HyperTerminal, with the following communication port settings:
|
|
3.
|
At the CLI prompt, type the username (default is "Admin" - case sensitive):
|
Username: Admin
|
4.
|
At the prompt, type the password (default is "Admin" - case sensitive):
|
Password: Admin
|
5.
|
At the prompt, type the following:
|
enable
|
6.
|
At the prompt, type the password again:
|
Password: Admin
|
7.
|
Access the Network configuration mode:
|
# configure network
|
8.
|
Access the IP Interfaces table:
|
(config-network)# interface network-if 0
(network-if-0)#
|
9.
|
Configure the IP address:
|
(network-if-0)# ip-address <IP address>
|
10.
|
Configure the prefix length:
|
(network-if-0)# prefix-length <prefix length / subnet mask, e.g., 16>
|
11.
|
Configure the Default Gateway address:
|
(network-if-0)# gateway <IP address>
(network-if-0)# activate
|
13.
|
Cable the device to your network. You can now access the device's management interface using this new OAMP IP address. |
