Configuring Syslog Server on Device
The following procedure describes how to configure the device to send syslog messages to the computer on which Syslog Viewer is installed.
|
➢
|
Configuring syslog server on device: |
|
1.
|
Log in to the device's Web interface. |
|
a.
|
Open the Logging Settings page (Troubleshoot menu > Troubleshoot tab > Logging folder > Logging Settings). |
|
b.
|
From the 'Enable Syslog' drop-down list, select Enable: |

|
3.
|
Configure the syslog message debug level: |
|
a.
|
Open the Logging Settings page (Troubleshoot menu > Troubleshoot tab > Logging folder > Logging Settings). |
|
b.
|
From the 'VoIP Debug Level' drop-down list, select Detailed: |

|
4.
|
Configure the address of the computer on which Syslog Viewer is installed: |
|
a.
|
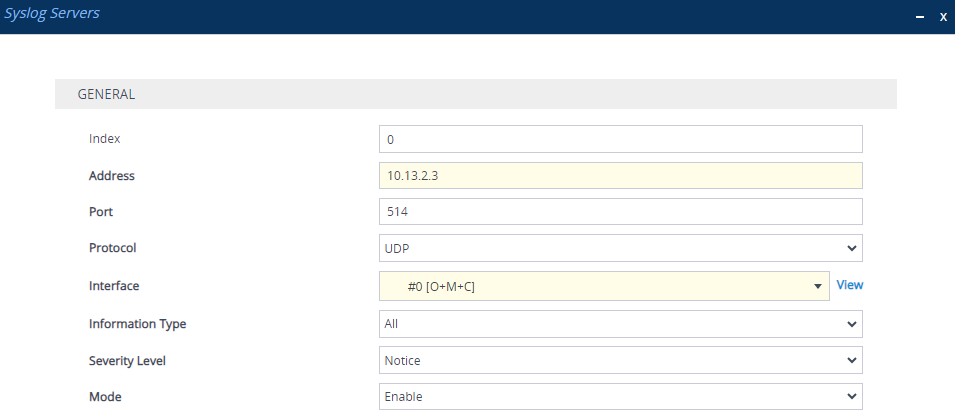
Open the Syslog Servers page (Troubleshoot menu > Troubleshoot tab > Logging folder > Syslog Servers). |
|
b.
|
Click New, and then do the following: |
|
◆
|
In the 'IP Address' field, enter the IP address of the computer on which Syslog Viewer is installed. |
|
◆
|
From the 'Interface' drop-down list, select one of the device's local IP Interfaces through which it sends syslog. |
|
◆
|
From the 'Severity Level' drop-down list, select the minimum severity level of messages that you want sent to Syslog Viewer. |
It's recommended to leave the syslog severity level at default (i.e., Notice) to prevent excessive utilization of the device's resources. Changing severity level is typically done only by AudioCodes Support for debugging.
|
◆
|
From the 'Mode' drop-down list, select Enable to enable this syslog setting. |
|
5.
|
On the toolbar, click Save to save your settings to the device's flash memory. |