Onboarding the Integrated Service
You can onboard a Webex Cloud Connect service by sending a email to the customer tenant admin account including a link to a Token invitation wizard . They must then login to their Webex Control Hub and consent to allow access to their platform. Once consent is provided, locations added on Webex are synced to Live Platform and numbers that you upload to the customer tenant on Live Platform are automatically synced to the customer Webex Control Hub.
In addition, the Token connection also enables the daily synchronization of the following License usage parameters with the Webex Control Hub:
| ■ | Unused DIDs: The total number of DIDs that are not yet assigned to users. |
| ■ | User DIDs (assigned DIDs): The total number of DIDs assigned to customer tenant of number type "user" for user voice calling. |
| ■ | Contact Center DIDs: The total number of DIDs loaded to customer tenant of number type Contact Center. |
| ■ | Service Number DIDs: The total number of DIDs loaded to customer tenant of number type 'Service' for service numbers such for applications such as Fax IVR and Emergency calling. |
| ■ | Service Numbers CAC: The total CAC value aggregated for the Service numbers DIDs. |
For this purpose, the customer must consent to allow the following permissions on their Webex Control Hub:
| ■ | Allow decryption and encryption |
| ■ | Read locations |
| ■ | Scope to limit the read access to partners telephony PSTN |
| ■ | Read users |
| ■ | Read and list telephony configuration |
| ■ | Create, edit and delete telephony configuration |
| ➢ | To onboard the Webex service: |
| 1. | Do one of the following: |
| ● | In the Customers page, select the check box adjacent to the relevant customer and then from the Add Service drop-down, choose Webex Cloud Connect. |
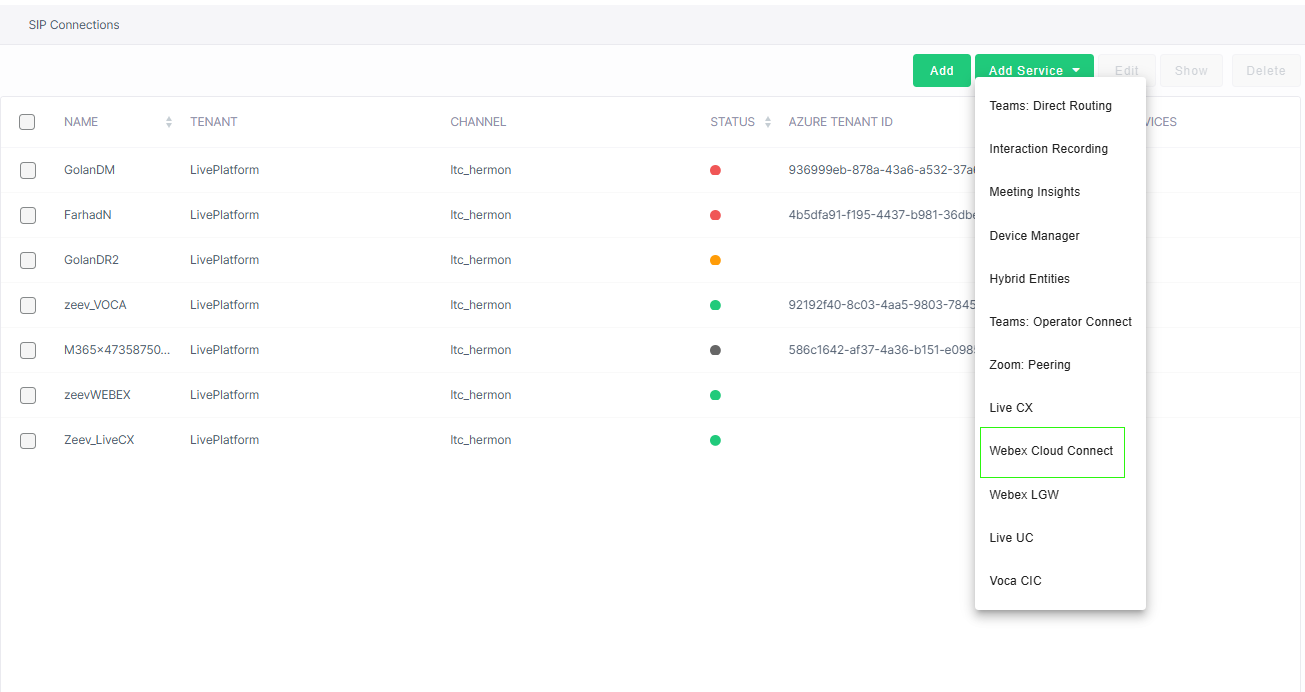
| ● | In the Services page, from the Add Service drop-down, choose Webex Cloud Connect. |
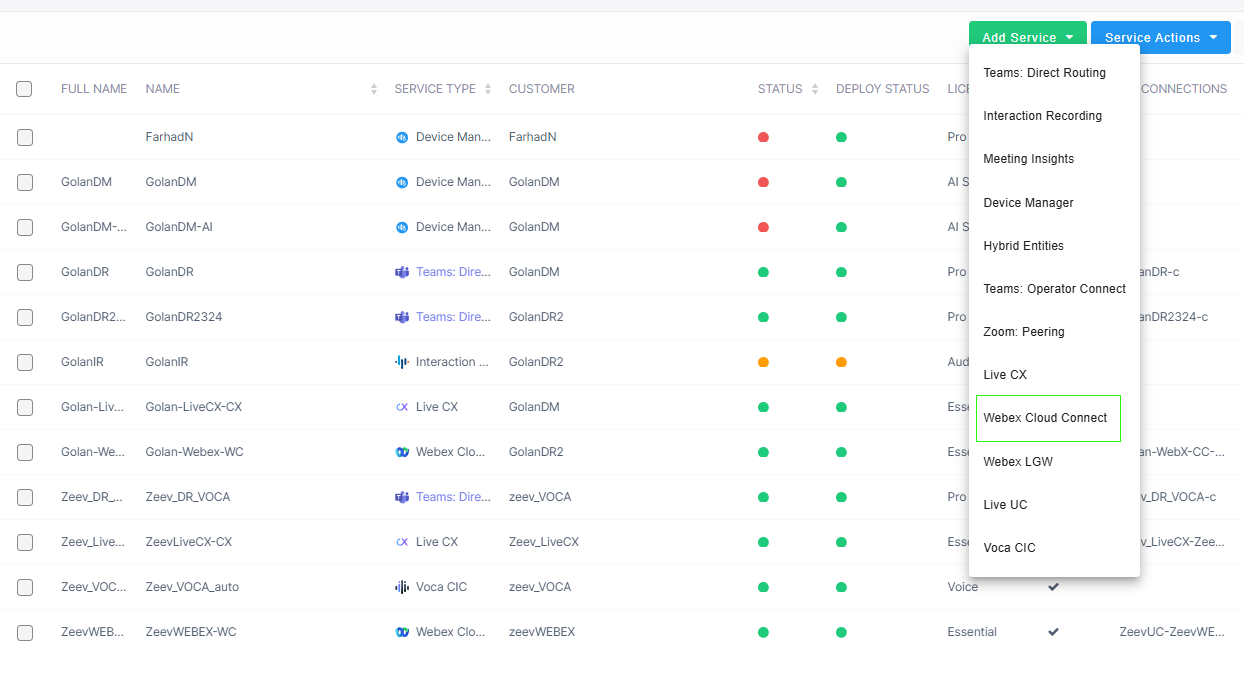
| a. | Select the relevant customer. |

The Onboarding form is displayed.
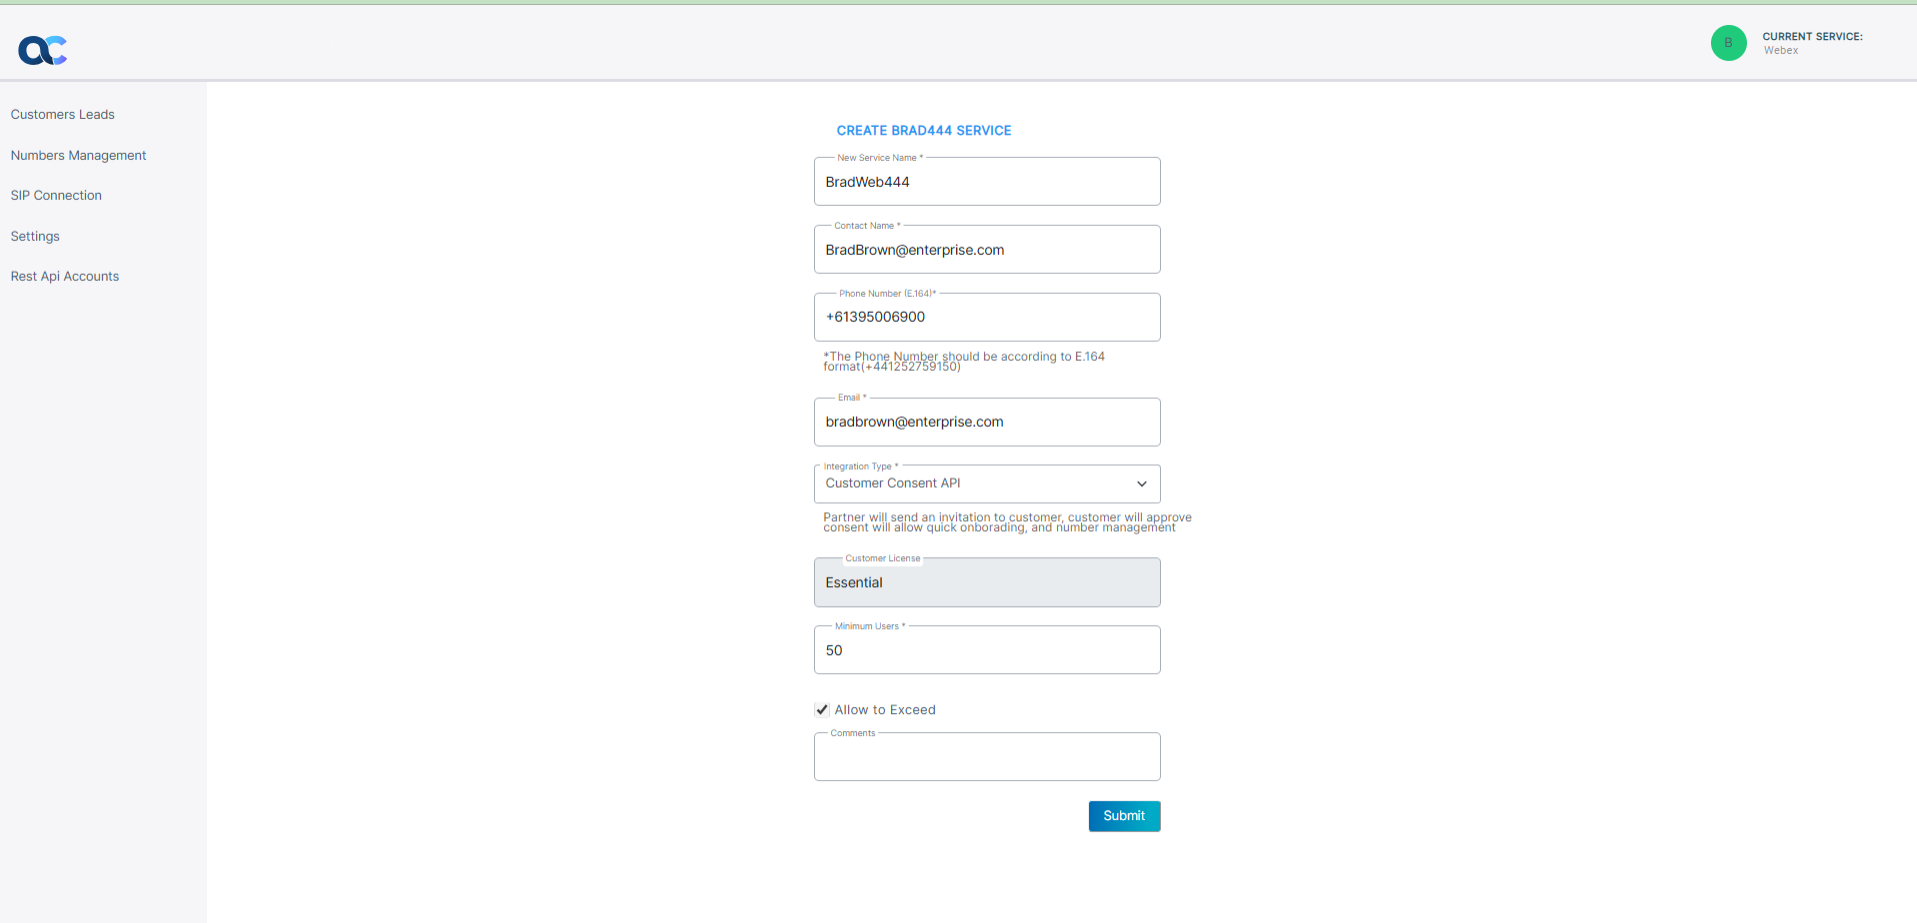
| 2. | Configure parameters according to the table below. |
|
Parameter |
Description |
|||
|---|---|---|---|---|
|
New Service Name |
The name of the new service. |
|||
|
Contact Name |
The name of the contact. |
|||
|
Phone Number (E.164) |
The phone number of the M365 tenant admin. |
|||
|
|
The email of the M365 tenant admin. |
|||
|
Integration Type |
|
|||
|
Webex Organization ID |
The ID used by the M365 tenant in the Webex interface. |
|||
|
Customer License |
The license type for the service. Default: Essential |
|||
|
Minimum Users |
The number of M365 tenant users that are managed by the service. |
|||
|
Allow to Exceed |
Indicates the number of users managed by the service that can exceed the Minimum Users without affecting the service. |
|||
|
Comments |
Free text notes. |
| 3. | Click Submit. Once the service is successfully added, a message similar to the following is displayed. |

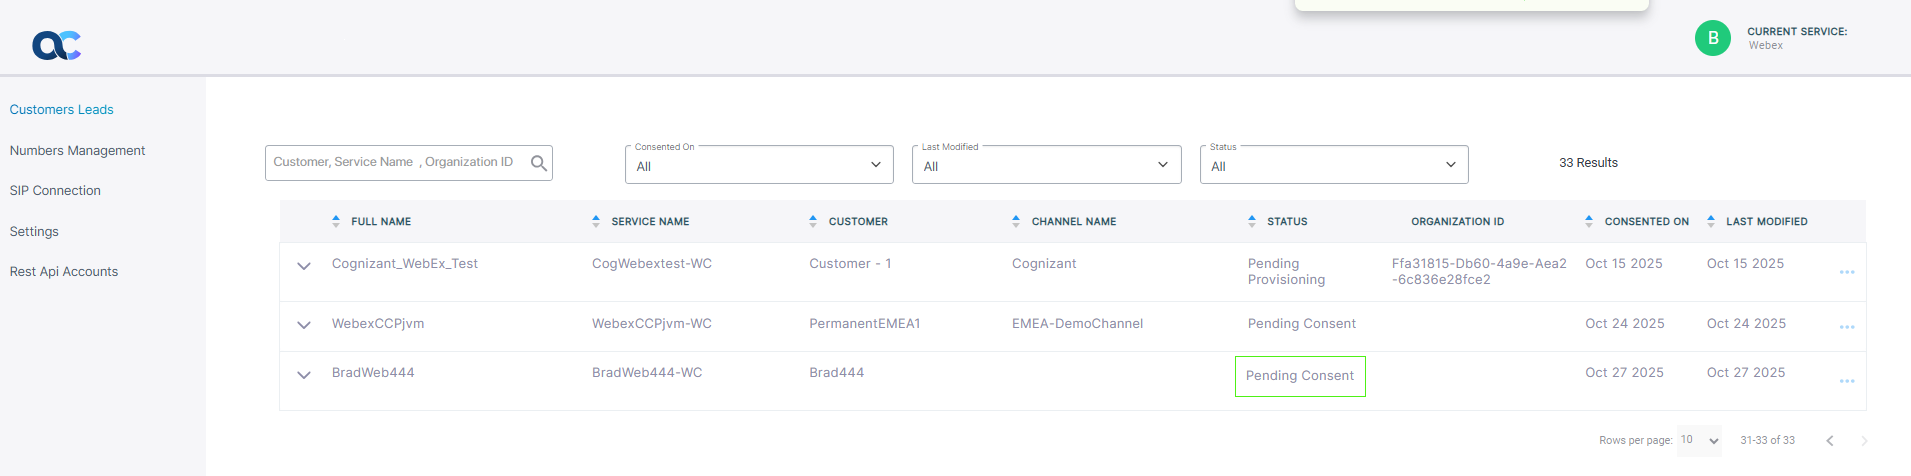
| 4. | From the Services page in Live Platform Operation Center, from the Service Actions drop-down, open the Management portal (Webex Cloud Connect > Open Services page). |
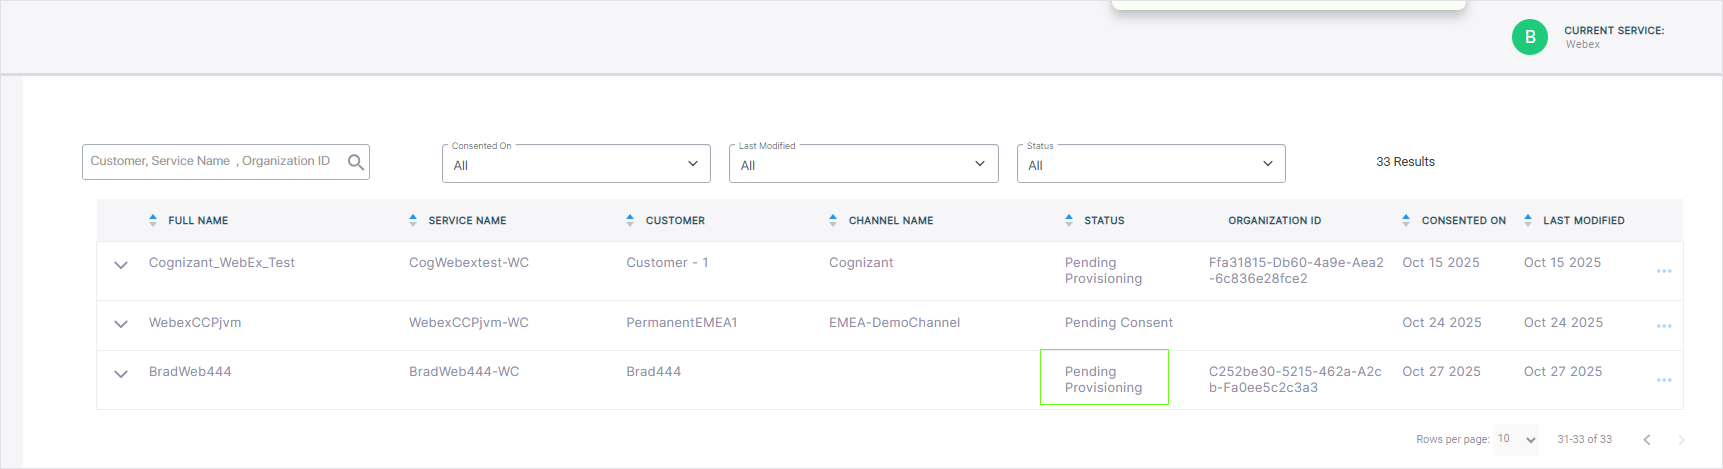
| 5. | Search for your customer; note that the Status is 'Pending Consent' until the customer runs the Token invitation link send to their customer admin email account (see step below). |
| 6. | An email invitation similar to the following is sent to the customer tenant. |
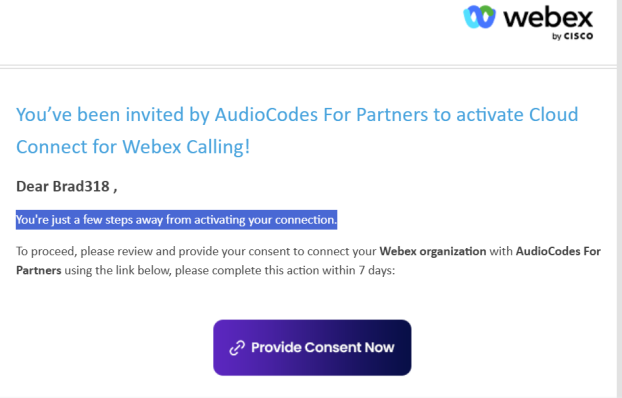
| 7. | Click Approve Connection Now. |
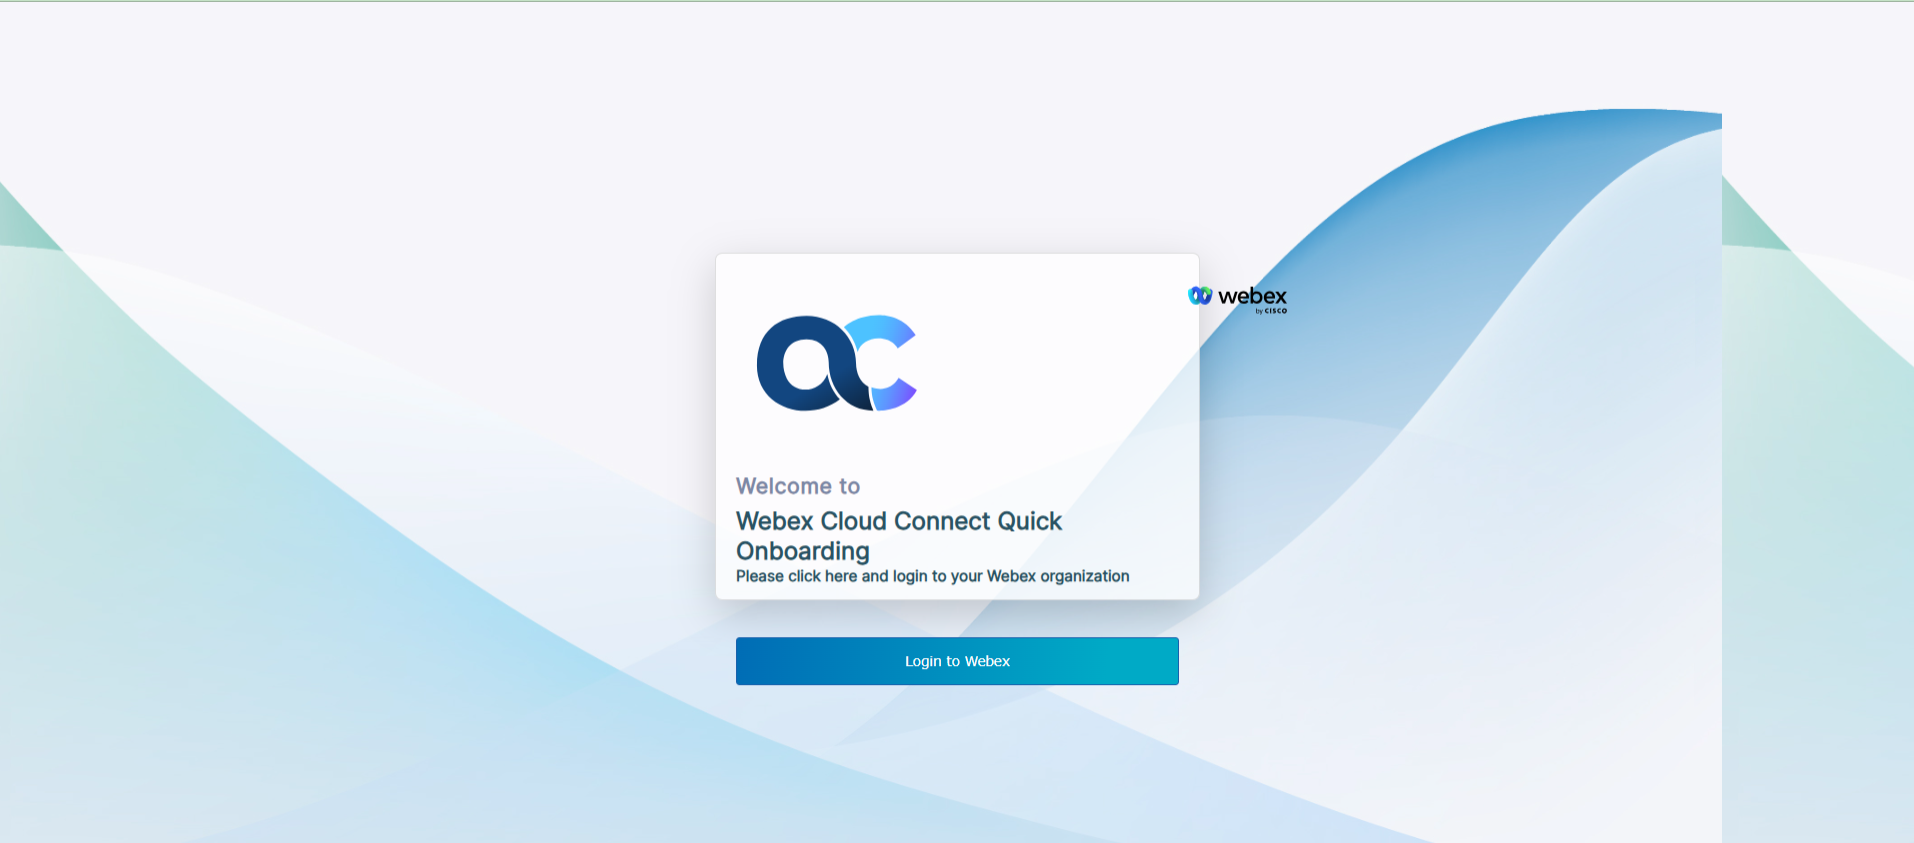
| 8. | Click Login to Webex. |
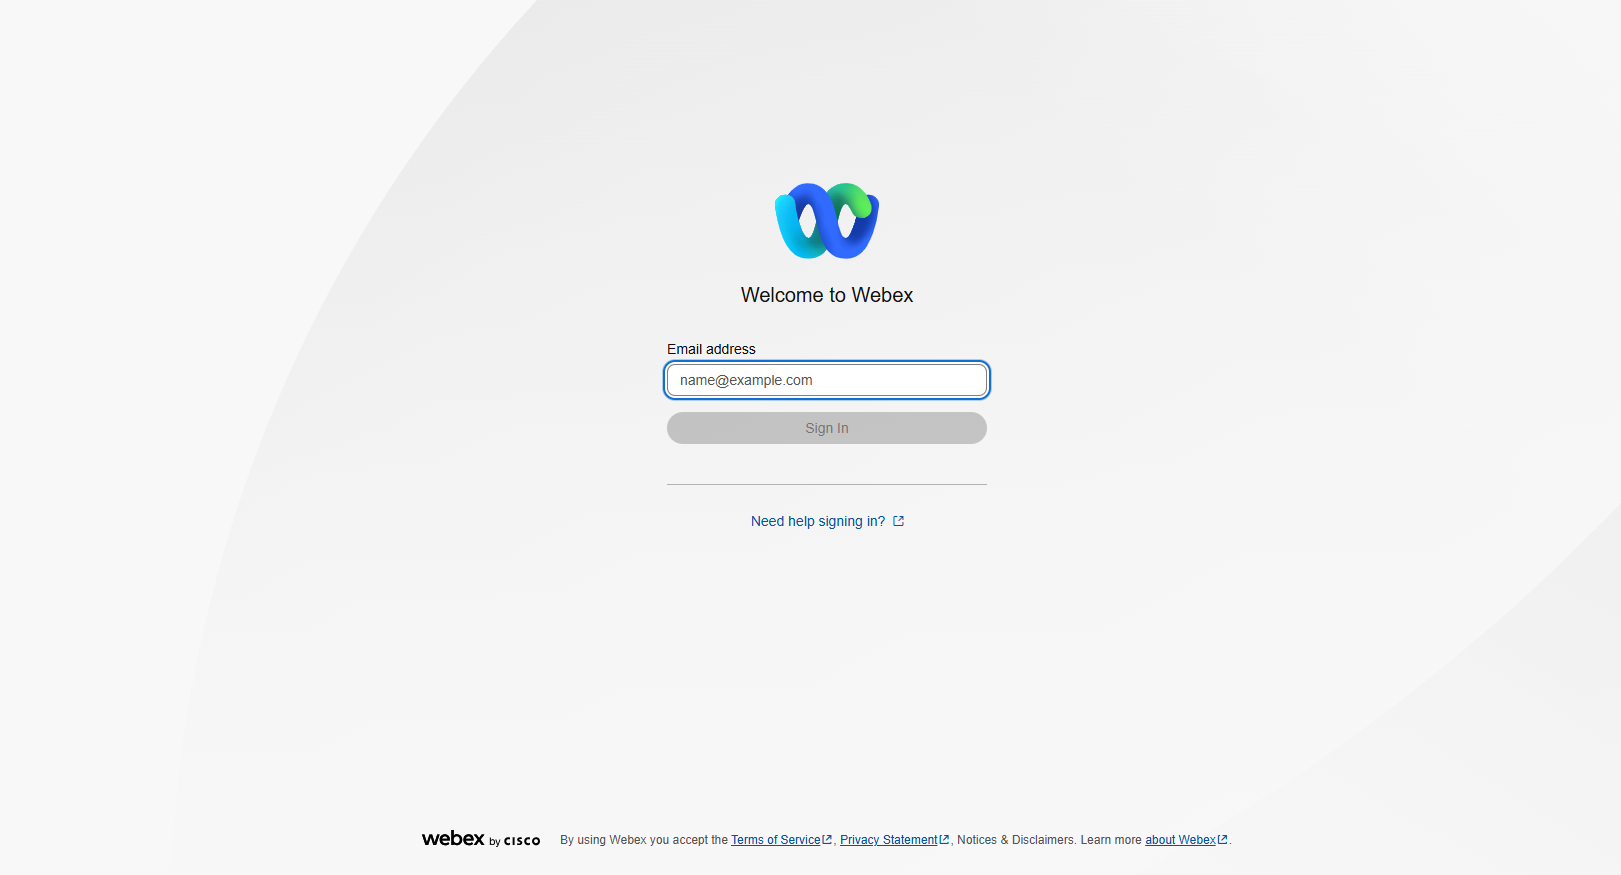
| 9. | Enter the Email address and password of the Webex Control Hub account and then click Sign in. |
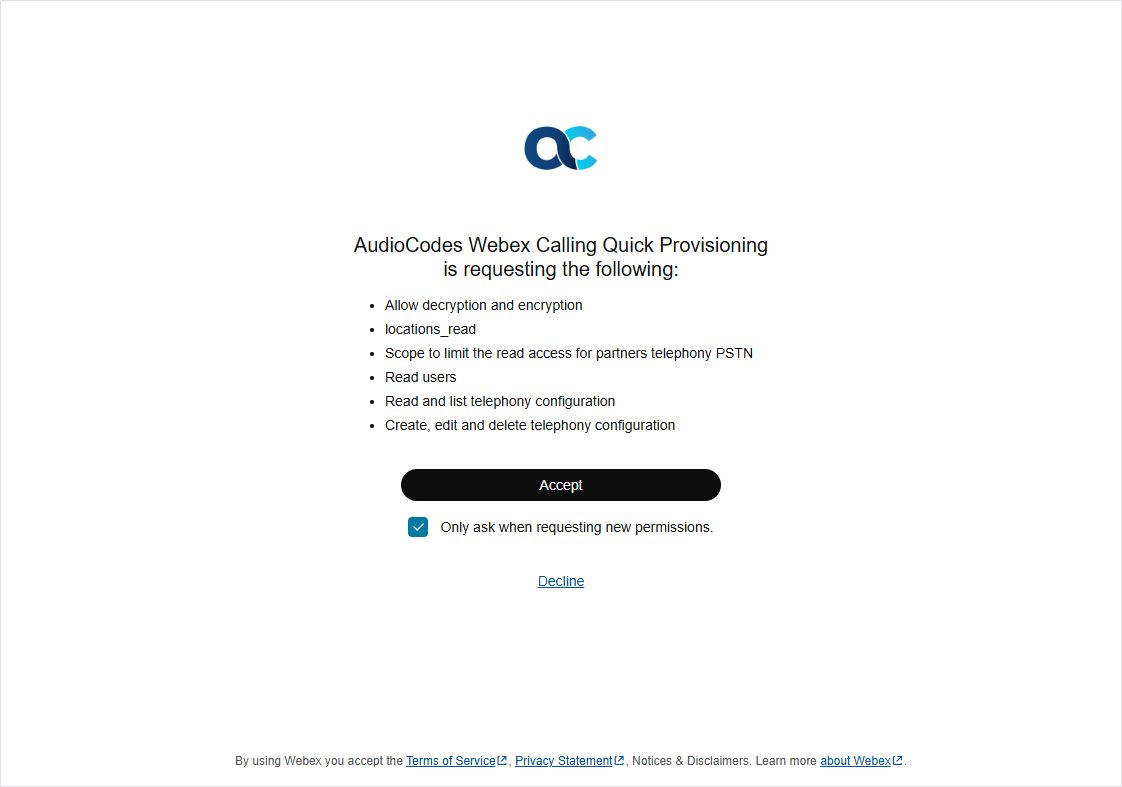
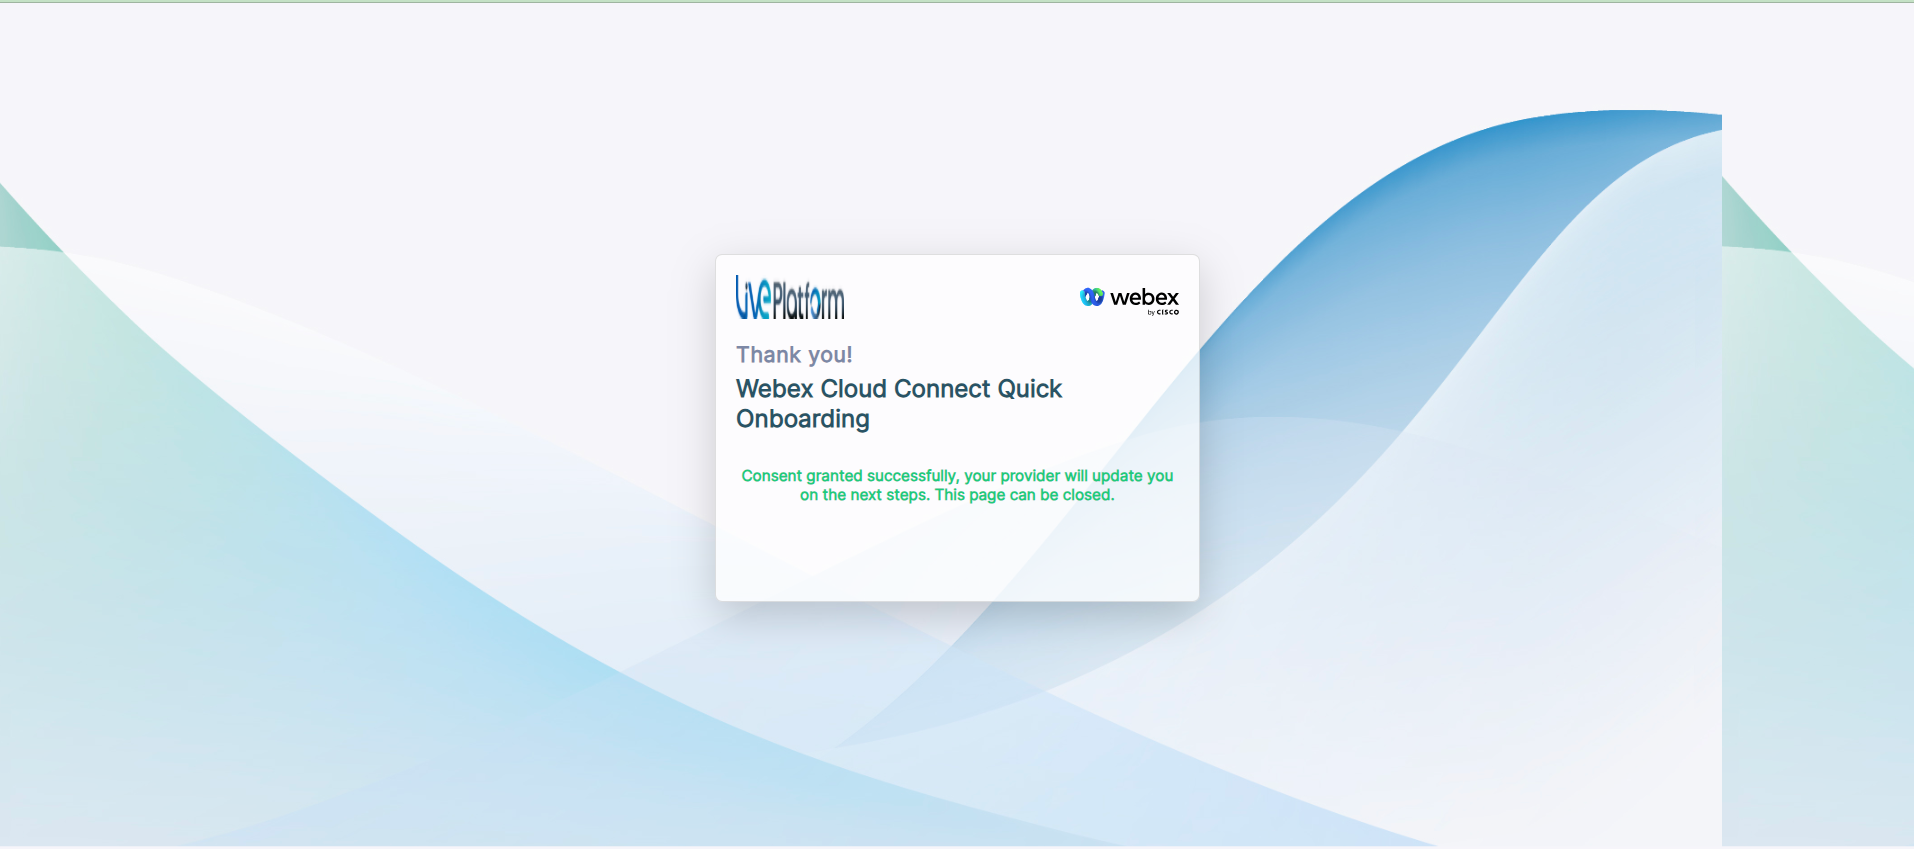
| 10. | Click Accept to provide consent. The following confirmation is displayed. You can close the screen. |
| 11. | From the Services page in Live Platform Operation Center, from the Service Actions drop-down, open the Management portal (Webex Cloud Connect > Open Services page). |
| 12. | Search for your customer; note that the Status is now 'Pending Provisioning'. |