Registering White label Channel
You can register the Live Platform Operation Center Application for Multitenancy setup with White label Channel tenants. This enables your Live Platform users to login to Live Platform with their White label FQDN. You must add a registration on Microsoft Azure portal and then configure the Application (Client) Id and secret in the Channel details App Registration tab in Live Platform along with the White label FQDN for the managed entity. You must also add the Live Platform Admin user to the matching Enterprise application and assign it the Live Platform Admin role. When logging in to Live Platform Operation Center, the URL path includes the defined White label FQDN. This registration requires your to consent to the following permissions:
This setup requires a separate Microsoft tenant license and you must also ensure that the White-label FQDNs are added to your DNS server.
|
➢
|
To register Live Platform application: |
|
1.
|
Login to Azure portal with Global Admin permissions for the White label tenant. |
|
2.
|
In the Navigation pane, select App registrations and then click New registration. |
|
3.
|
Enter the name of the White Label Channel. |
|
4.
|
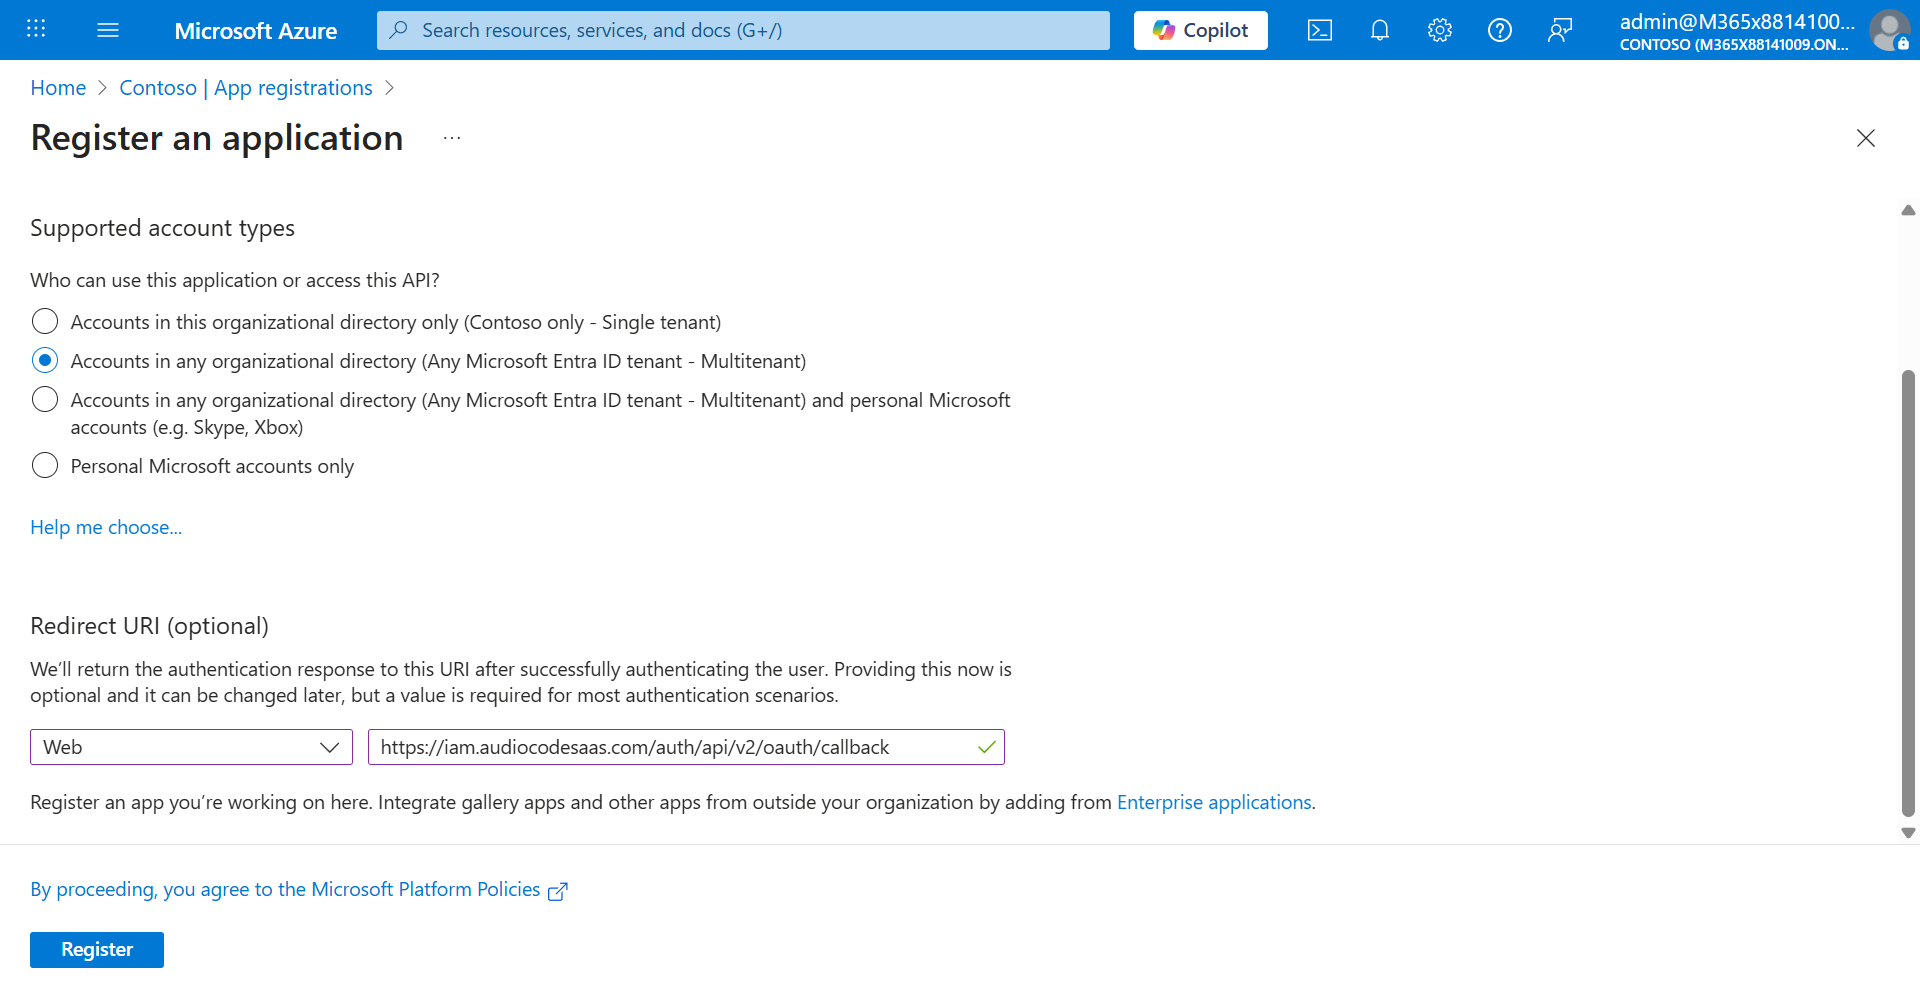
Select the check box Accounts in any organizational directory (Any Microsoft Entra ID Tenant-Multitenant). |
|
5.
|
Under Redirect URI, edit the Redirect URI for the Live Platform as follows: https://iam.audiocodesaas.com/auth/api/v2/oauth/callback |
|
●
|
Make sure that the customer's organization's firewall allows the below URLs: |
|
✔
|
https://iam.audiocodesaas.com |
|
✔
|
https://acservicesiam.b2clogin.com/tfp/acservicesiam.onmicrosoft.com |
|
✔
|
https://acservicesiamfiles.blob.core.windows.net |
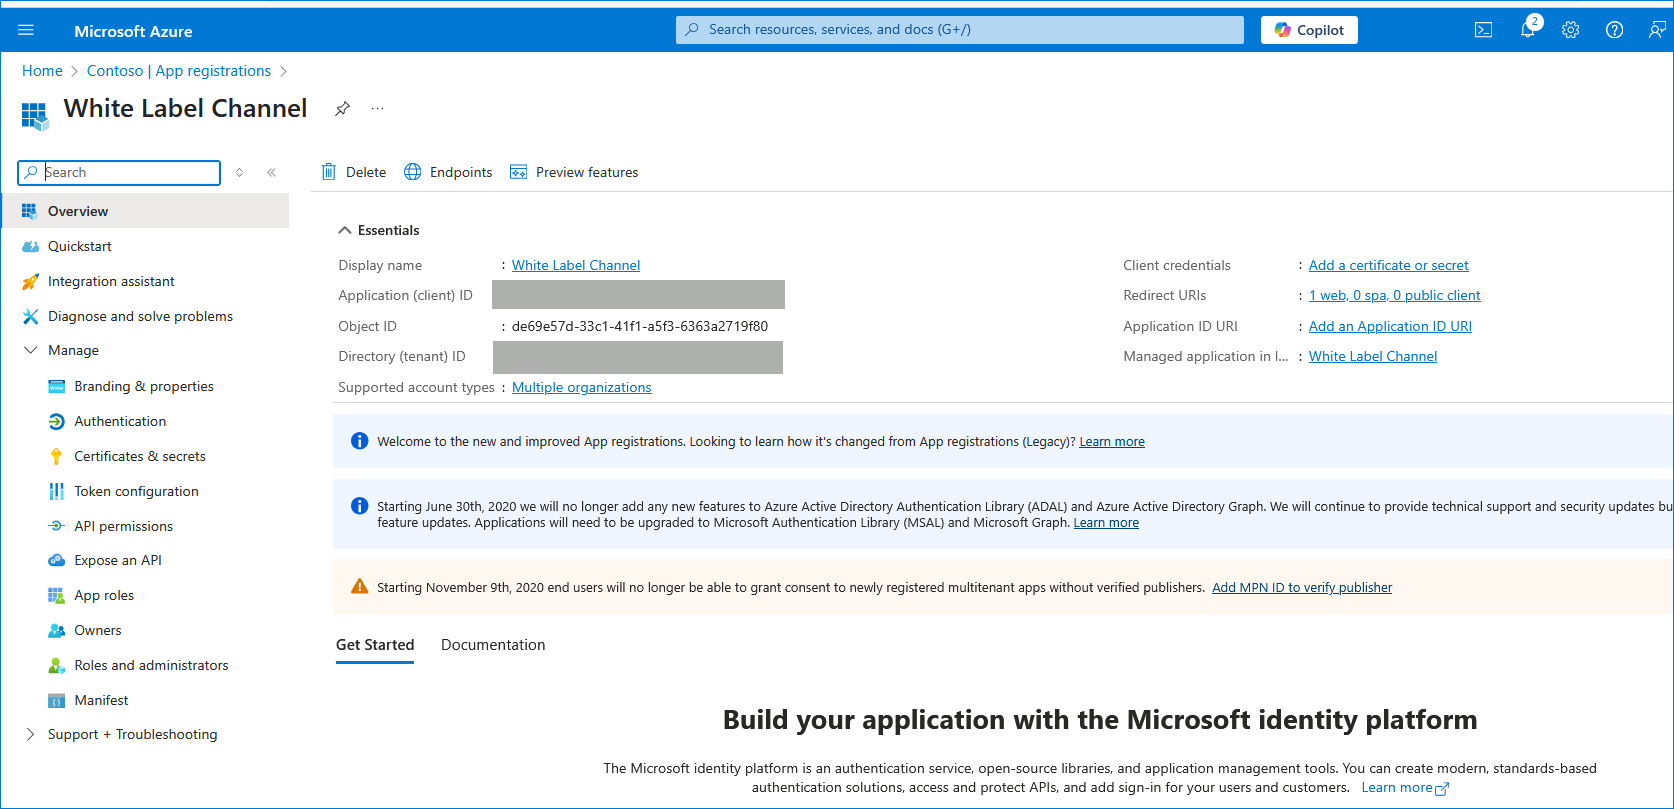
The newly registered application is displayed.
|
8.
|
Double-click the new application i.e. White Label Channel (in this example) to configure it. |
|
9.
|
In the Navigation pane, select Authentication. |
|
10.
|
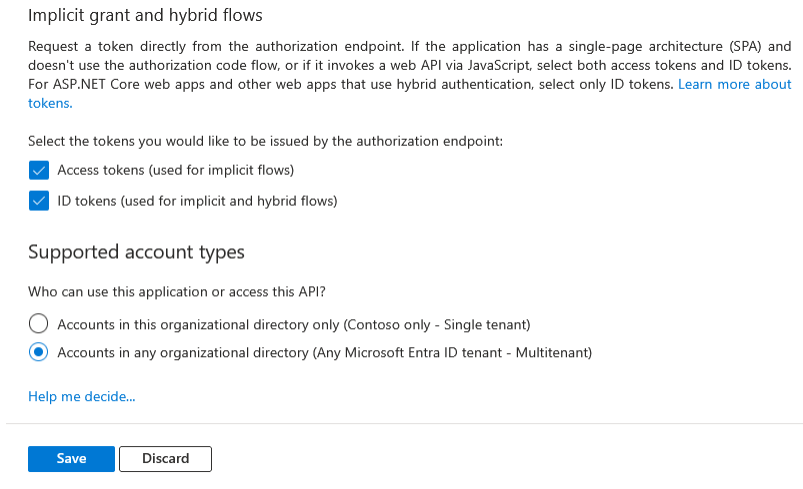
Under Implicit grant and hybrid flows, select Access tokens, and ID tokens check boxes. |
|
12.
|
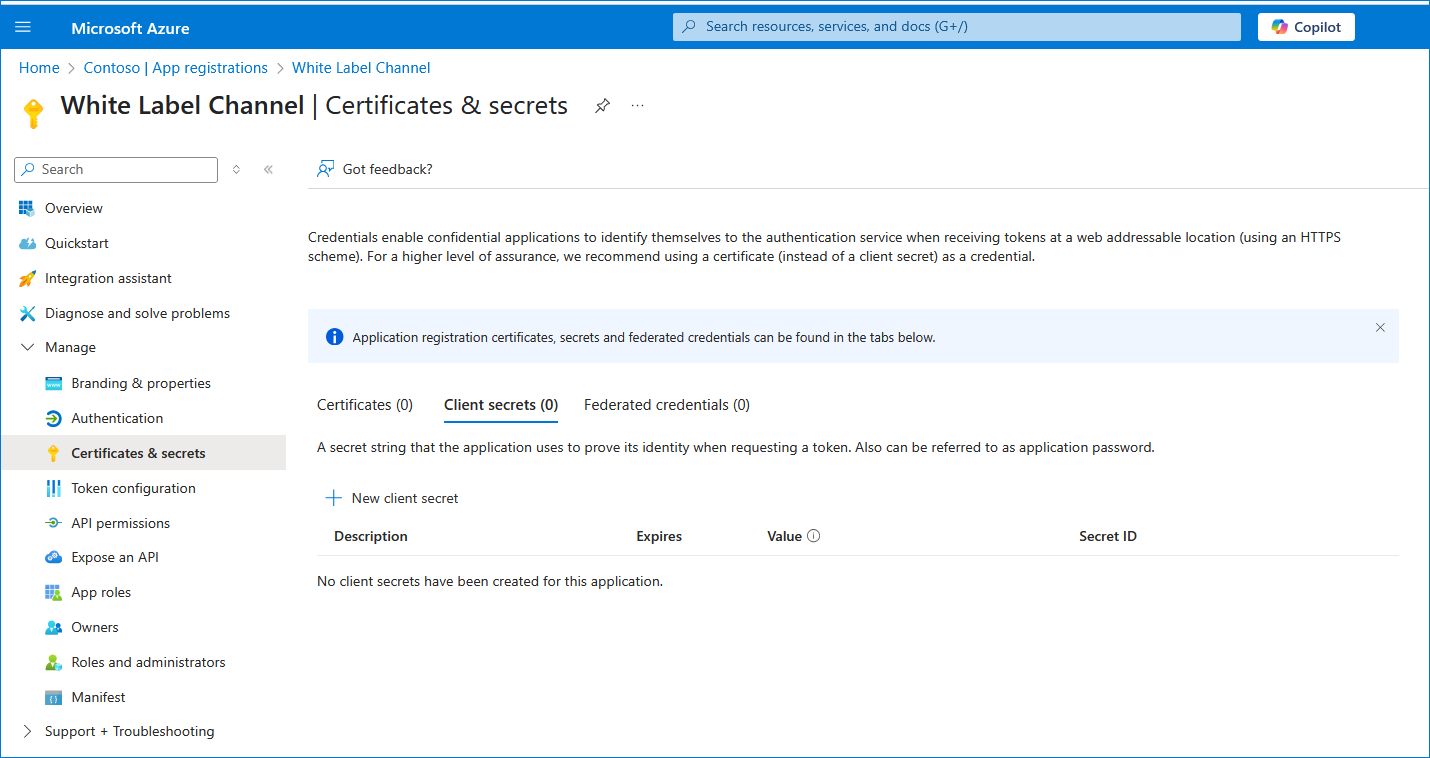
In the Navigation pane, select Certificates & secrets. |
|
13.
|
Click New client secret. |
|
14.
|
Enter a description and from the drop-down list select 24 months. |


|
16.
|
Copy the secret Value to clipboard as its required in later configuration and cannot be retrieved once you leave this screen. |
|
17.
|
In the Navigation pane, select Token configuration. |
|
18.
|
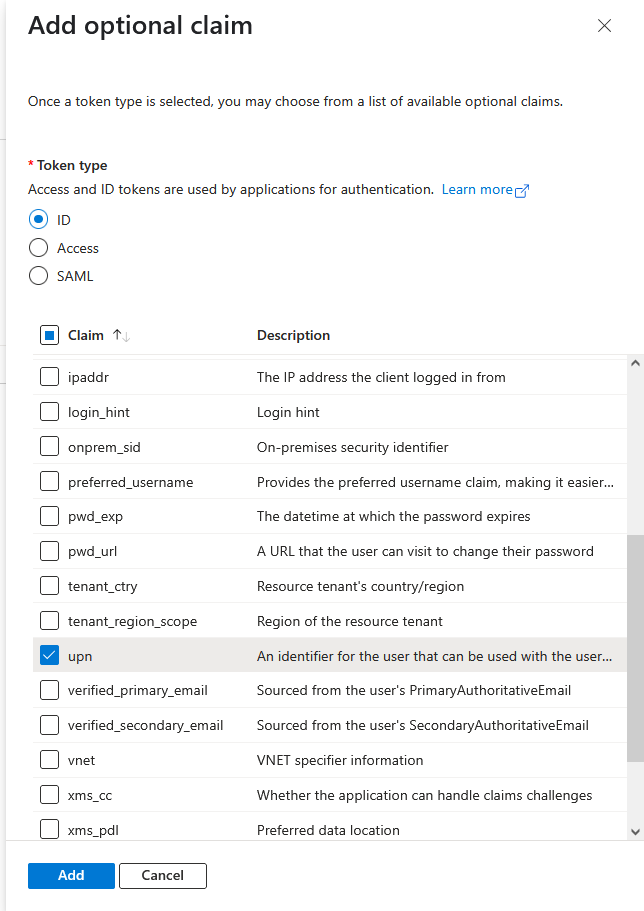
Click Add optional claim, choose ID type, upn optional claim, and then click Add to confirm. |
|
19.
|
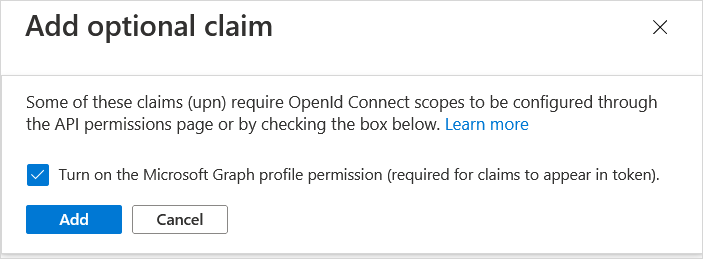
Select the Turn on the Microsoft Graph profile permission check box and then click Add. This adds the Profile permission to the API permissions list. |
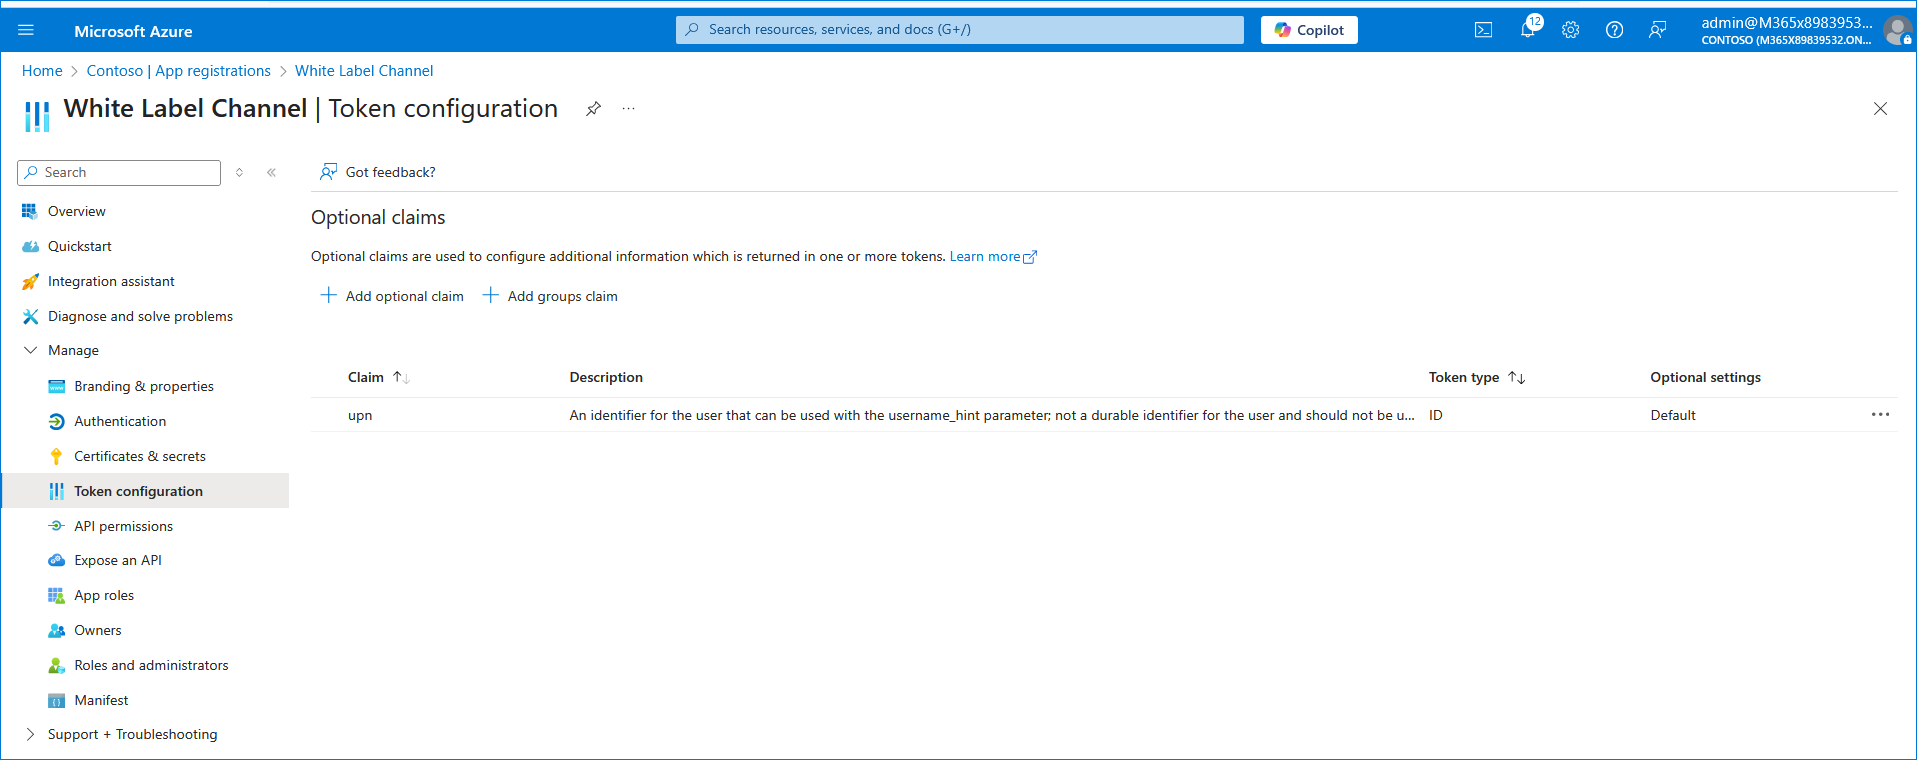
This configuration assumes that all operators have been added to the Active Directory in UPN format e.g. Johnb@firm.com. If operators have been added in email format e.g. John.Brown@firm.com then they will not be able to connect to Live Platform in the multitenancy setup.
|
20.
|
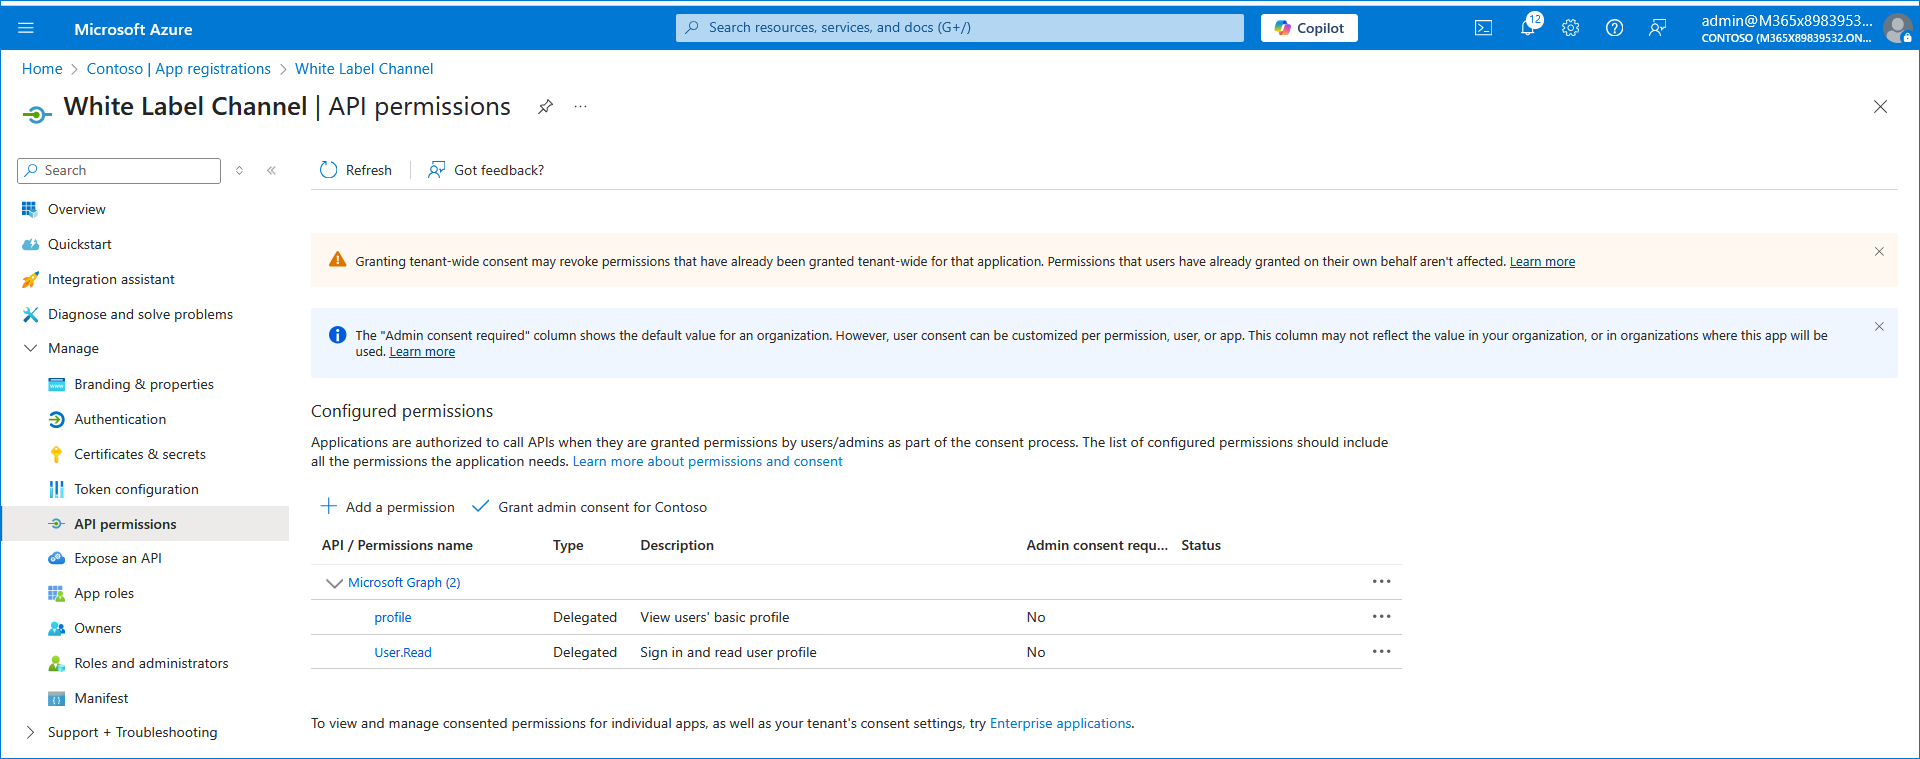
In the Navigation pane, select API permissions. |
|
21.
|
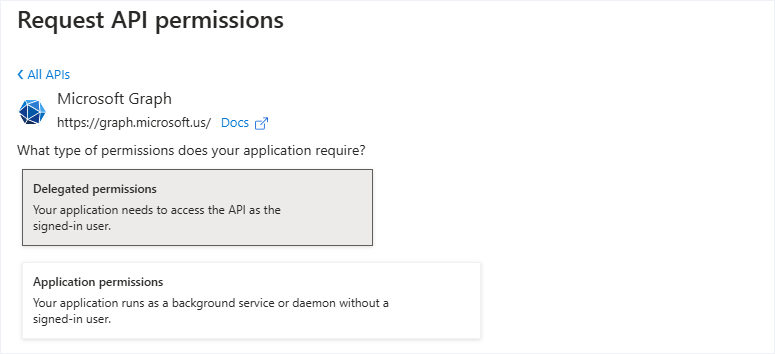
Click Add a permission and then click the Microsoft Graph link. |
|
22.
|
Click Delegated permissions. |
|
23.
|
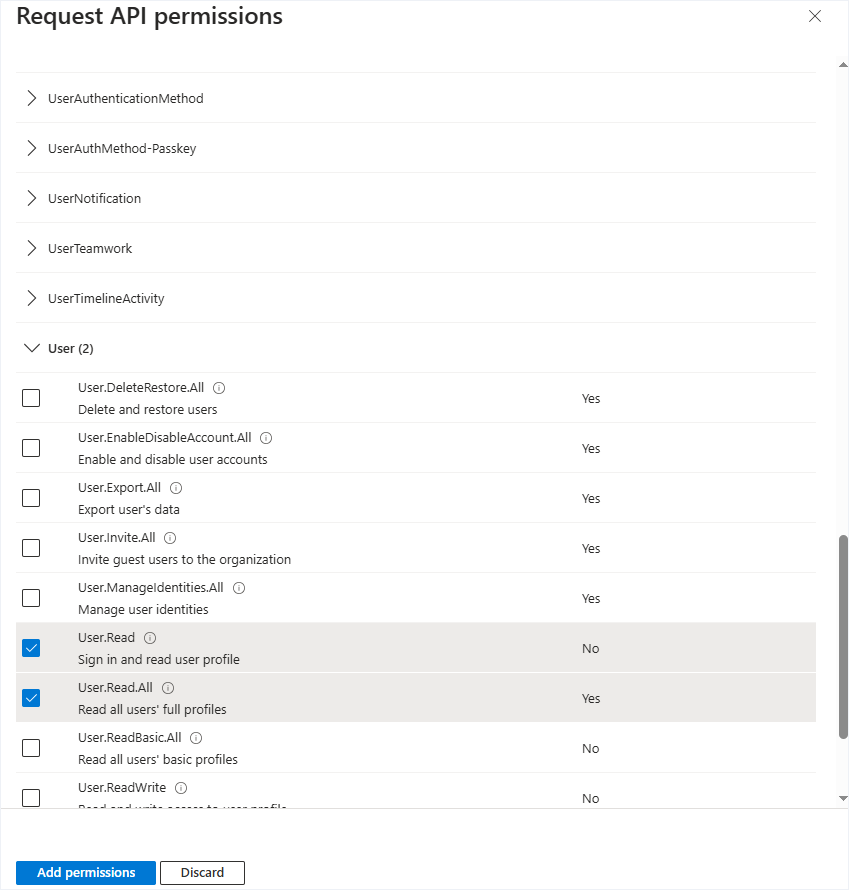
Select permission User.Read.All and then click Add permissons. |
|
24.
|
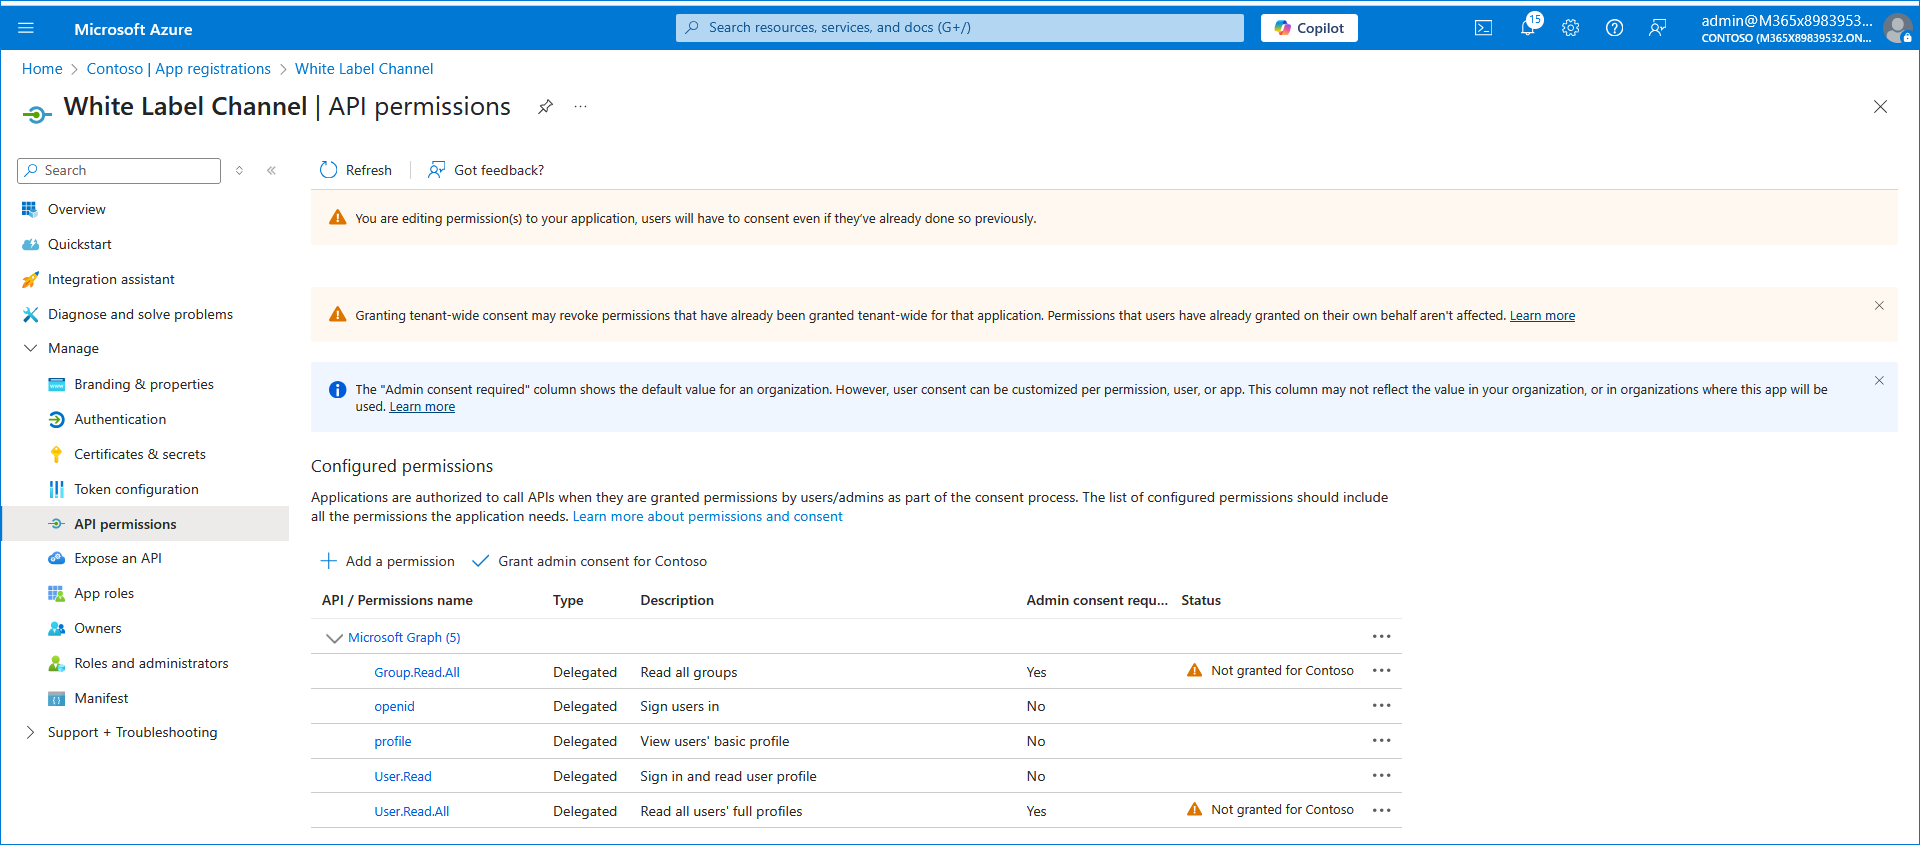
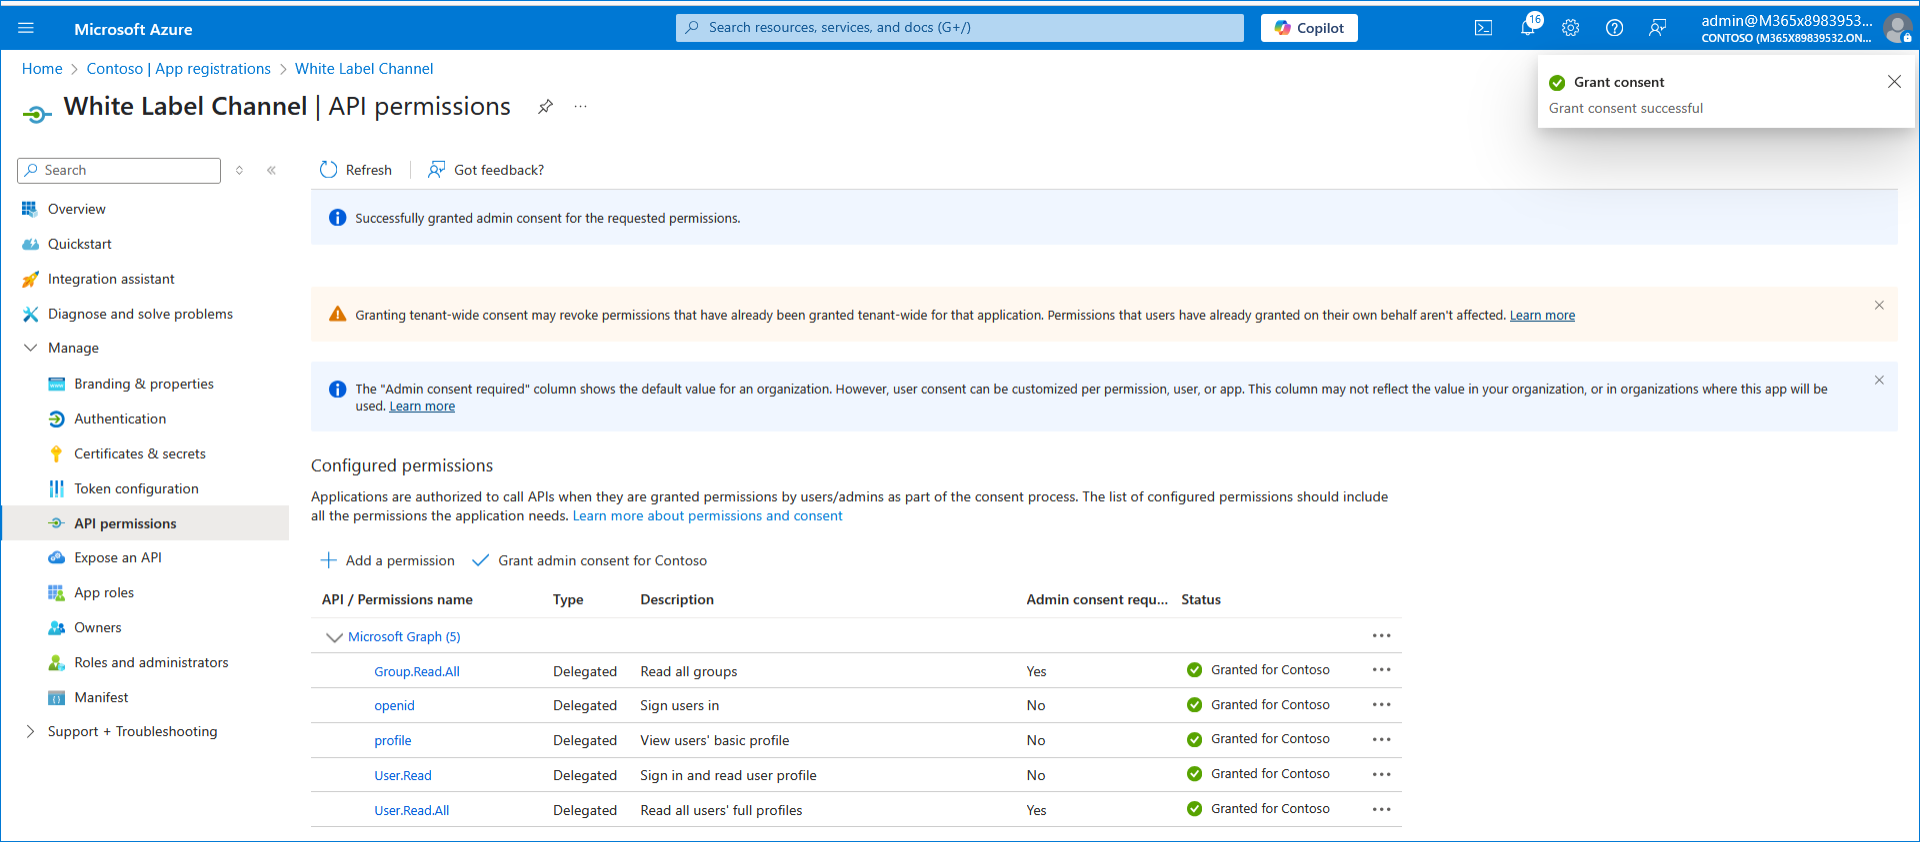
Repeat the process to add the following permissions: |
The configured API permissions are displayed.
|
25.
|
Click Grant admin consent for Audiocodes, Inc. |

|
26.
|
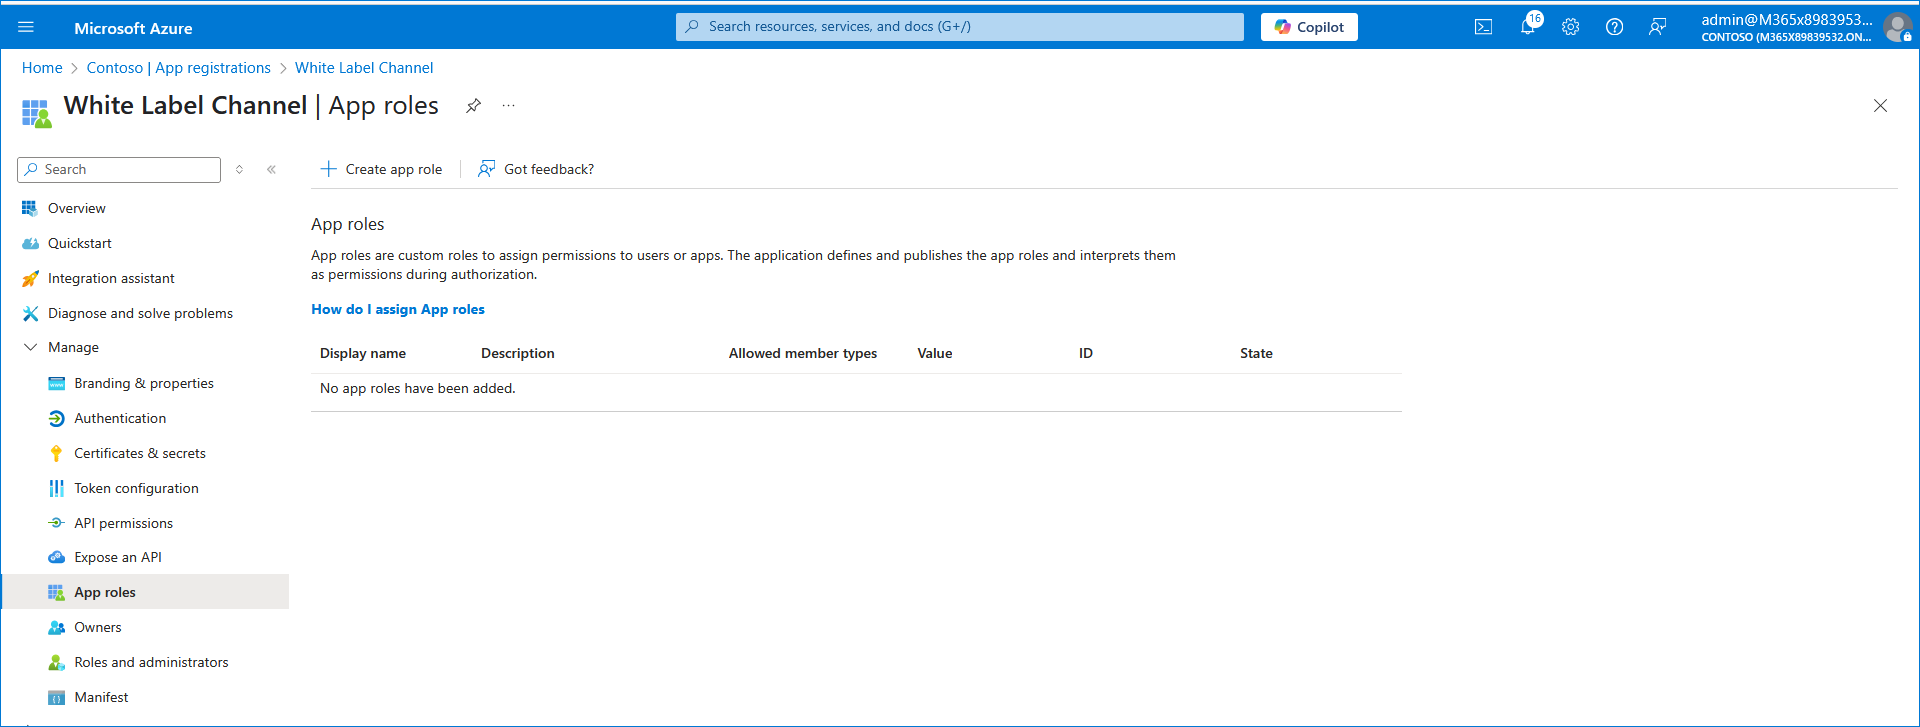
In the Navigation pane, select App roles. |
|
27.
|
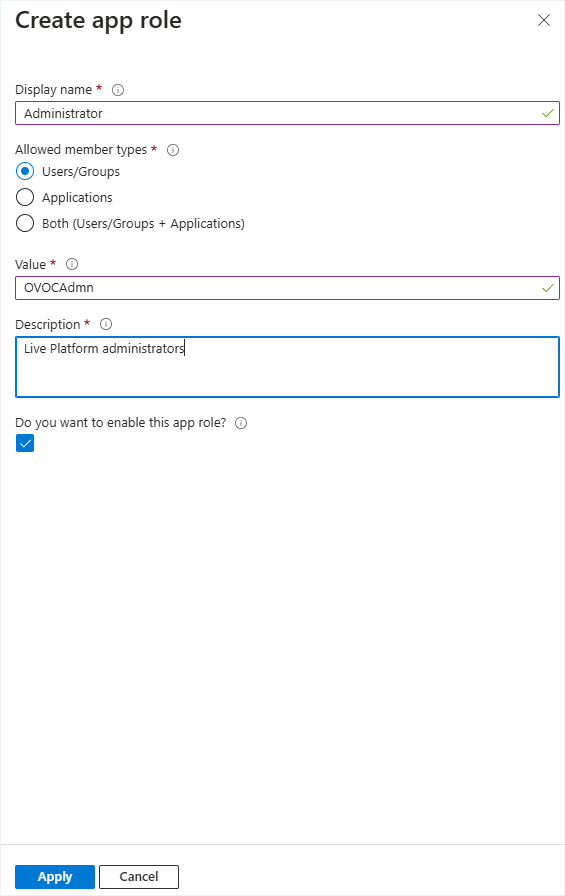
Click Create app role and create a role with Admin permissions: |
|
●
|
In the Display Name field, enter Administrators or Admins |
|
●
|
Select Users/Groups check box |
|
●
|
Select the Do you want to enable this app role check box. |
|
28.
|
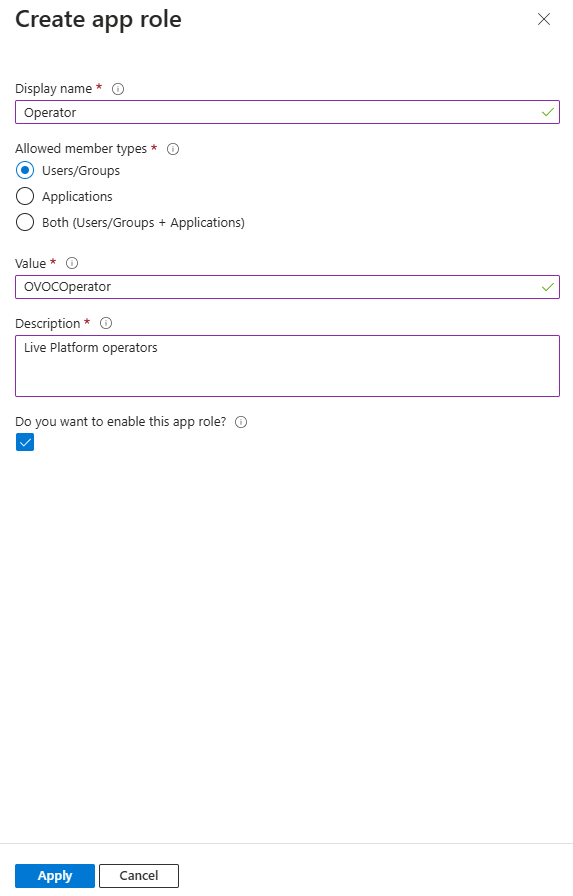
Repeat the process described above to create an App role with Operator permissions with value OVOCOperator. |
|
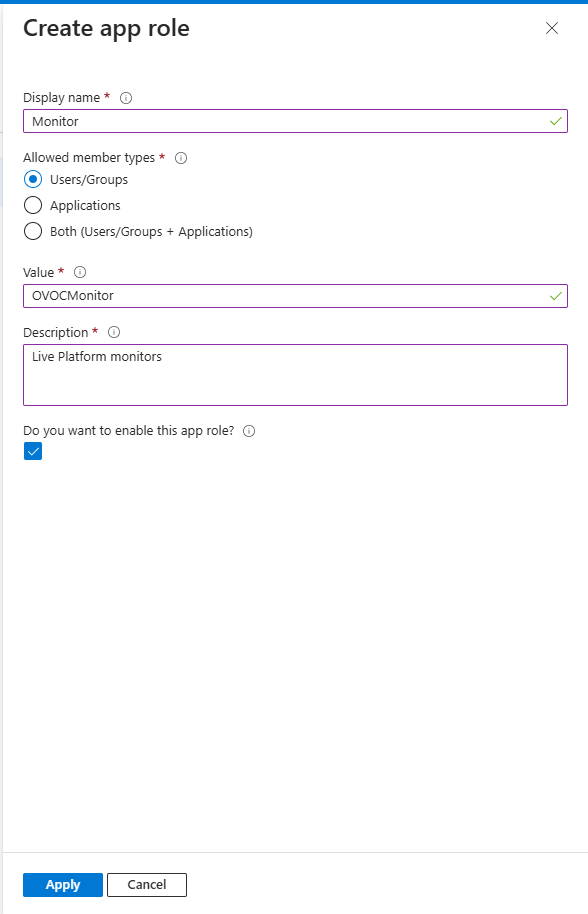
29.
|
Repeat the above process to create an App role with Monitor permissions with value OVOCMonitor. |
|
30.
|
Repeat the above process to add an App role with OperatorLite permissions with value OVOCOperatorLite. |
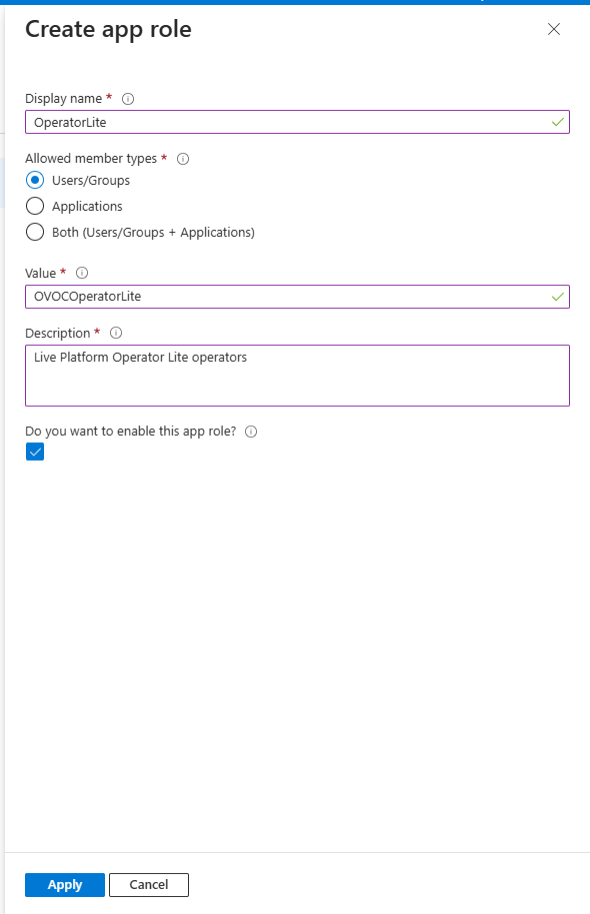
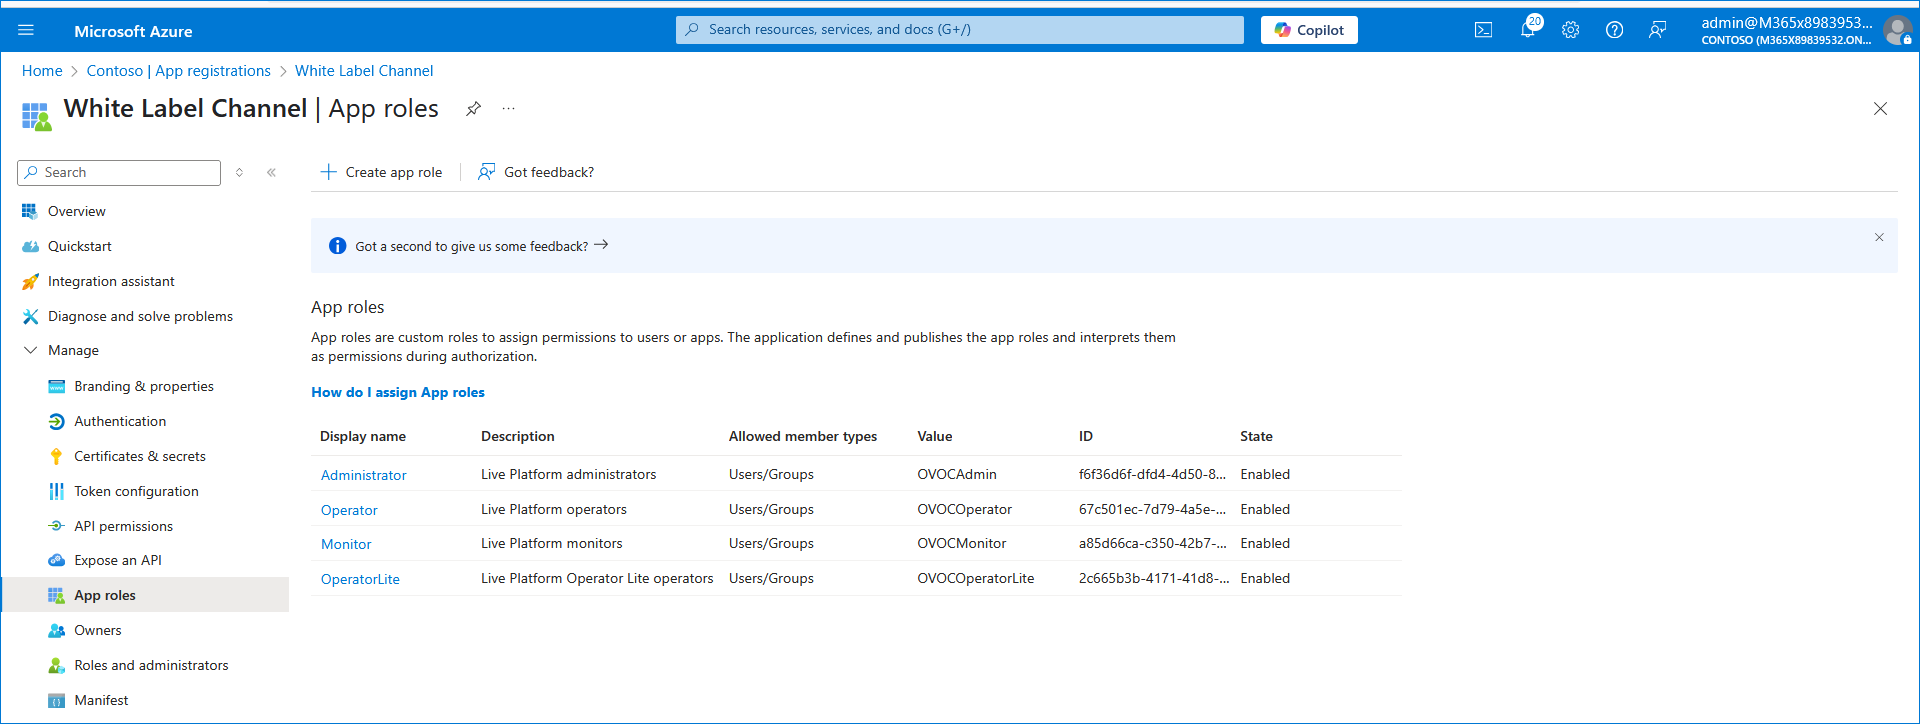
The new roles are displayed:
|
31.
|
In the Live Platform Operation Center, edit the Channel tenant for which you wish to custom white-label. |
|
32.
|
In the General tab, enter the Tenant ID of the white-label tenant registration that you defined on Azure portal above. |
|
33.
|
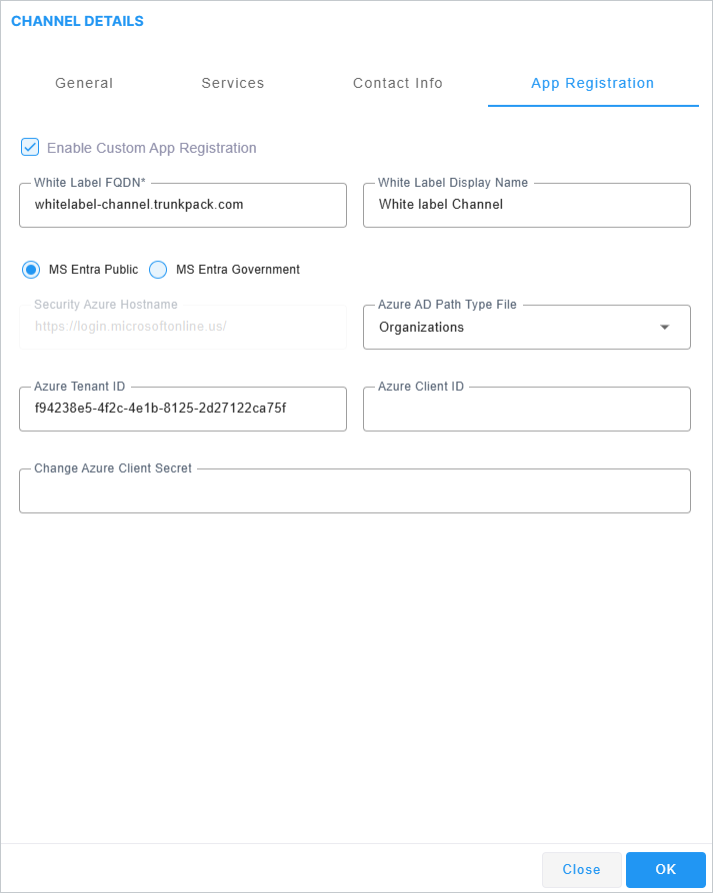
Click the App Registration tab. |
|
34.
|
Select the Enable Custom App Registration check box. |
|
35.
|
Configure the White label FQDN and optionally configure the White Label display name. |
The FQDN should be defined in the relevant DNS zone on Azure or another DNS server.
|
36.
|
Enter the credentials of the registration that you defined on the Azure portal above: |
|
38.
|
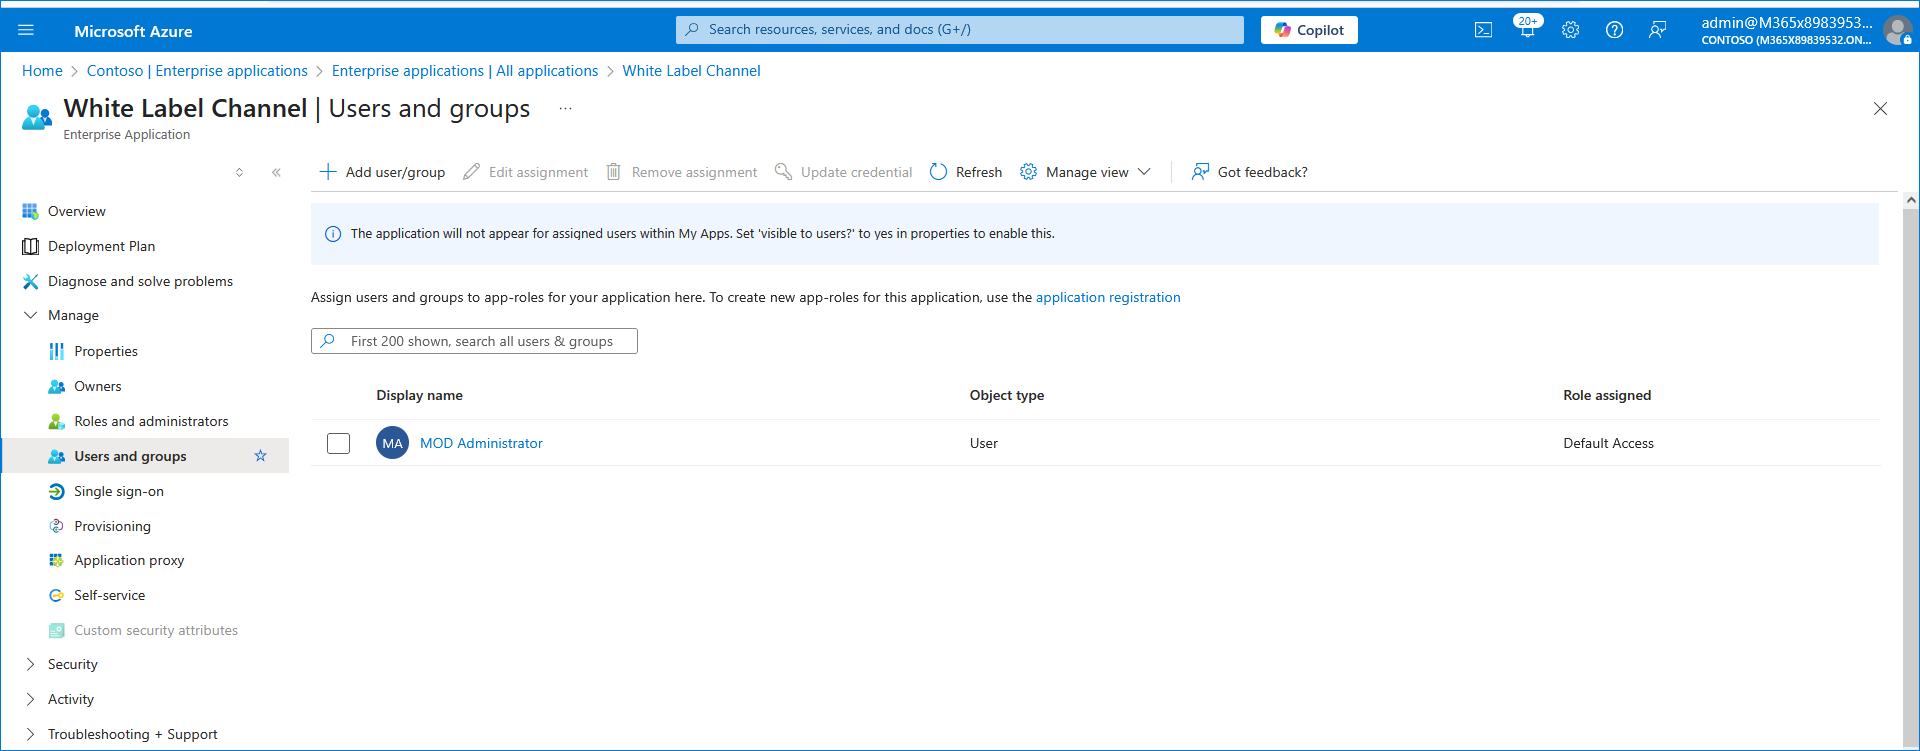
In the Azure portal, open the Enterprise Application for the new White Label registration that you created above (it has the same name as the Application registration that you created above). |
|
39.
|
In the Navigation pane, click Users and groups. |
|
40.
|
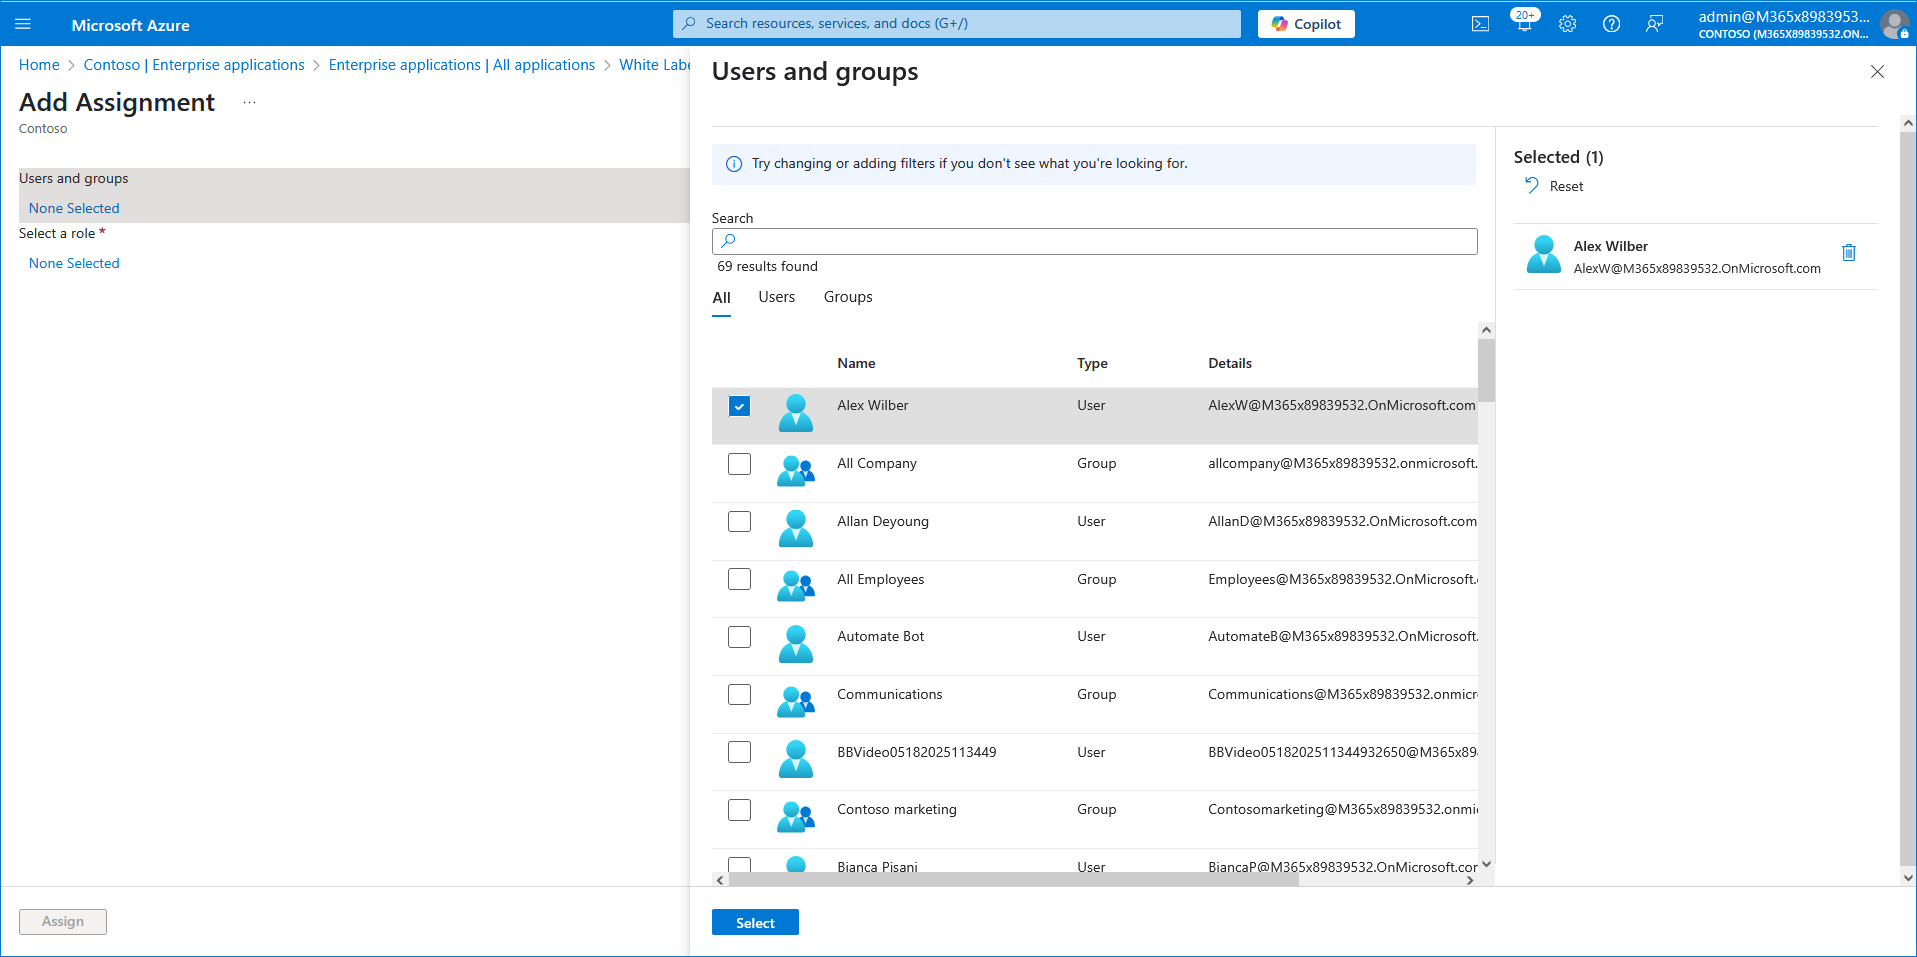
Click Add user/group. |
|
41.
|
Select the user for which you wish to configure as Live Platform Channel Admin user, and then click Select. |
|
42.
|
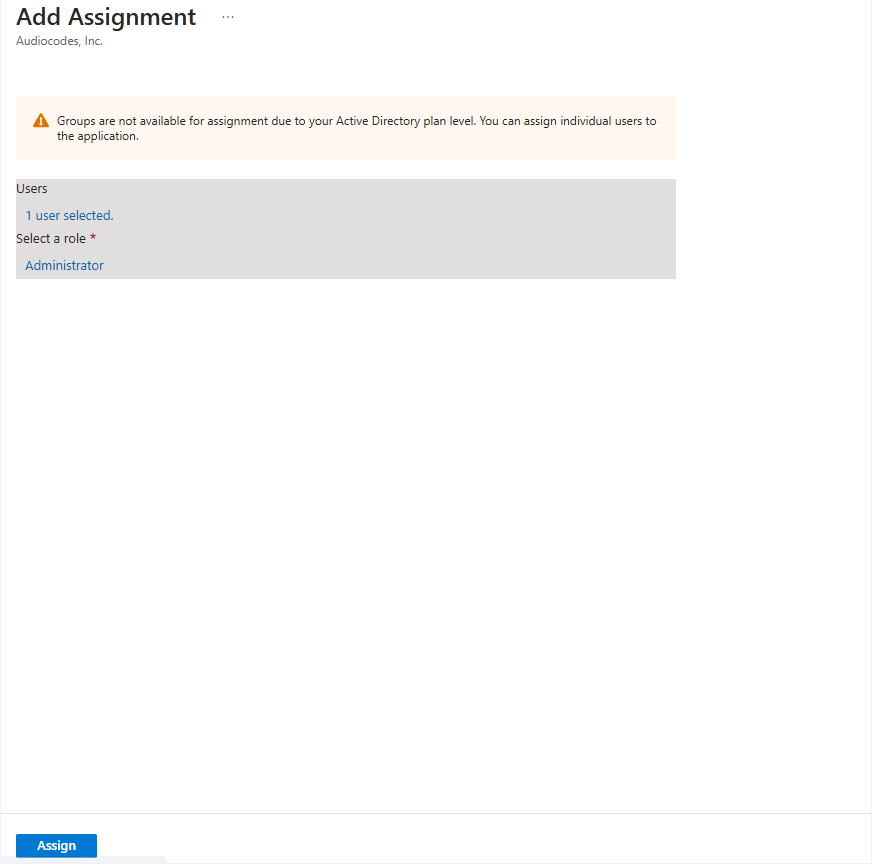
Select the Administrator role and then click Select. |

The user assignment is displayed.

|
44.
|
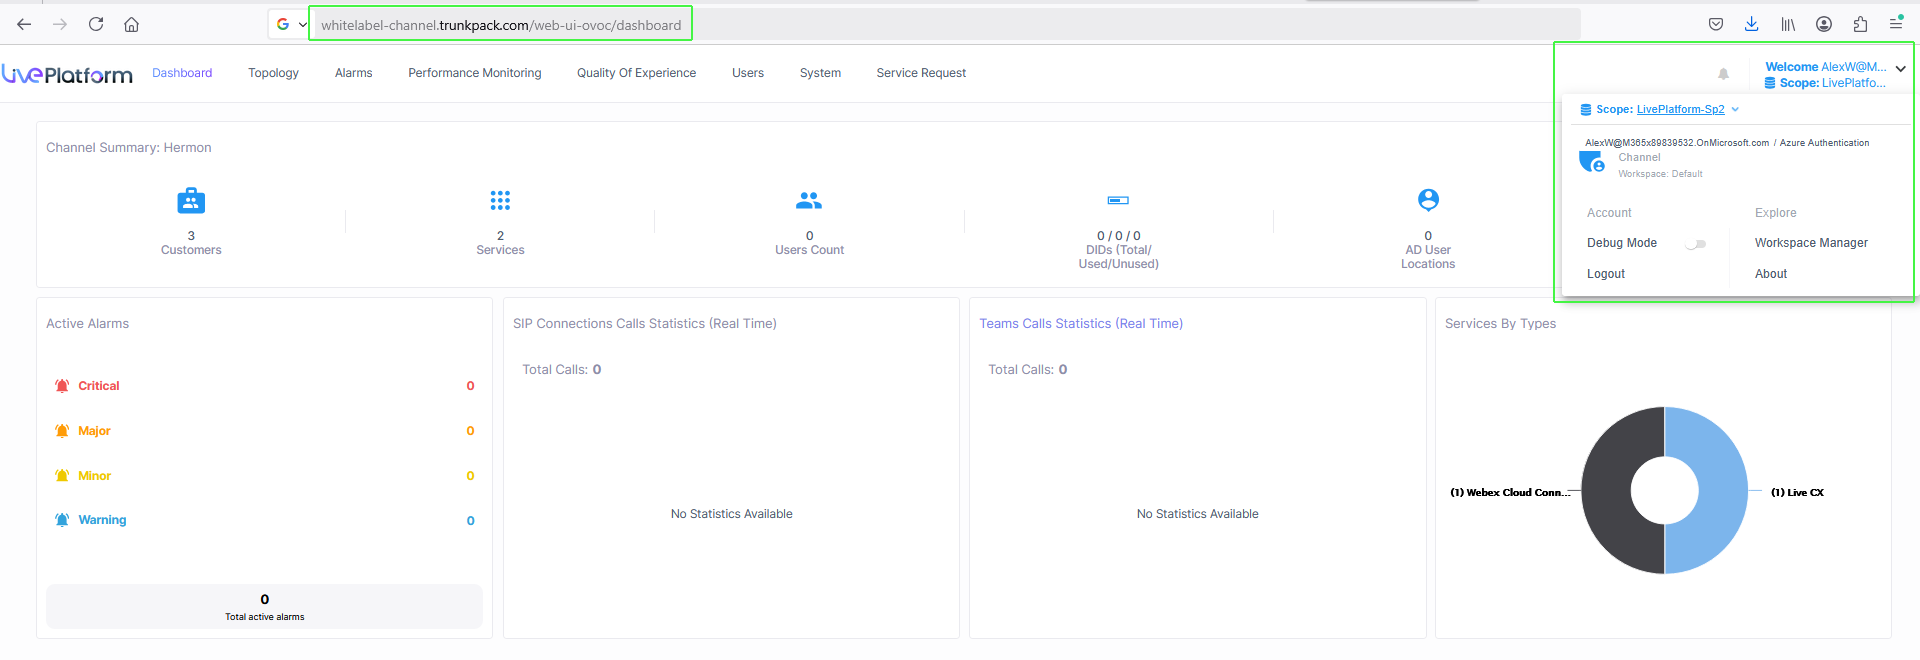
Login with the credentials of the Channel Admin user that you defined above. Note that the FQDN that you configured in the Channel details in Live Platform is displayed in the login URL. In the Operator Actions menu, see the details of the logged in Channel administrator. |
