
Manage routing rules
This new Live Hub release introduces a redesigned Routing Rules table, offering a more intuitive and user-friendly experience. All your existing routing rules have been automatically and seamlessly migrated into the new routing format, preserving your existing routing logic. For a description of the changes, click here.
A routing rule is a set of conditions and actions that determine how incoming or outgoing calls are handled on your Live Hub account. It's a decision-making process that directs calls to specific destinations based on various telephony details. For example, you can use routing rules to direct calls to a bot for automated customer service, or to a specific contact center agent based on the caller's location.
Live Hub offers a simple way to manage your routing rules. You can create new routing rules by clicking the Add new routing rule button on the Routing Rules page. A routing rule is created by defining the conditions (call criteria) and specifying the call's destination (Route To). You can search for a routing rule in the search bar at the top of the page, and you can view each rule's configuration in detail by expanding the selected rule's row. To modify the configuration, click the Edit button.
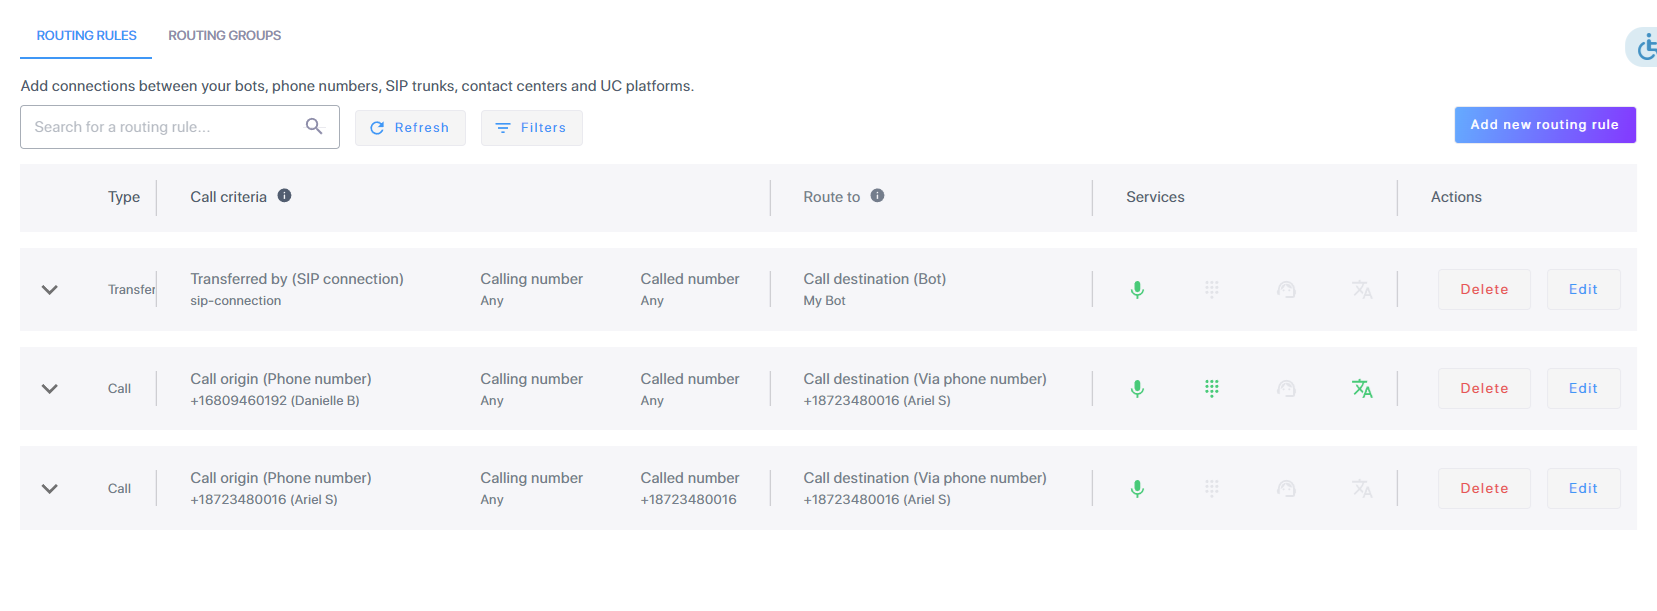
Key components of a routing rule
Type
Type specifies whether the rule is triggered by an incoming Call or a Transfer.
Call Criteria
These are the criteria used to evaluate incoming calls. If a call meets all of these criteria, it will match this routing rule and the actions listed below will be applied. Call Criteria determines how calls are routed by defining specific conditions. Here you set the conditions that activate the routing rule.
-
Call Origin (Phone number) or Transferred by (Bot). The name of this field dynamically changes based on the selected type.
The service that initiated the call, for example, a bot, a specific SIP connection, or if someone called a phone number that was purchased on Live Hub.
If you selected, for example, the type Call, the field is be labeled 'Call Origin'. However, if the rule is triggered by a Transfer, the field name becomes 'Transferred By'.
-
Calling Number: The phone number of the person initiating the call. You can enter the entire phone number or just a prefix to match a group of calls.
-
Called Number: The phone number of the recipient of the call. It can be the full number or a prefix. The prefix should be limited in case it is a SIP connection.
Route To
Direct the call to a specific destination, such as a phone number, voice mail, or another routing rule. The recipient's phone will display this number as the incoming call's source.
Services
When viewing the routing rule configuration, these options are displayed as icon indicators for each routing rule.
|
Icon |
Description |
|---|---|
 Recording Recording |
When green, indicates that the routing rule is configured with at least one of the “Live Hub recording” or “External recording” services. |
 Number customization Number customization
|
When green, indicates that the routing rule is configured with at lease on of the customized fields. |
 Assist bot Assist bot |
When green, indicates that the routing rule is configured with the assist bot feature. |
|
|
When green, indicates that the routing rule is configured with the voice translation feature. |
 Voice translation
Additional options you configured when you created the routing rule are displayed when expanding the rule: Live Hub recording, External recording, Assist bot, and Call initiator.
Actions
These are the actions that are taken when the conditions of a rule are met. To modify or remove a routing rule, click the appropriate button in the Actions column.
Filter routing rules
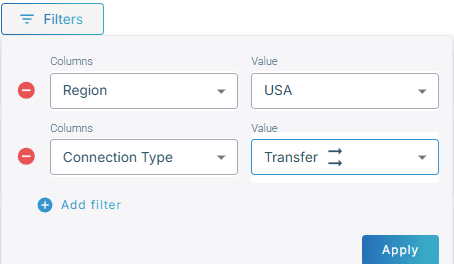
You can filter the list of routing rules to make it easier to find specific rules, especially when you have a large number of them. To do this, click Filter, and then the Add filter button. From the drop down lists, select identifying details of the routing rules you want to find. For example, if you want to only see the list of routing rules for the United States, from the Columns drop-down list, select Region, and from the Value drop-down list, select USA. You can include more filters by clicking the Add filter button again.
The figure below shows an example of two filtering rules:
View routing rule details
You can expand each routing rule to display more details about the rule, such as which services are enabled, which region the rule is applied to, and whether the phone numbers were customized.

Add a routing rule
The following procedure describes how to add a routing rule.
You can configure up to 150 routing rules.
To add a routing rule:
-
In the Navigation pane, select Routing and then click the Routing Rules tab; the Routing List page appears, displaying your routing rules.
-
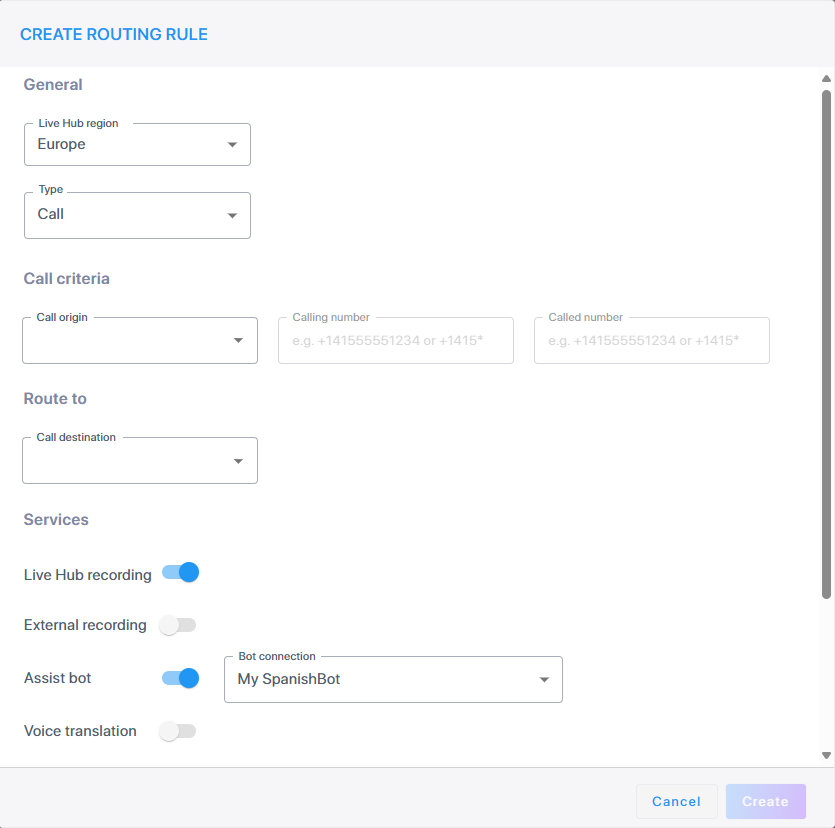
Click Add new routing rule; the following appears:
-
From the 'Live Hub region' drop-down list, select the geographical location (region) in which Live Hub voice infrastructure is deployed.
-
Under 'Origin', choose the conditions to determine where the call is routed.
-
From the 'Type' drop down list, select the call type that triggers this rule, Call or Transfer. Your selection here affects the next drop down.
-
If you selected the type Call, from the 'Call Origin' drop down list, select the source of the call that will trigger the rule.
-
If you selected Transfer, from the 'Transferred by' drop down list, select the source of the transferred call that will trigger the rule.
-
-
Under 'Condition', set the call-matching criteria:
-
In the 'Calling number' field, enter the caller's phone number or pattern.
-
In the 'Called number' field, enter the called party's phone number or pattern.
The phone numbers can be:
-
Full number e.g., +14155551234
-
Prefix e.g., +14155551*
-
Any number e.g., *
-
-
-
Under 'Route To', define the destination of the call that this rule triggered. From the 'Call destination' drop down, select where the call is routed. You can route the call to a bot, a phone number, the original service number (the number from the original incoming call), and more. The recipient's phone will display this number as the caller.
You can also select the option to Reject call, which allows you to block a specific phone number when the rule’s conditions are met.
Routing rules services are not available when the destination is selected as an assist bot.
-
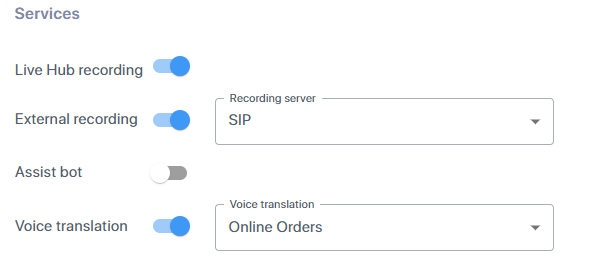
Under 'Services', define additional functionality:
-
Enable the Live Hub recordingtoggle button if you want calls initiated by this routing rule to be recordedby Live Hub.
-
Enable the' External recording toggle button if you want calls initiated by this routing rule to be recorded by an external recorder, such as a SIP recorder. If you turn on this feature, the 'Recording server' drop down list appears. From the 'Recording server' drop down, select the SIPREC SRS you want to use.
-
This field will not be displayed if you selected Transfer as the 'Call Type'.
-
This toggle is only enabled after configuring the Generic Recording Server in the SIP connection settings. See Create a SIP Connection for SIPREC.
-
-
Enable the Agent assist bot toggle button if you want to enable an assist bot. If you turn on this feature, the 'Bot connection' drop drown list appears. From the 'Bot connection' drop down list, select the bot you want as your agent assist.
-
If the original call uses an assist bot or voice translation, that configuration controls what continues.
-
If both the call and transfer use assist bot or voice translation, they must use the same one; otherwise, the original configuration continues.
-
If only the transfer has an assist bot or voice translation, the transfer configuration is used.
-
If transfer settings are disabled, the feature stops.
-
-
This toggle is only enabled after configuring an assist bot in the Bots settings. See Define your bot connection.
-
-
Enable the Voice translation toggle button if you want your calls to be translated in real time. If you turn on this feature, the 'Voice translation' drop drown list appears. From the list, select the Voice translation you want this on for.
-
This field will not be displayed if you selected Transfer as the 'Call Type'.
-
This toggle is only enabled after configuring Voice translation. See Create a new voice translation.
-
This toggle is not enabled if you enabled the Assist bot.
-
If the original call uses an assist bot or voice translation, that configuration controls what continues.
-
If both the call and transfer use assist bot or voice translation, they must use the same one; otherwise, the original configuration continues.
-
If only the transfer has an assist bot or voice translation, the transfer configuration is used.
-
If transfer settings are disabled, the feature stops.
-
-
-
-
From the 'Call initiator' drop-down list, select who initiated the call, the Customer or the Agent.
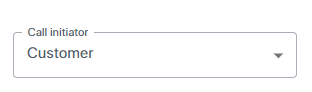
This field will not be displayed if you selected Transfer as the 'Call Type'.
-
Expand 'Number Customization' to modify the following phone numbers: called numbers, calling numbers, and service numbers.

-
In the 'Customized calling number',enter a new phone number of the caller ID (display number). By default, the number is not modified.
-
In the 'Customized called number', enter a new phone number of the recipient. For example, if the original called number is +14155551234, you can change it to +1445555555.By default, the number is not modified.
-
In the 'Customized service number', enter a new service number. Service number represents the service number for the outgoing calls and is applicable for SIP connections. Only relevant when the use of service number for SIP connection is enabled, this configuration overrides the SIP connection service number value.
The customized number can be any of the following:
-
Full phone number. For example, +14155551234
-
Any number. For example, leave empty indicating that no customization is done.
-
-
-
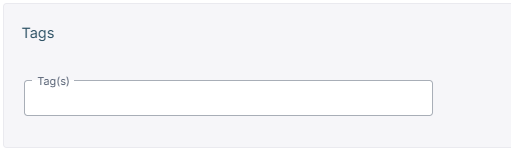
Expand 'Tags' and enter a tag (up to 50 characters) to label the traffic for this routing rule. This tag will be used for reporting and billing.
Note: Tags are supported for call types only and are not supported for transfers.
-
Click Create; the routing rule is created and placed at the top of the routing rule list.
Edit a routing rule
The following procedure describes how to edit a routing rule.
To edit a routing rule:
-
In the Navigation pane, select Routing; the Routing List page appears, displaying your routing rules.
-
Find the routing rule you want to modify, and click Edit.
-
Make your necessary changes, and then click Update; a confirmation message appears that the Routing rule has been successfully updated.
Delete a routing rule
The following procedure describes how to delete a routing rule.
To delete a routing rule:
-
In the Navigation pane, select Routing; the Routing List page appears, displaying your routing rules.
-
Find the routing rule you want to delete, and click Delete.
A message appears asking you to confirm your action and if affirmative, the routing rule is deleted.