DVD3: OVOC Server Application Installation
The procedure below describes how to install the OVOC server application. This procedure takes approximately 20 minutes.
|
➢
|
To perform DVD3 installation: |
|
1.
|
Download the DVD3-OVOC Server Application Installation.ISO file to your PC. |
|
2.
|
Using the WinSCP utility (see Transferring Files) transfer the DVD3.ISO file to the OVOC Version 8.2 server acems user home directory: /home/acems
|
|
3.
|
Login into the OVOC server by SSH, as 'acems' user, and enter the password acems. |
|
4.
|
Switch to 'root' user and provide root password (default password is root): |
su - root
|
5.
|
Mount the .ISO file to make it available: |
mount /home/acems/DVD3_EMS_.iso /mnt
|
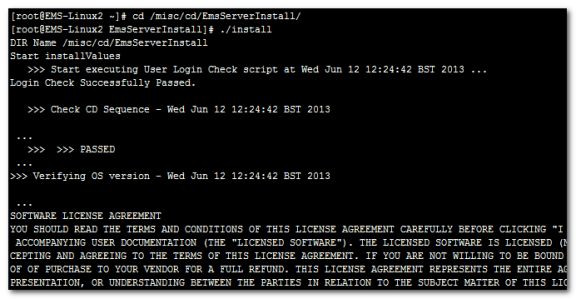
6.
|
Change directory to the script location: |
cd /mnt/EmsServerInstall/
5. Run the installation script from its location:
./install
OVOC server Application Installation
|
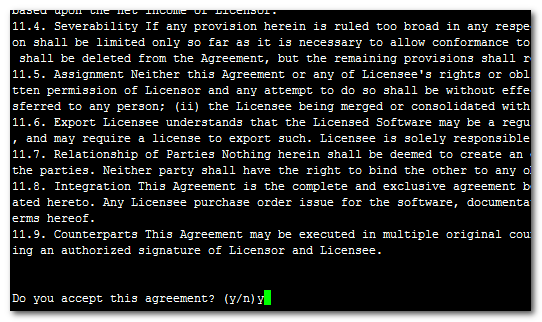
7.
|
Enter y, and then press Enter to accept the License agreement. |
OVOC server Application Installation – License Agreement
|
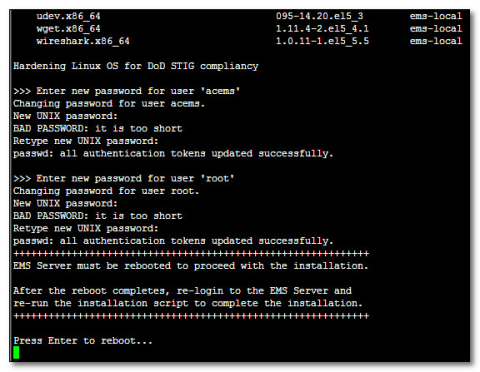
8.
|
When you are prompted to change the acems and root passwords, enter new passwords or enter existing passwords. You are then prompted to reboot the OVOC server machine; press Enter. |
OVOC server Application Installation (cont)
|
9.
|
The installation process verifies whether Rocky Linux version 8.x that you installed from DVD1 includes the latest OS patch updates; do one of the following: |
|
●
|
If OS patches are installed, press Enter to reboot the server. |
OVOC Server Installation Complete

|
10.
|
Wait for the installation to complete and reboot the OVOC server by typing reboot. |
|
11.
|
When the OVOC server has successfully restarted, login into the OVOC server by SSH, as ‘acems’ user and enter password acems. |
|
12.
|
Switch to 'root' user and provide root password (default password is root): |
su - root
|
13.
|
Type the following command: |
# OvocServerManager
|
14.
|
Verify that all processes are up and running (Viewing Process Statuses), configuration and data has been restored, and that you can login to the OVOC Web client. |