Creating a Login Welcome Message
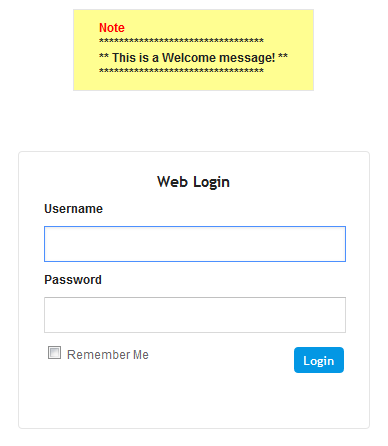
You can create a personalized welcome message that is displayed on the Web Login screen. The message always begins with the title "Note" and has a color background, as shown in the example below:
|
➢
|
To create a login welcome message: |
|
1.
|
Using a text-based editor (e.g., Notepad) to create an ini file that includes only the [WelcomeMessage] table parameter. Use the parameter to configure your message, where each index row is a line in your message, for example: |
[WelcomeMessage ]
FORMAT Index = Text;
WelcomeMessage 1 = "*********************************";
WelcomeMessage 2 = "** This is a Welcome message! **";
WelcomeMessage 3 = "*********************************";
[\WelcomeMessage]
|
3.
|
Save your new configuration to flash. |
Uploading an ini file through the Auxiliary Files page doesn't require a device restart.
|
➢
|
To remove the welcome message: |
|
2.
|
Open the file in a text-based editor, remove the [WelcomeMessage] table, and then save the file. |
|
3.
|
Upload the file through the Configuration File page. |
After the file is uploaded, the device restarts to apply your new configuration.