Configuring Wireshark Packet Capturing using RPCAP
You can use the device's embedded Remote Capture Protocol (RPCAP) server to capture network packets (IPv4 and IPv6) and then analyze them using the Wireshark tool on your computer. Once you have enabled the device's RPCAP server and then connected (over TCP) your remote Wireshark client to the device, you can use Wireshark to start or stop network capture on a specific device network interface, collect the captured data, and filter the captured data. In other words, control of the packet capturing process is from your Wireshark client. For more information on RPCAP functionality, refer to Wireshark documentation.
|
●
|
Wireshark filtering is merely a view filter; the device sends all packets to the computer running Wireshark, regardless of Wireshark's filtering settings. |
|
●
|
It’s not recommended to uses RPCAP during heavy traffic as this may utilize much of the device's CPU and network resources.
If you need to capture specific traffic during heavy traffic, it's recommended to use the CLI command debug capture or the Logging Filters table for IP traces with the relevant filters (see Configuring Logging Filter Rules). |
|
●
|
To free up the device's CPU resources used by the RPCAP server, after you have finished debugging, it's recommended to stop the RPCAP server, as described at the end of this section.
|
|
●
|
By default (no filters applied), RPCAP captures non-media only (e.g., SIP, syslog, and Web) and doesn't capture media (i.e., RTP/RTCP).
This is to prevent CPU overload under medium or high traffic.
Therefore, RPCAP is not intended to capture media.
If you want to capture media, use the Logging Filters table, as described in Configuring Logging Filter Rules. |
|
➢
|
To start packet capturing through RPCAP: |
|
1.
|
Start packet capturing by the device's RPCAP server, using the following CLI command. This command also allows you to configure the first and second ports of the RPCAP server. The first port is an always-open listening port for initial connections. The second port is sent to the client during the initial connection to open a new TCP connection for the captured packets. By default, the first port number is 2002 and the second port number is dynamically allocated by the device. |
# debug capture rpcap-server start <First Port> <Second Port>
|
2.
|
On your remote computer, start the Wireshark client. |
|
3.
|
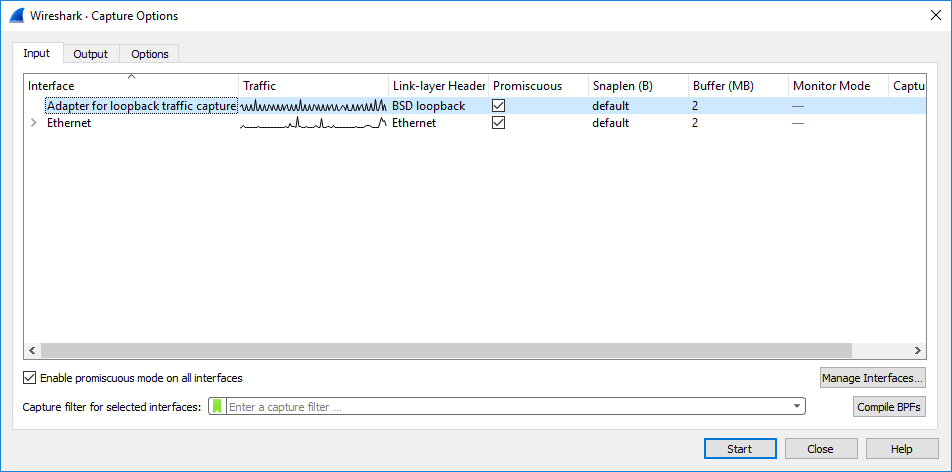
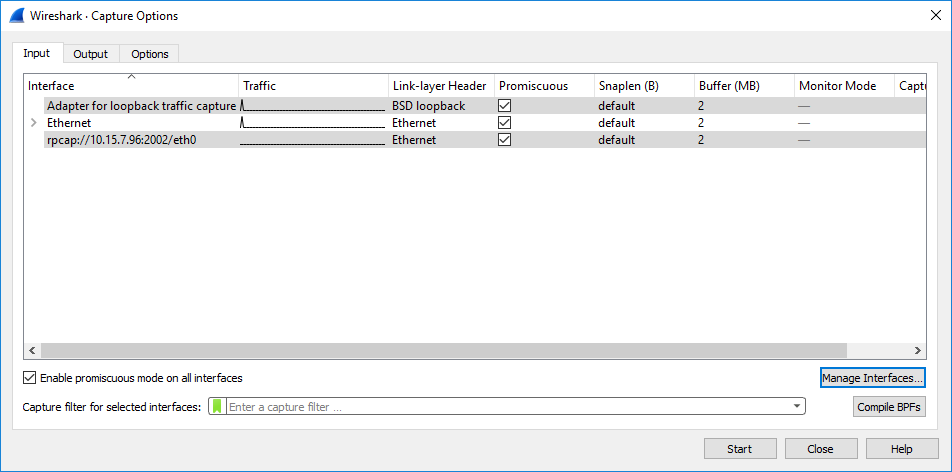
From the Capture menu, choose Options; the Capture Options dialog box appears: |
|
4.
|
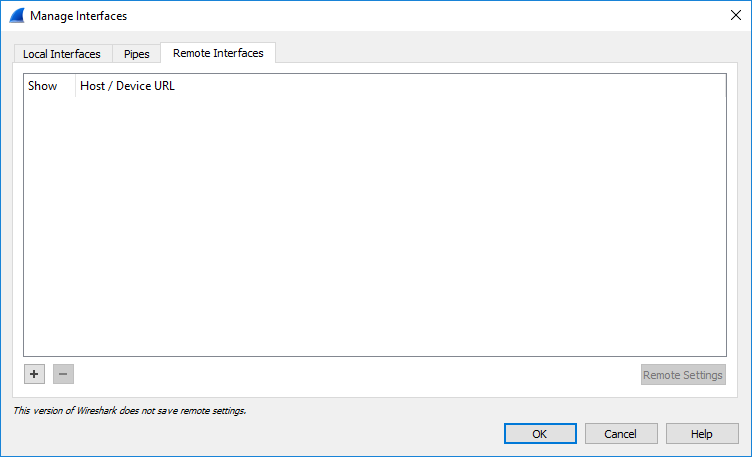
Click Manage Interfaces, and then in the Manage Interfaces dialog box, select the Remote Interfaces tab: the following appears: |
|
5.
|
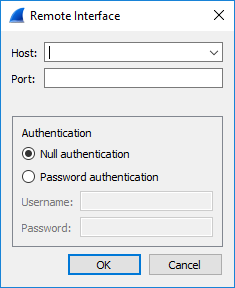
Click the plus button; the following dialog box appears: |
|
6.
|
Fill in the following fields: |
|
●
|
In the 'Host' field, enter the IP address of the device. |
|
●
|
In the 'Port' field, enter the port of the device that is used for the packet capture sessions. |
|
7.
|
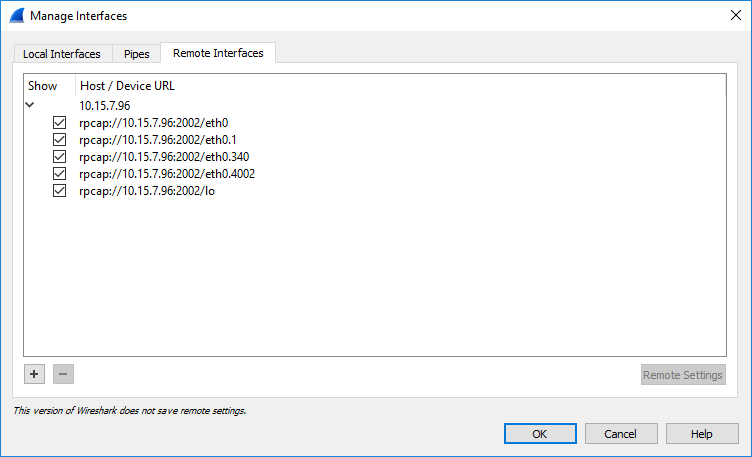
Click OK; the Manage Interfaces dialog box displays a list of all the device's network interfaces: |
|
8.
|
Using the check boxes, select only the network interfaces on which you want to capture packets, and then click OK; the Manage Interfaces dialog closes and you are returned to the Capture Options dialog box, which now displays the device's network interfaces that you selected in the previous step: |
|
9.
|
Select the required network interface, and then click Start; the Capture Options dialog box closes and the main Wireshark window displays captured packets as they are collected by Wireshark, as shown in the following example: |
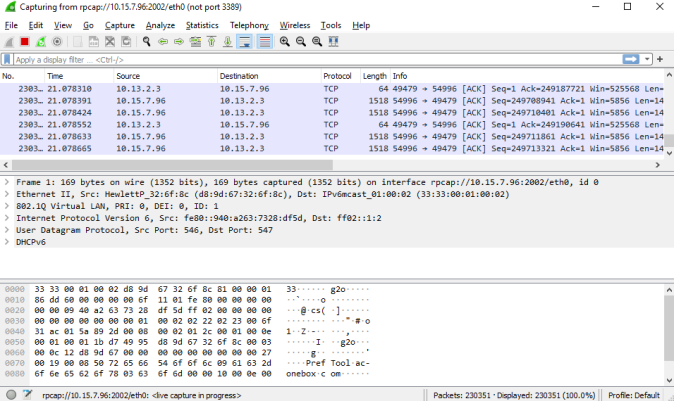
To stop the packet capturing on Wireshark, from the Capture menu, choose Stop. To continue capturing (with or without saving the previous capture), choose Start.
To stop the device's RPCAP server, first stop the Wireshark capturing, and then run the following CLI command:
# debug capture rpcap-server stop