Add a New Channel
|
1.
|
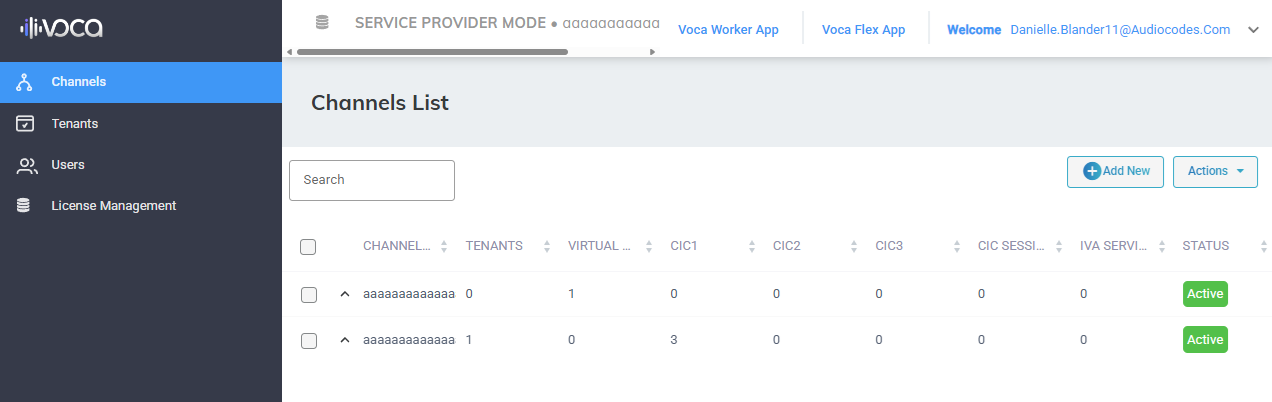
From the Navigation pane, select Channels. |
|
3.
|
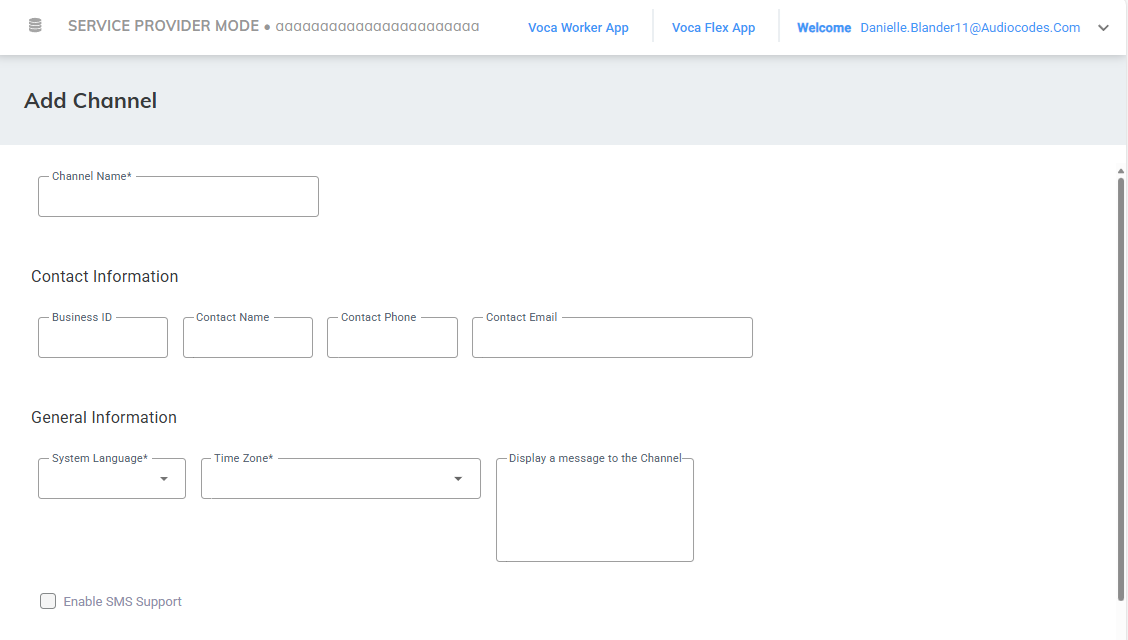
Enter the 'Channel Name'. |
|
4.
|
Under Contact information, fill in the following: |
|
5.
|
Under General Information, fill in the following: |
|
●
|
'Announcement Bar' - Add a custom message that appears in the Channel’s 'License Management' section with details about license expiry dates. |
|
●
|
Select Enable SMS Support checkbox. |
|
6.
|
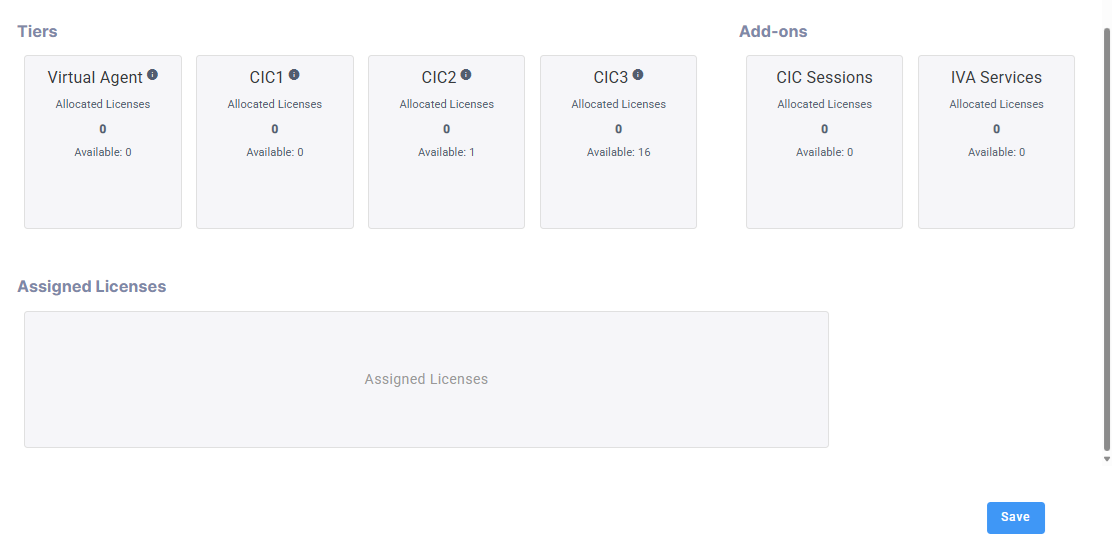
Configure Tiers and Add-ons. |
Each Tier represents a service level (Virtual Agent, CIC1, CIC2, or CIC3). Each Tier box displays the following information:
|
●
|
Allocated Licenses - The number of licenses allocated to this Service Provider in this Tier, regardless of their expiration date |
|
●
|
Available (Licenses) - The number of licenses that can be allocated to this Service Provider that were not allocated to other Service Providers yet. |
|
a.
|
Under the 'Tiers' section, select a license package. |
|
b.
|
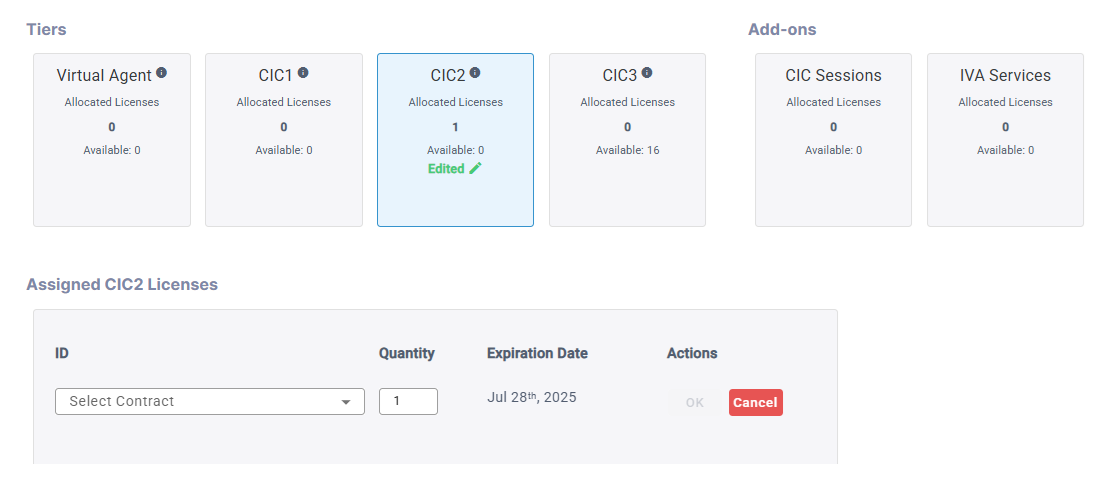
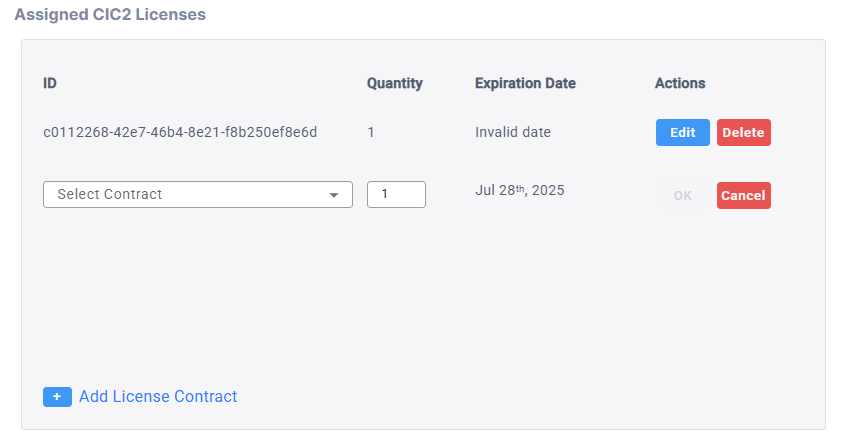
Add a license contract. Under the 'Assigned <C1C1> Licenses' section, click + Add License Contract. |
|
c.
|
From the 'ID' drop-down list, select the contract's ID from which you want to allocate licenses. |
|
d.
|
Enter the quantity of licenses to allocate from the contract. |
|
|
|
| ID |
The license contract ID number. |
| Quantity |
The number of licenses that were assigned in this contract. |
| Expiration Date |
The date in which the licenses will expire in this contract. |
|
7.
|
(Optional) You can increase/decrease the quantity of licenses for a contract by clicking Edit. |
|
8.
|
(Optional) You can delete the assignment of a contract to a Channel by clicking Delete. |
|
9.
|
(Optional) You can add more licenses to the currently selected tier by clicking + Add License Contract again. |
|
10.
|
Click Save. The new channel appears in the 'Channels' list, and is active by default. |