Create App Registration Manually
This procedure describes how to manually add the App registration to your M365 tenant including:
|
■
|
Associating Microsoft Entra Roles to the application according to table described in Secure Connection using Application Registration |
|
➢
|
To create the new registration: |
|
1.
|
Login to the Azure portal (portal.azure) with global Admin credentials for the M365 tenant. |
|
2.
|
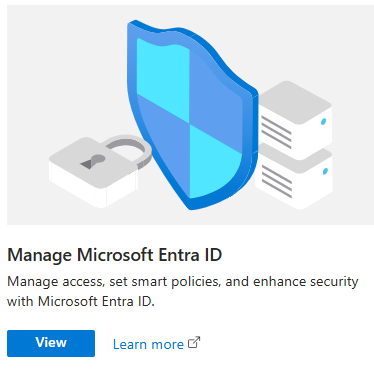
Click View to the Microsoft Entra ID interface. |
|
3.
|
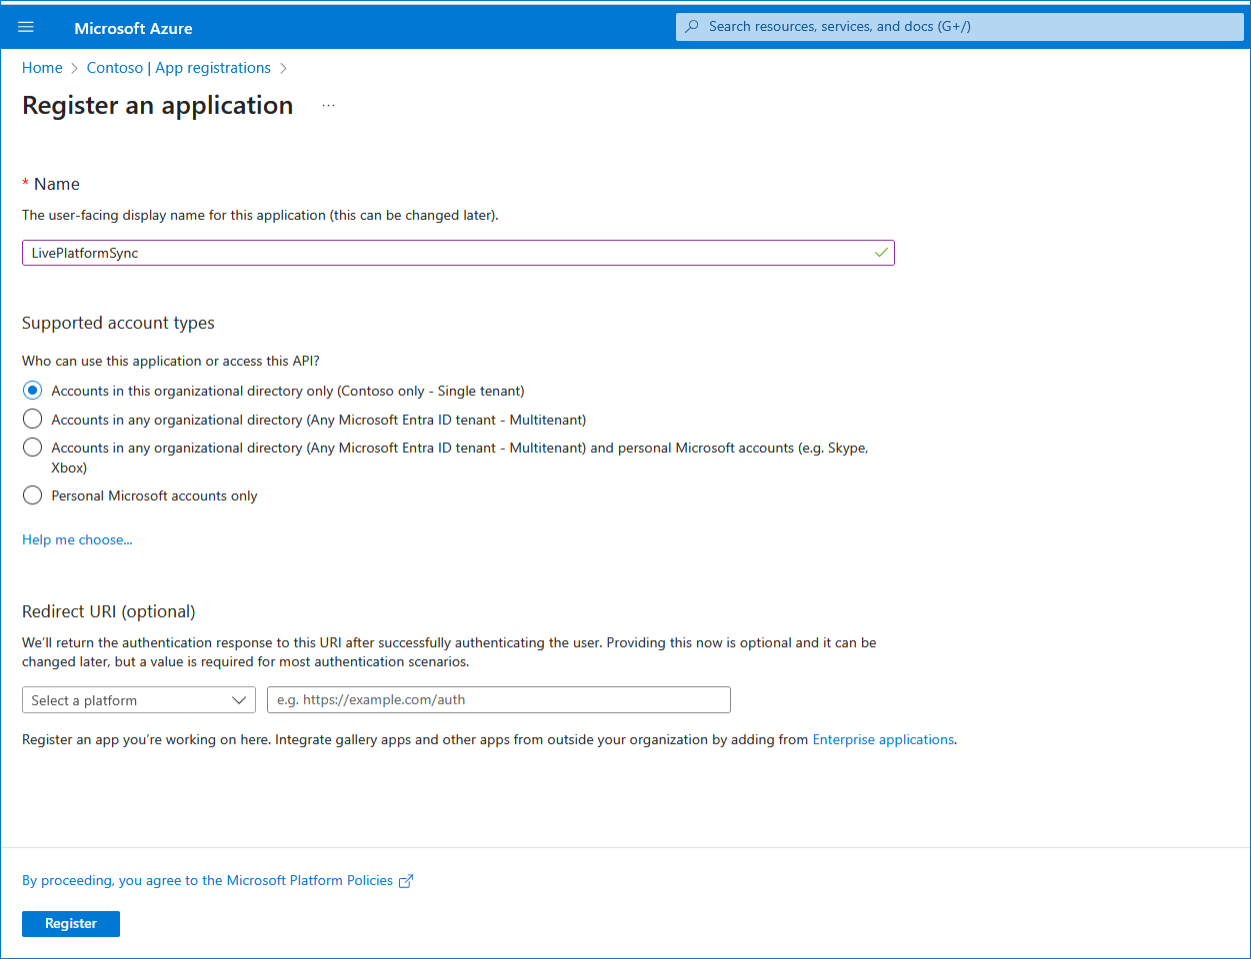
In the Navigation pane, select Manage > App registrations and then click New registration. |

|
4.
|
Enter the name of the application. |
|
5.
|
Select Accounts in this organizational directory only (Contoso only-Single tenant). |

|
7.
|
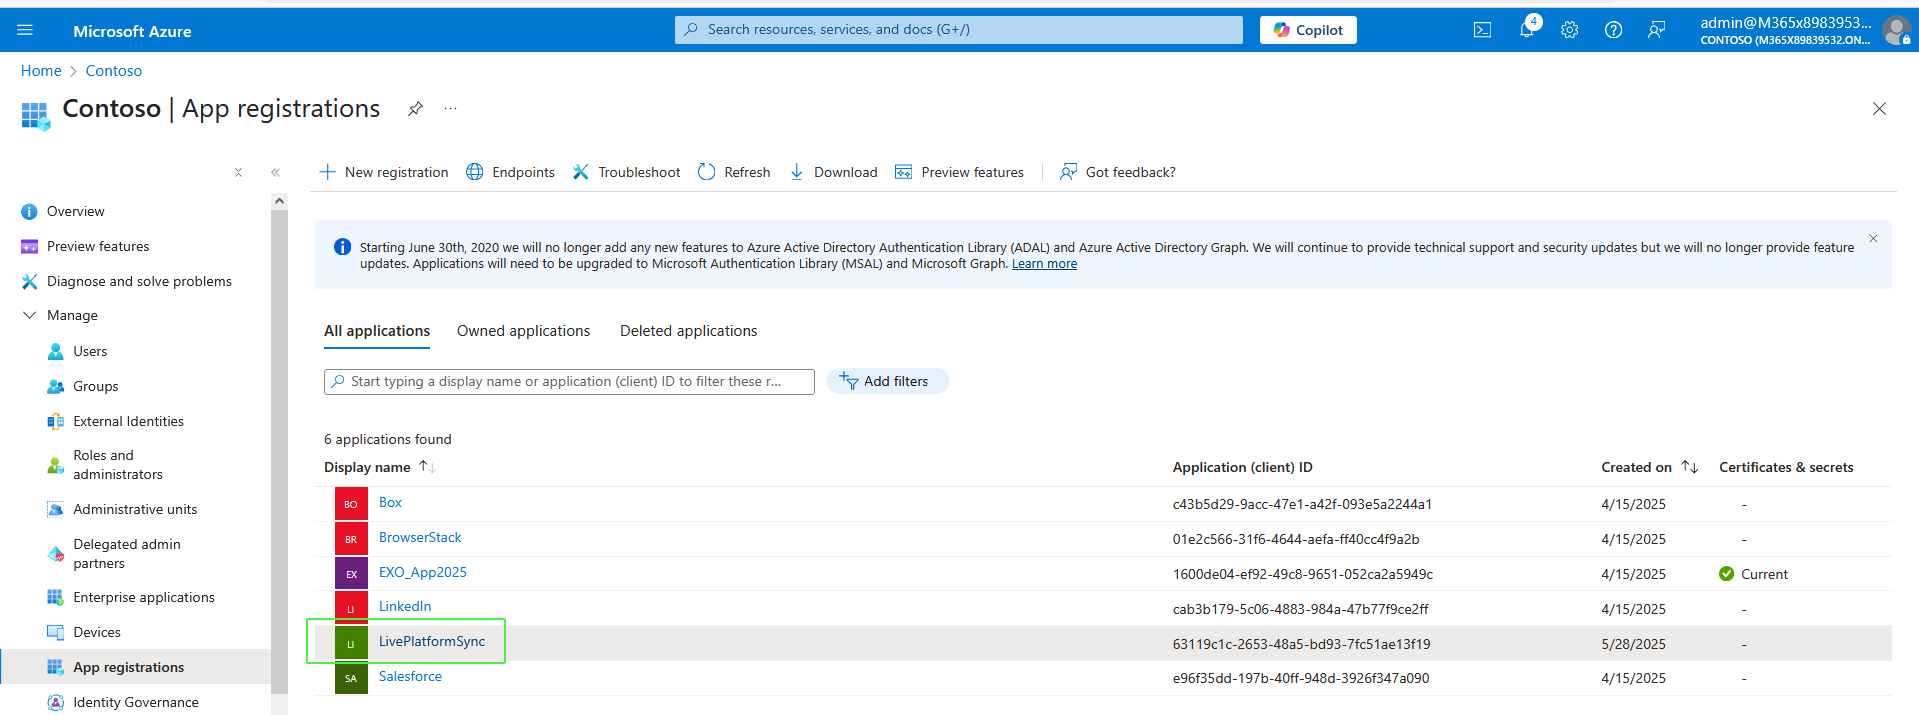
Click to open the Overview page for the new registration. |

|
8.
|
In the Overview page, Copy the Tenant ID and Application (client) ID value. |
|
9.
|
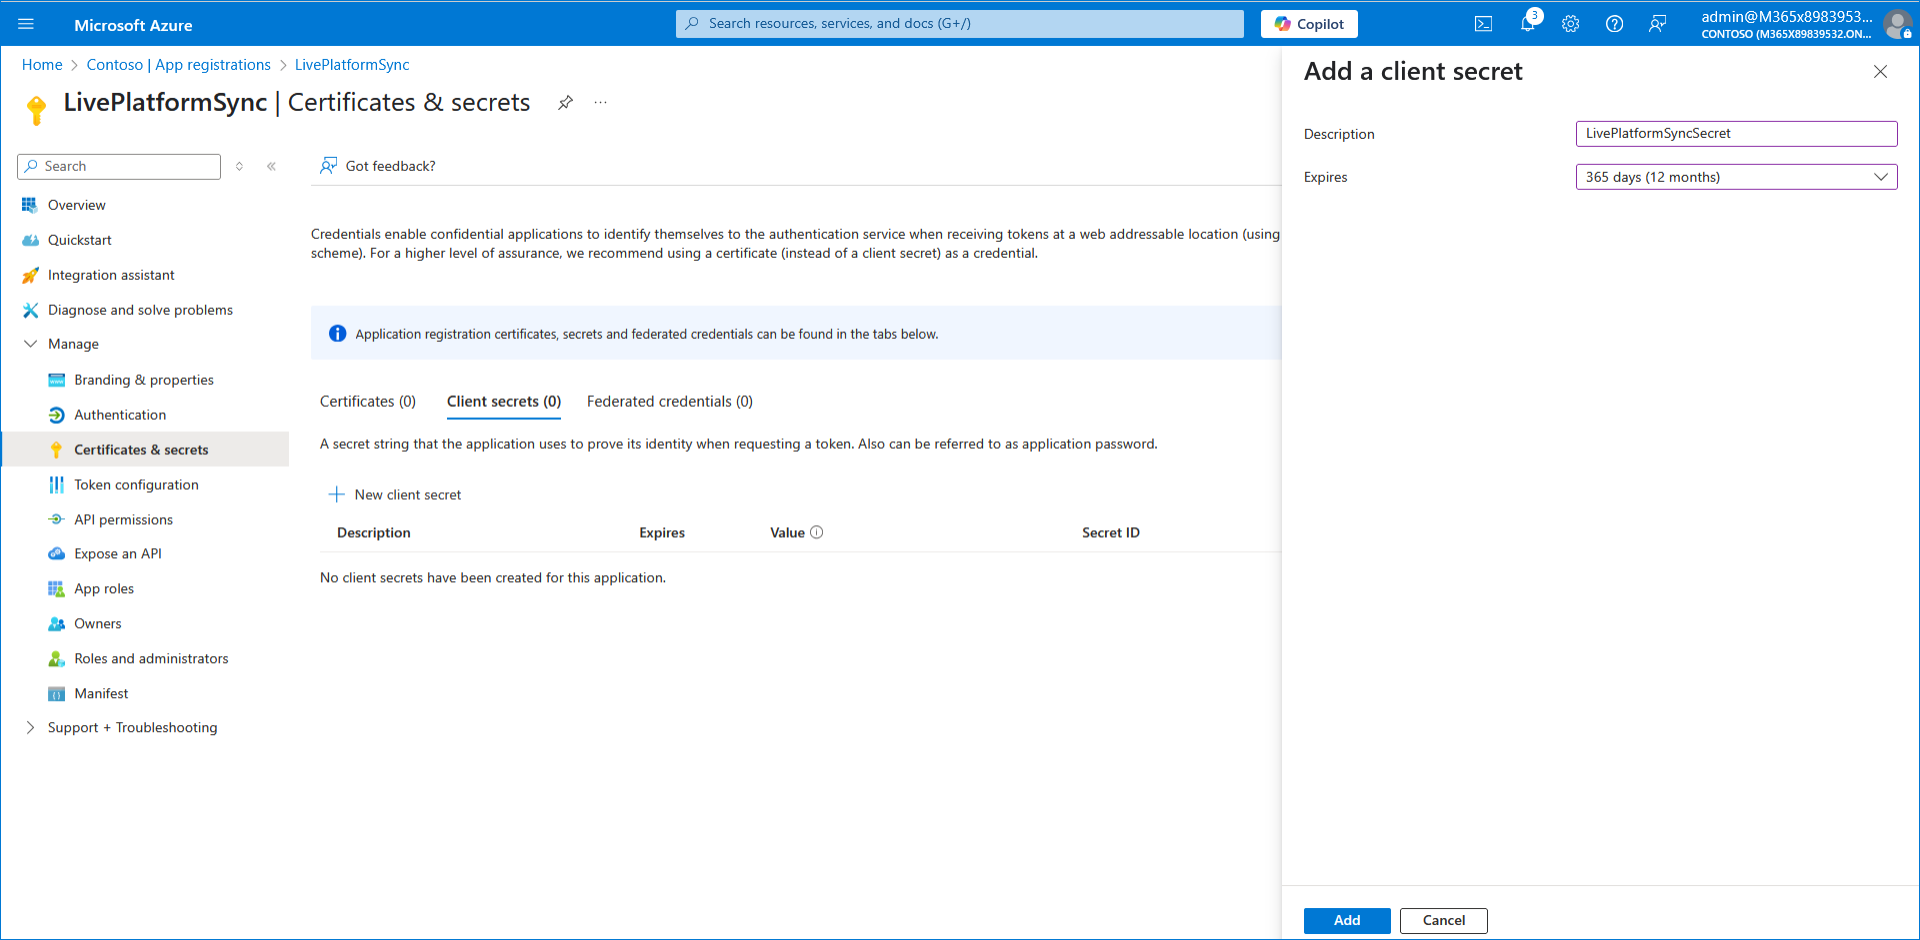
In the Navigation pane, select Certificate & secrets. |

|
10.
|
Click New client secret to add a new client secret. |

|
11.
|
Enter the Description for the secret and the Expires date (recommended 12 months) and then click Add. |

|
12.
|
Copy the value to clipboard as its required for later configuration in the Service portal. |
|
●
|
Copy the value immediately to notepad as it hashed after a short time. |
|
●
|
If you use the Application registration to create additional services, a new secret should be created for each new service. |
|
13.
|
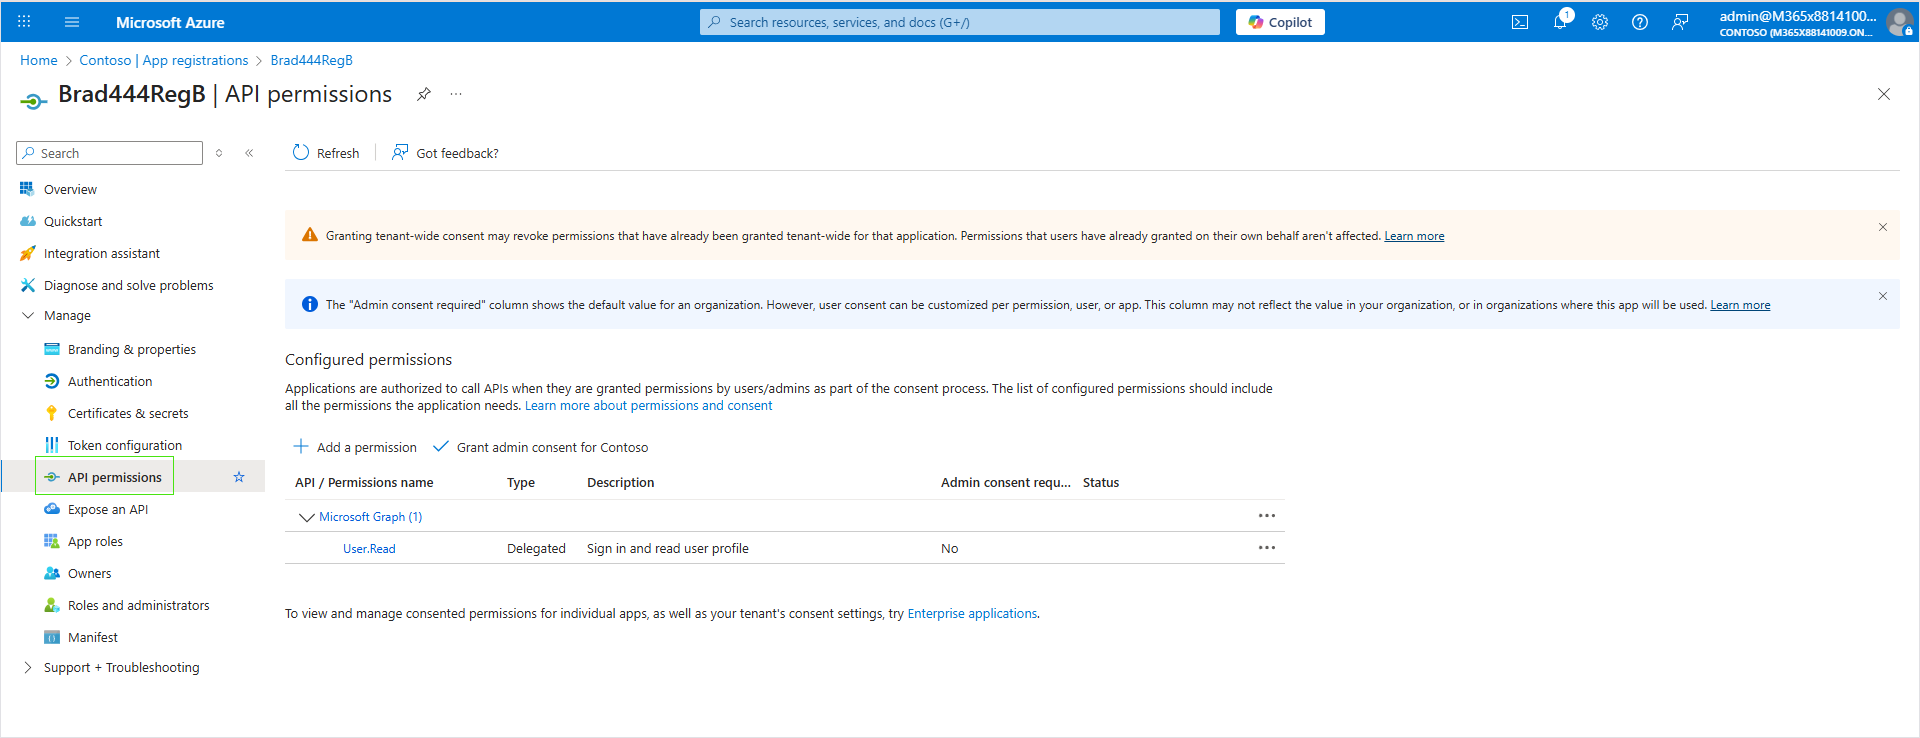
In the Navigation pane, select Manage > API permissions. |
|
14.
|
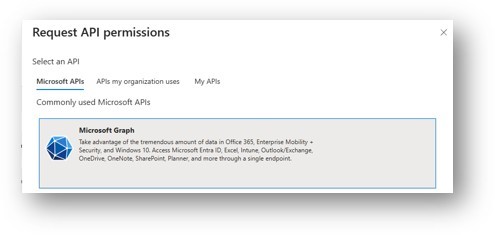
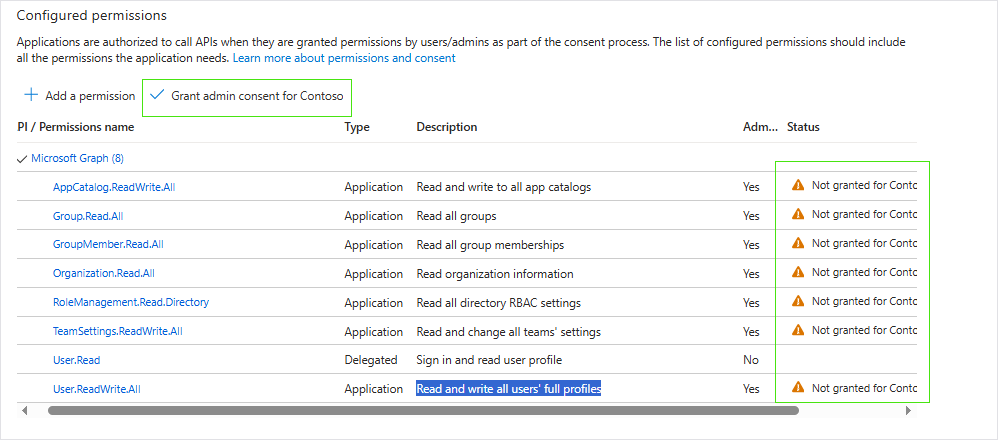
Click + Add a permission and then select Microsoft Graph. |
|
15.
|
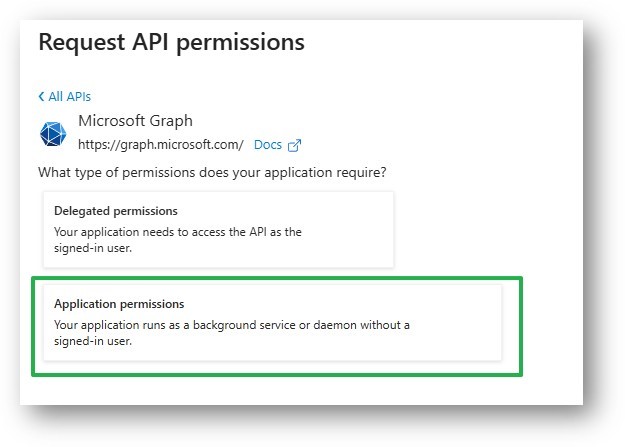
Select Application permissions. |
|
16.
|
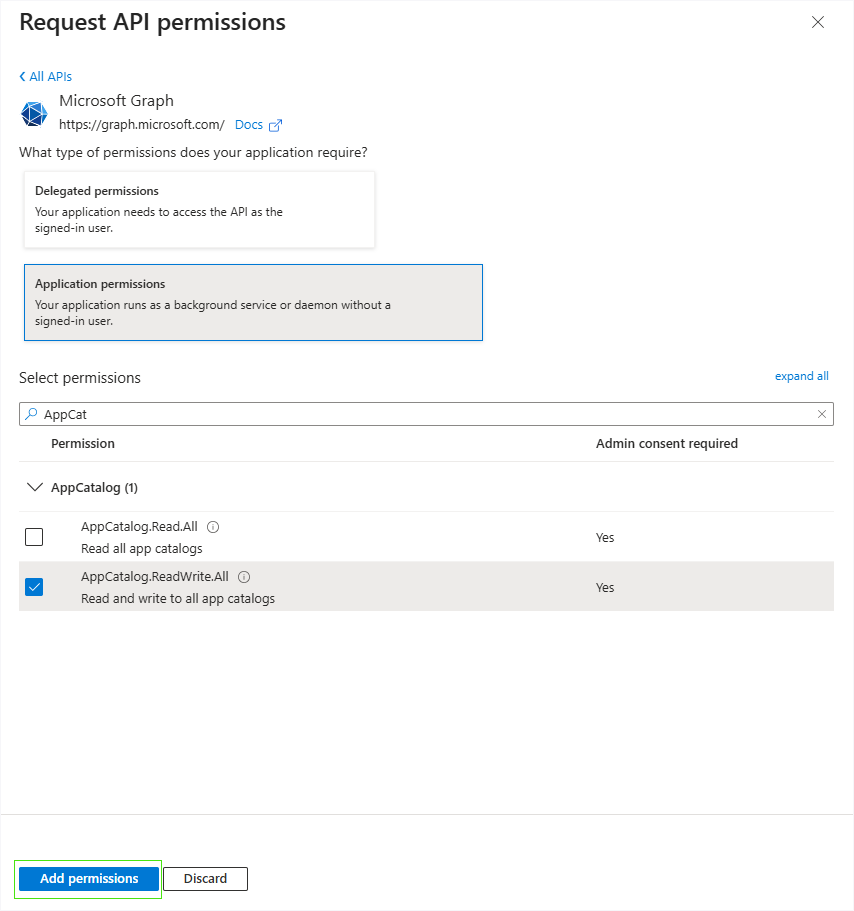
Type AppCatalog, select AppCatalog.ReadWrite.All (Read and write to all app catalogs), and then click Add permissions. |
|
17.
|
Repeat the above steps for the following permissions: |
|
●
|
Group.Read.All (Read all groups) |
|
●
|
Organization.Read.All (Read organization information) |
|
●
|
RoleManagement.Read.Directory
(Read all directory RBAC settings) |
|
●
|
TeamSettings.ReadWrite.All (Read and change all teams' settings) |
|
●
|
User.ReadWrite.All (Read and write all users' full profiles) |
|
18.
|
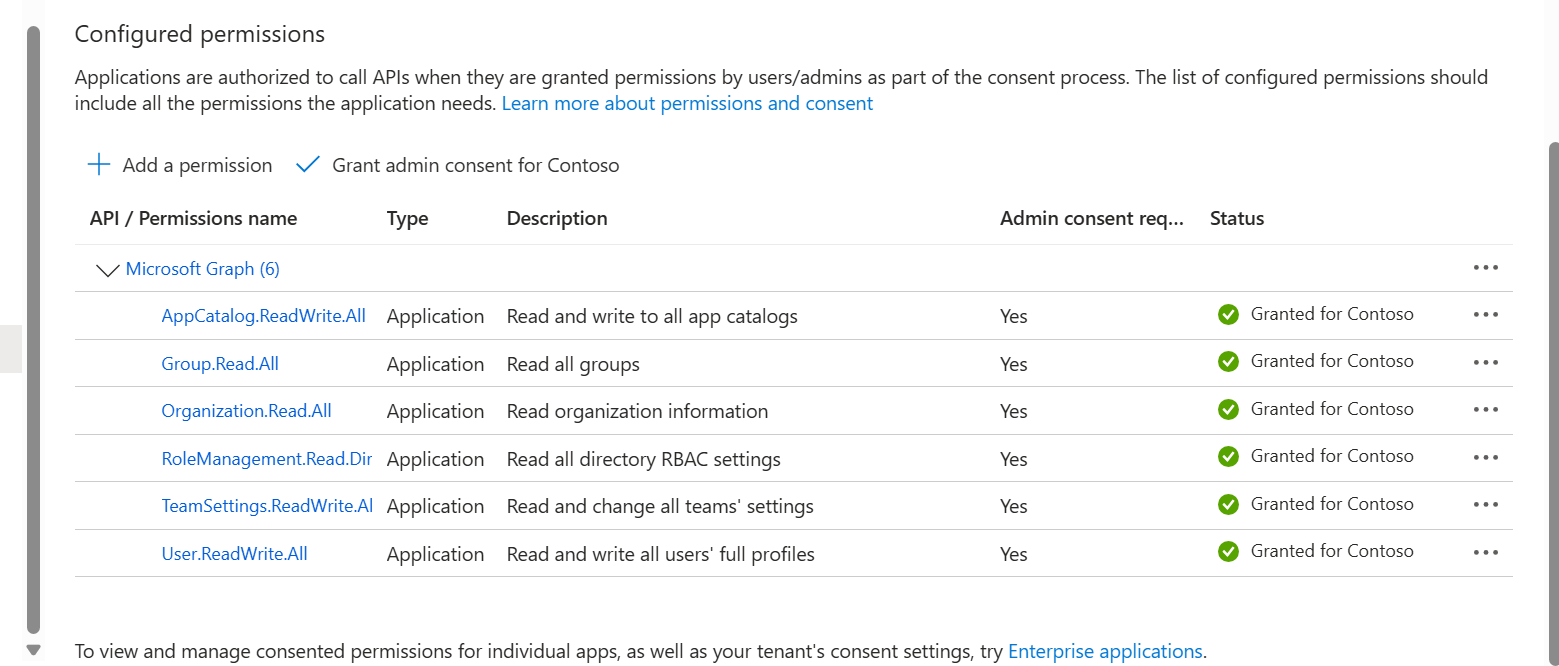
Grant admin consent for the new permissions. |

All permissions are granted.
|
19.
|
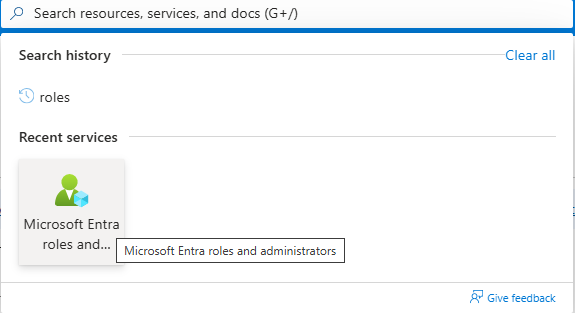
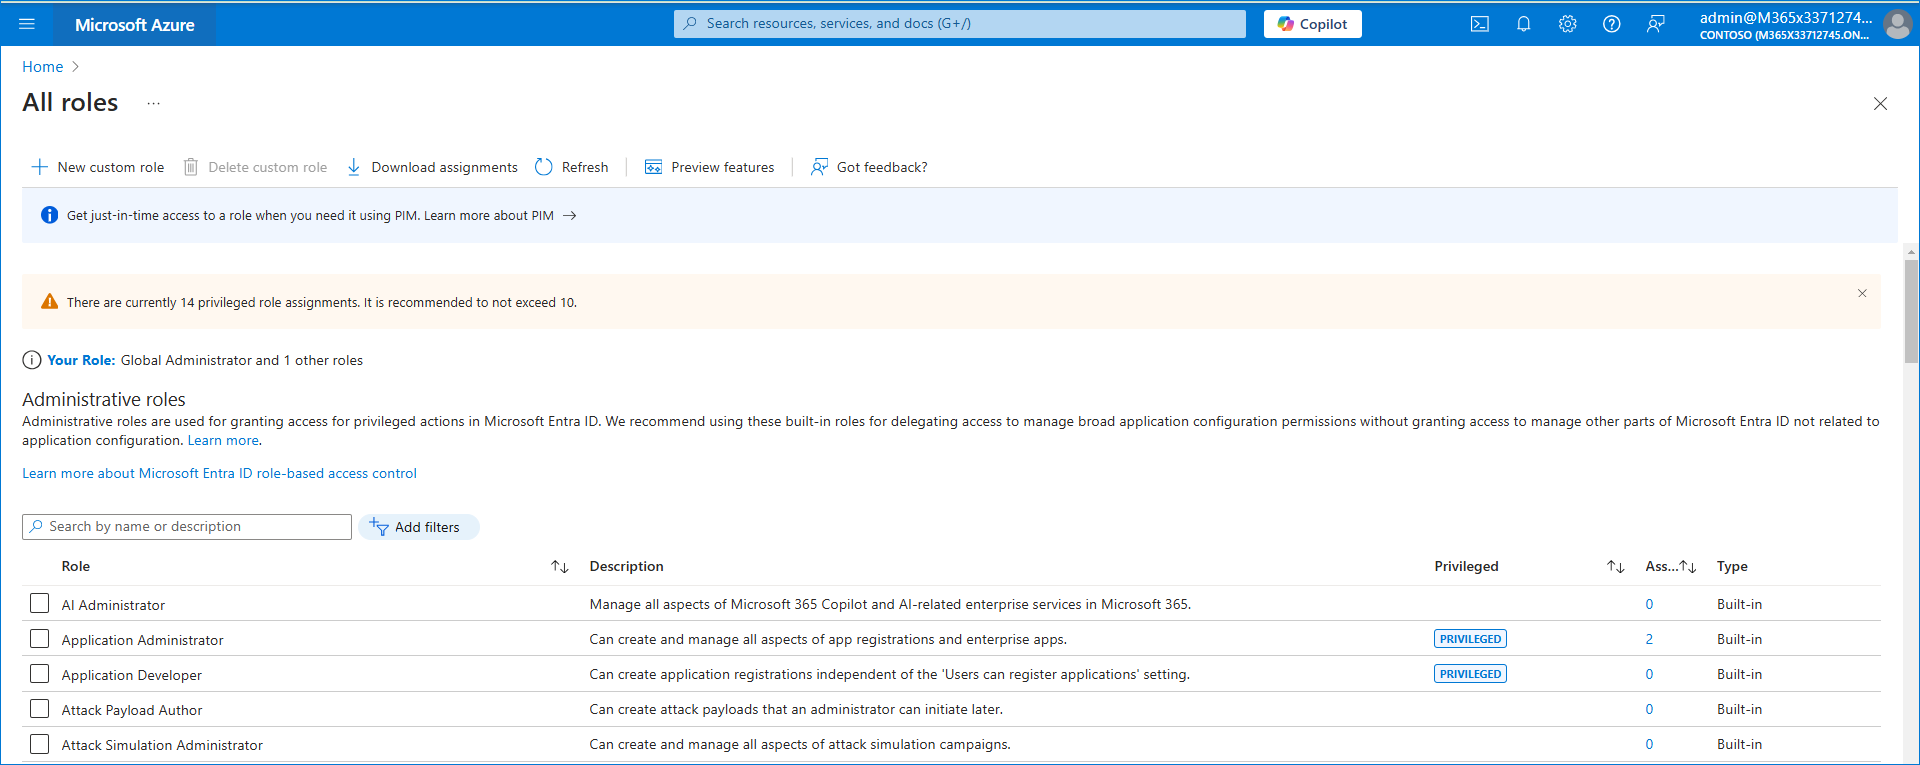
In the search box in the Menu bar, type Microsoft Entra Roles and administrators. |
|
20.
|
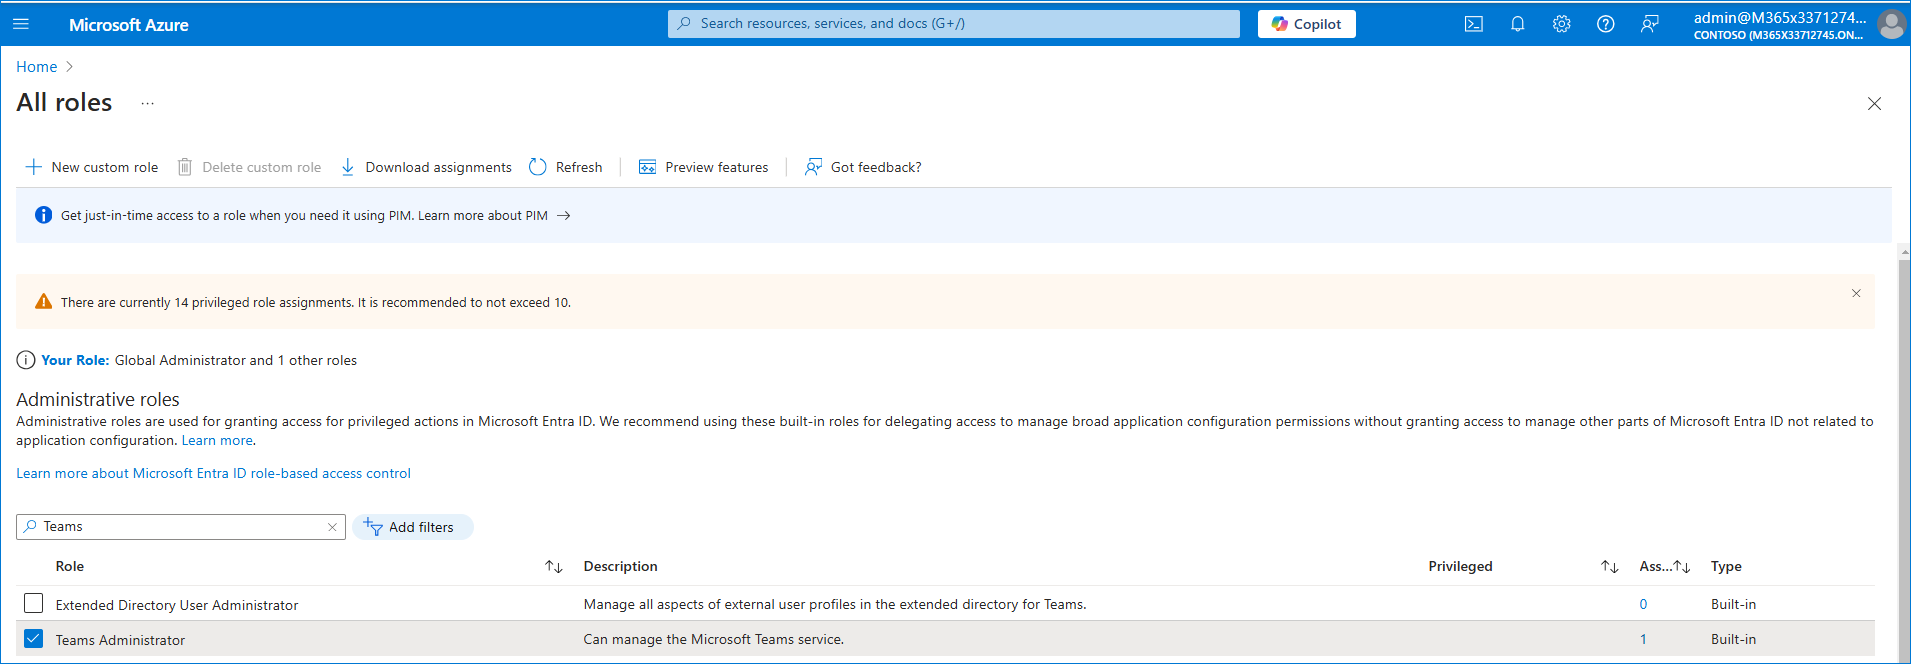
In the Search box, enter the name of the role that is required for the Application Registration creation process according to the table shown in Secure Connection using Application Registration , and then select the check box for the entry. |
|
21.
|
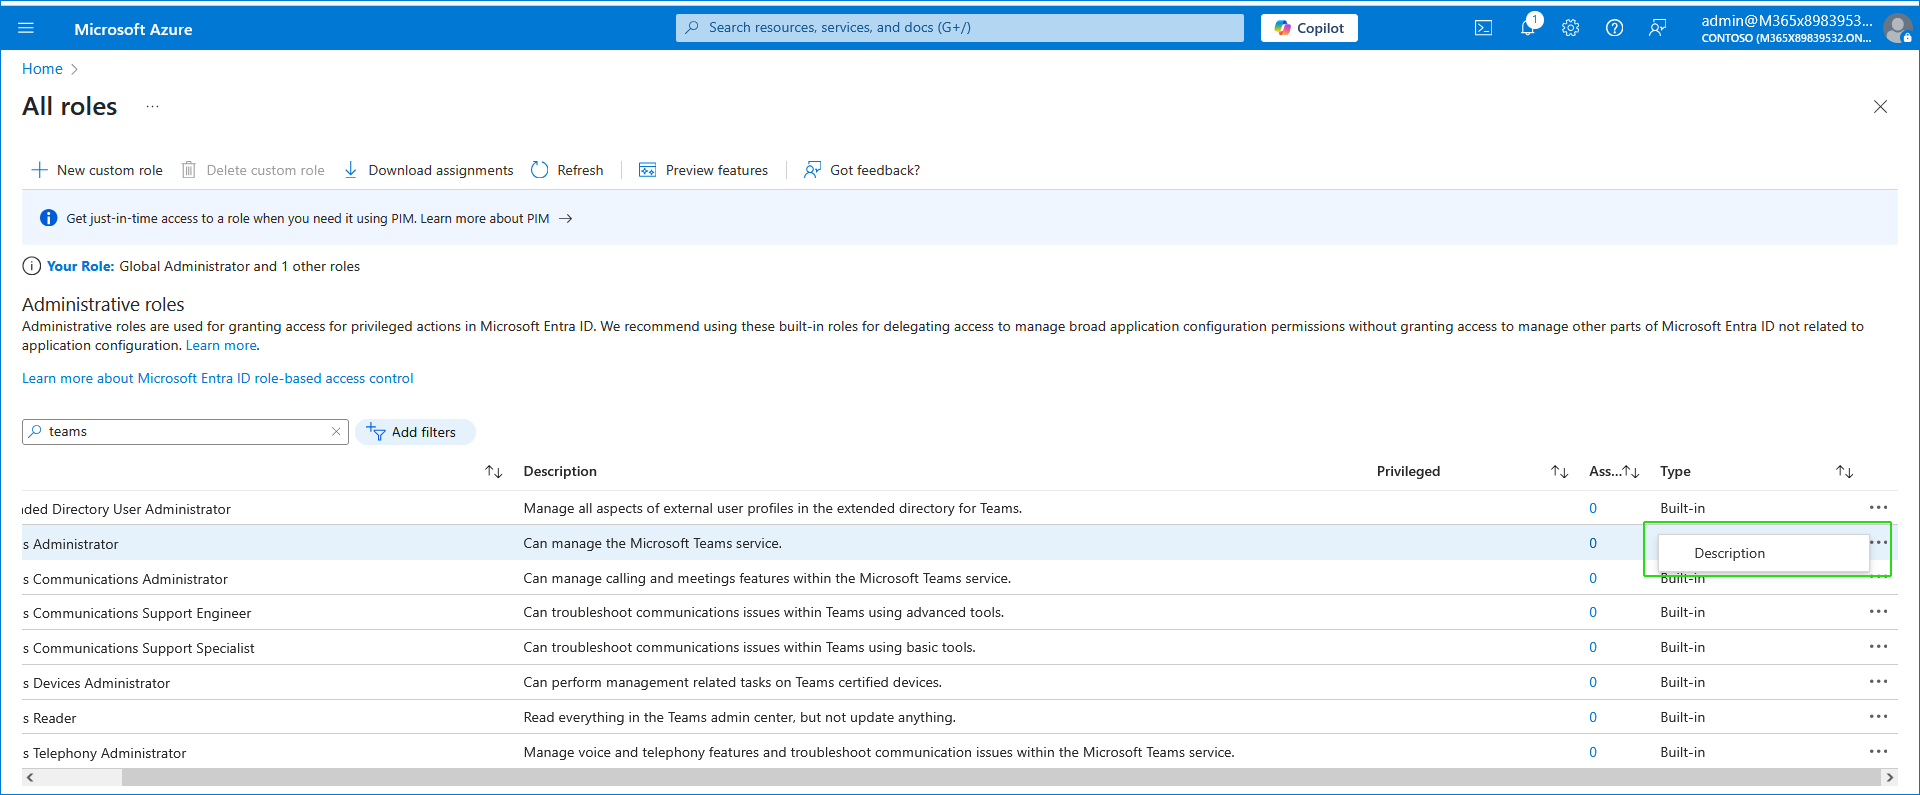
Scroll to the end of the line for the entry, right-click ...and then clickDescription. |
|
22.
|
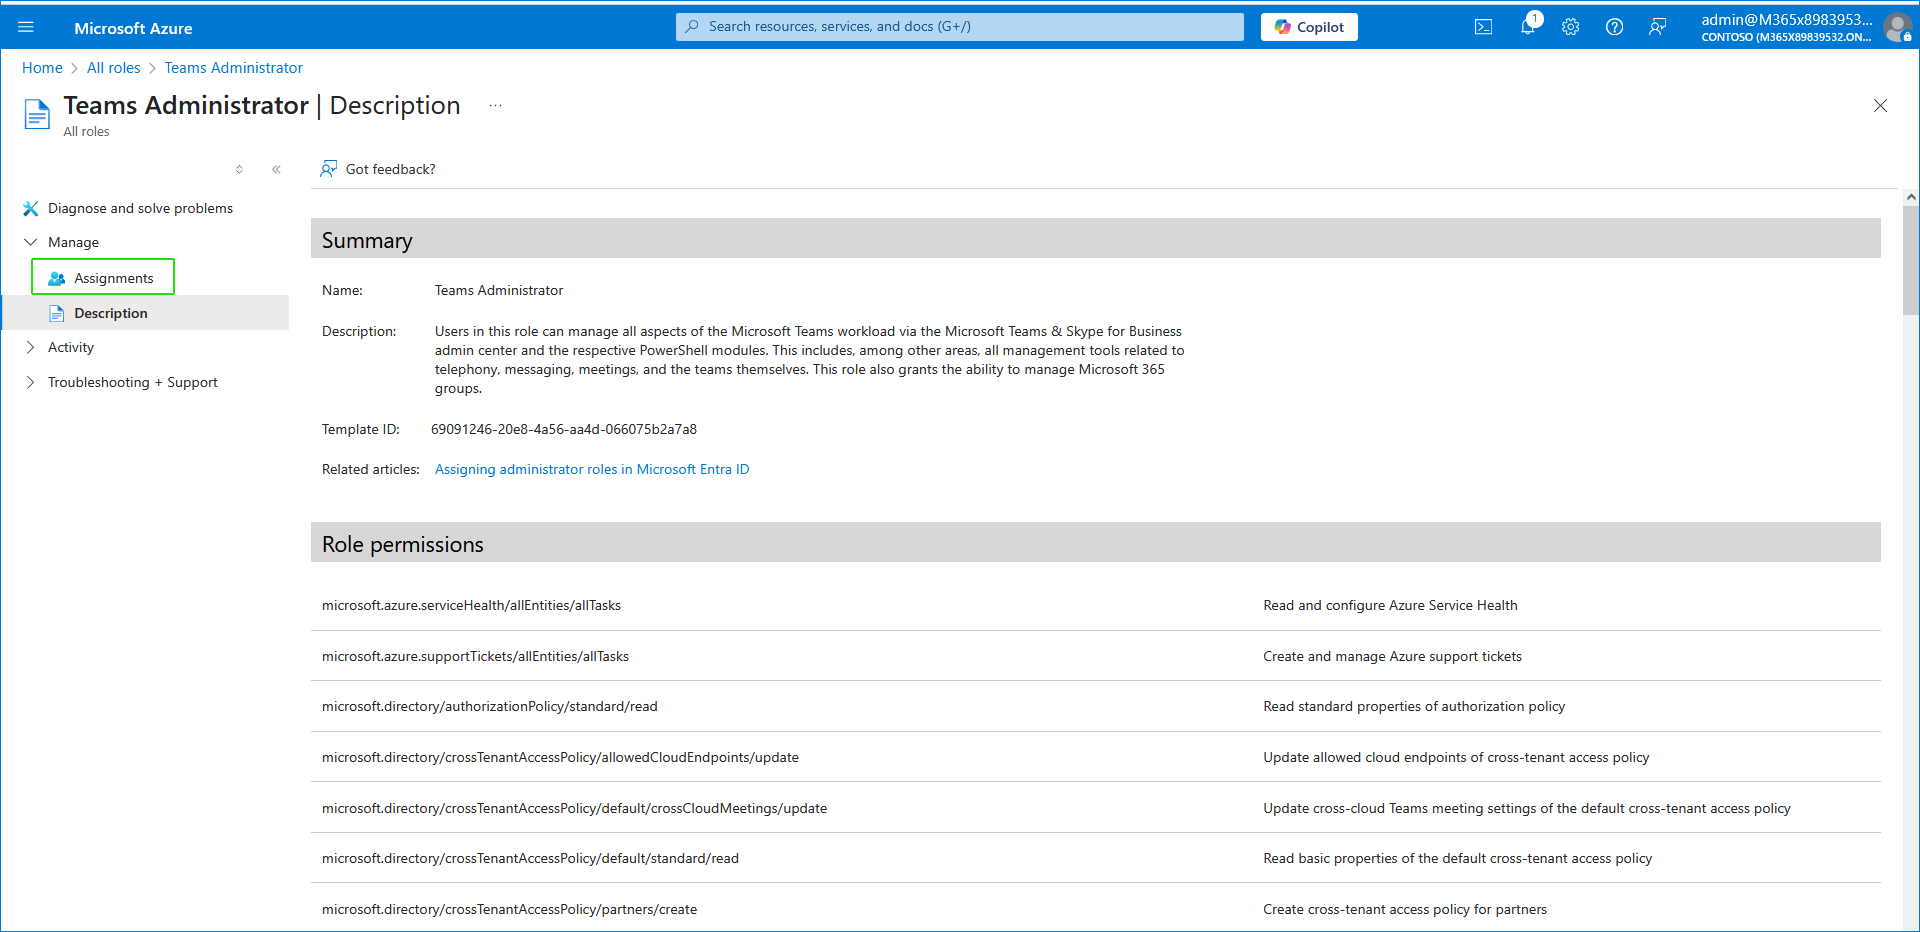
In the Navigation pane, click Assignments. |
|
23.
|
Click Add assignments. |

|
24.
|
Search for the name of the Application Registration that you created above, select it and then click Add. |
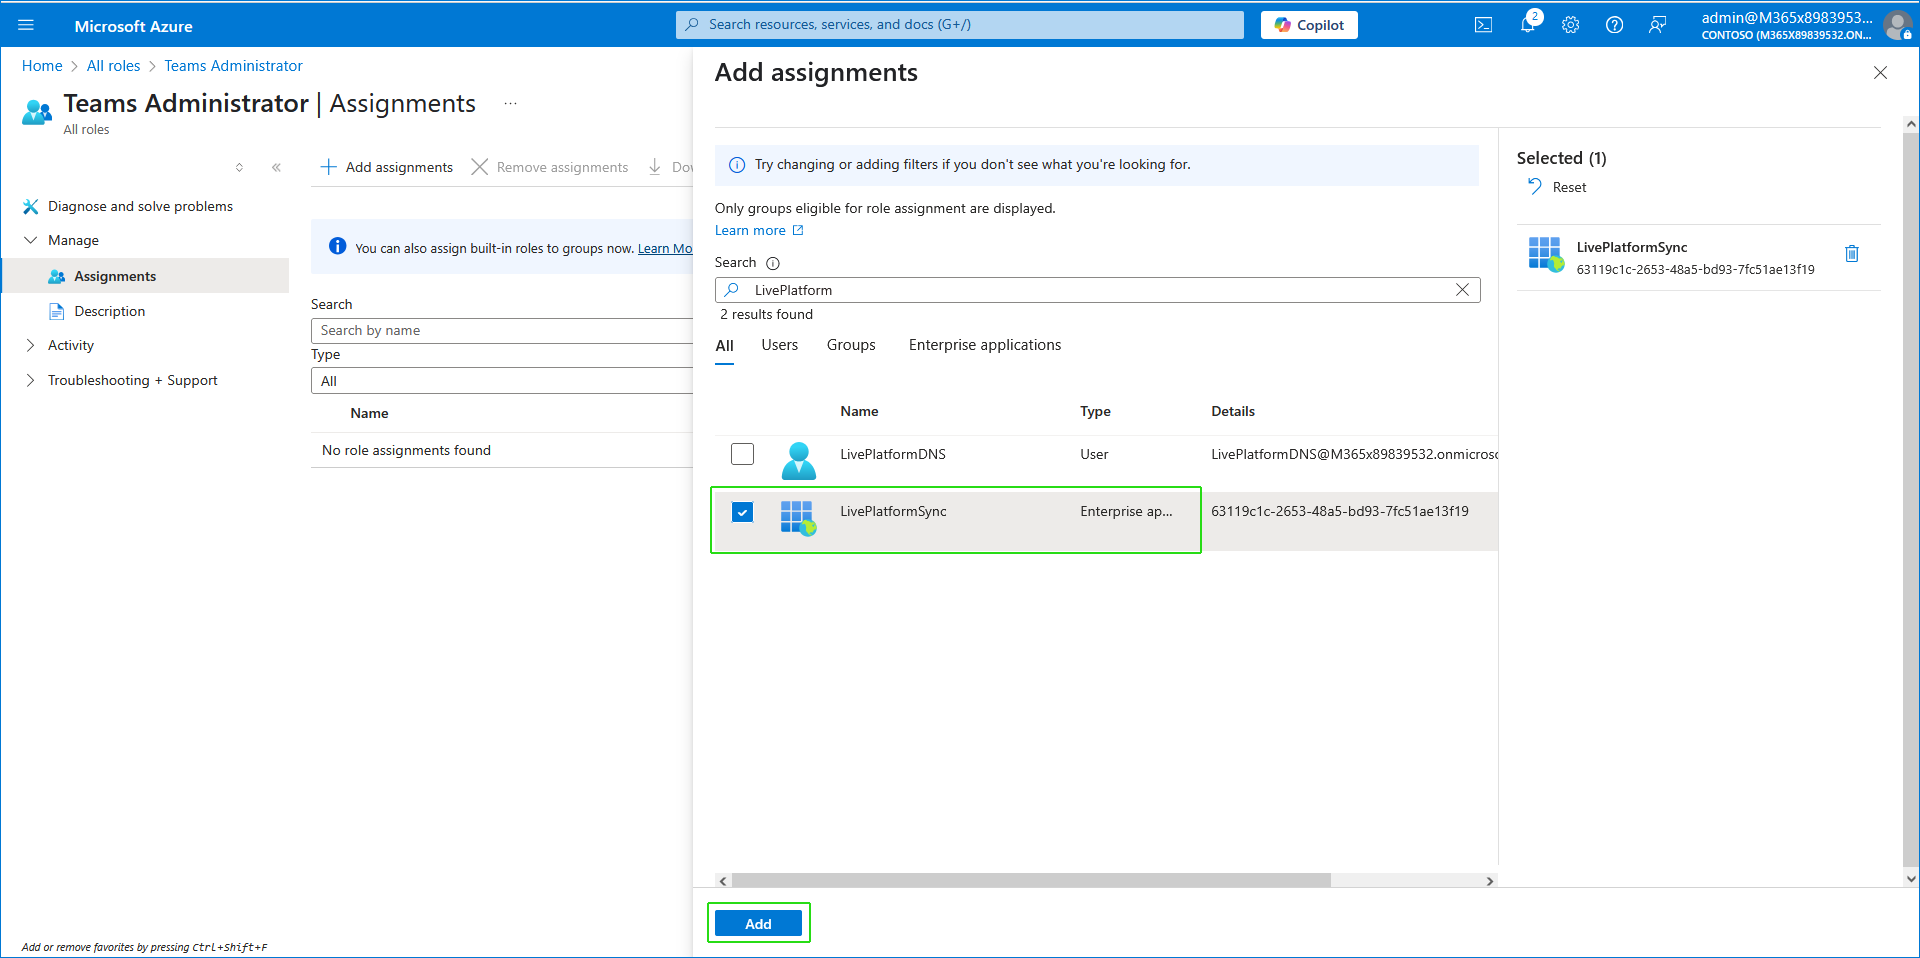
The new association is displayed.

|
25.
|
Repeat the above steps for each required role. |
|
26.
|
Proceed to Authenticate Manually Created App Registration. |


