Create App Registration Manually
This procedure describes how to manually add an App registration to secure the connection between the customer M365 tenant and Live Platform. Once the App registration has been successfully created, you need to assign it Microsoft Entra ID Administrator roles (see Assign Administrator Roles to the App Registration).
|
➢
|
To create the App registration: |
|
1.
|
Sign-in to Microsoft Entra ID with global Admin credentials for the M365 customer tenant. |
|
2.
|
Click View to the Microsoft Entra ID interface. |
|
3.
|
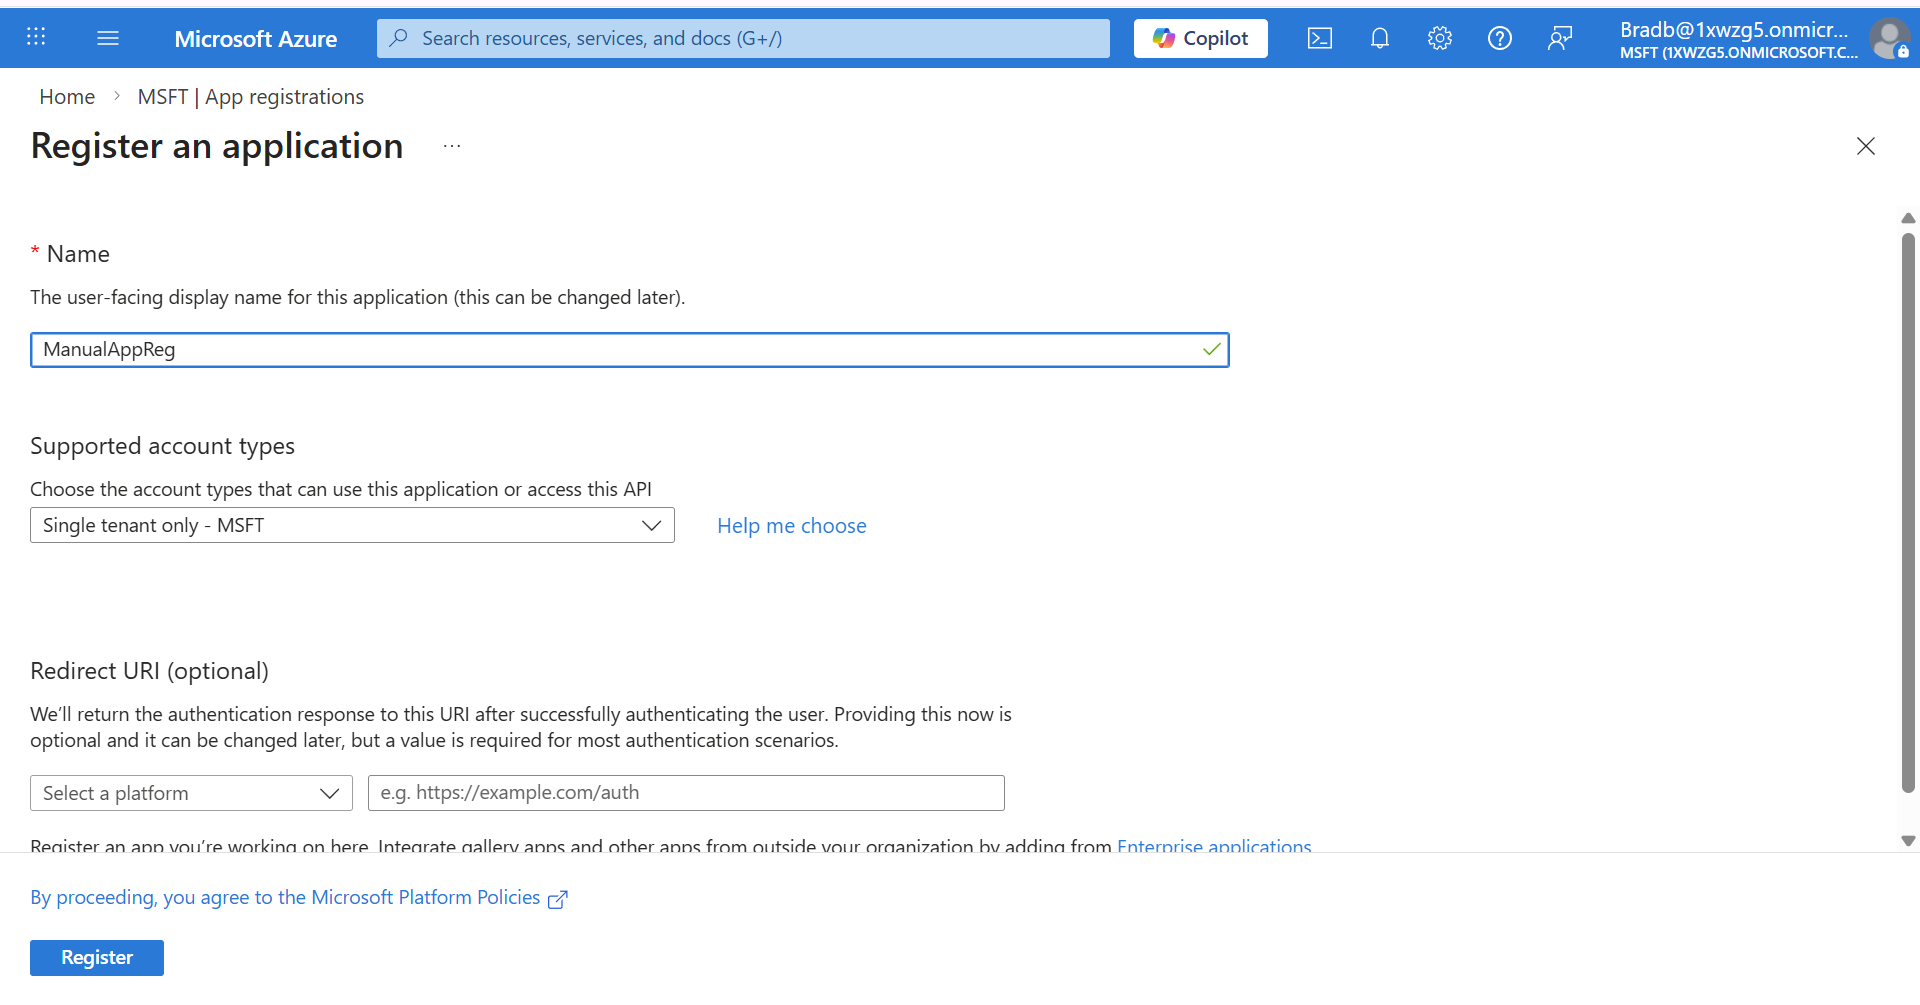
In the Navigation pane, select Manage > App registrations and then click New registration. |

|
4.
|
Enter the name of the application. |
|
5.
|
Select Single tenant only - MSFT). |

|
6.
|
Click Register. The new registration is displayed. |
|
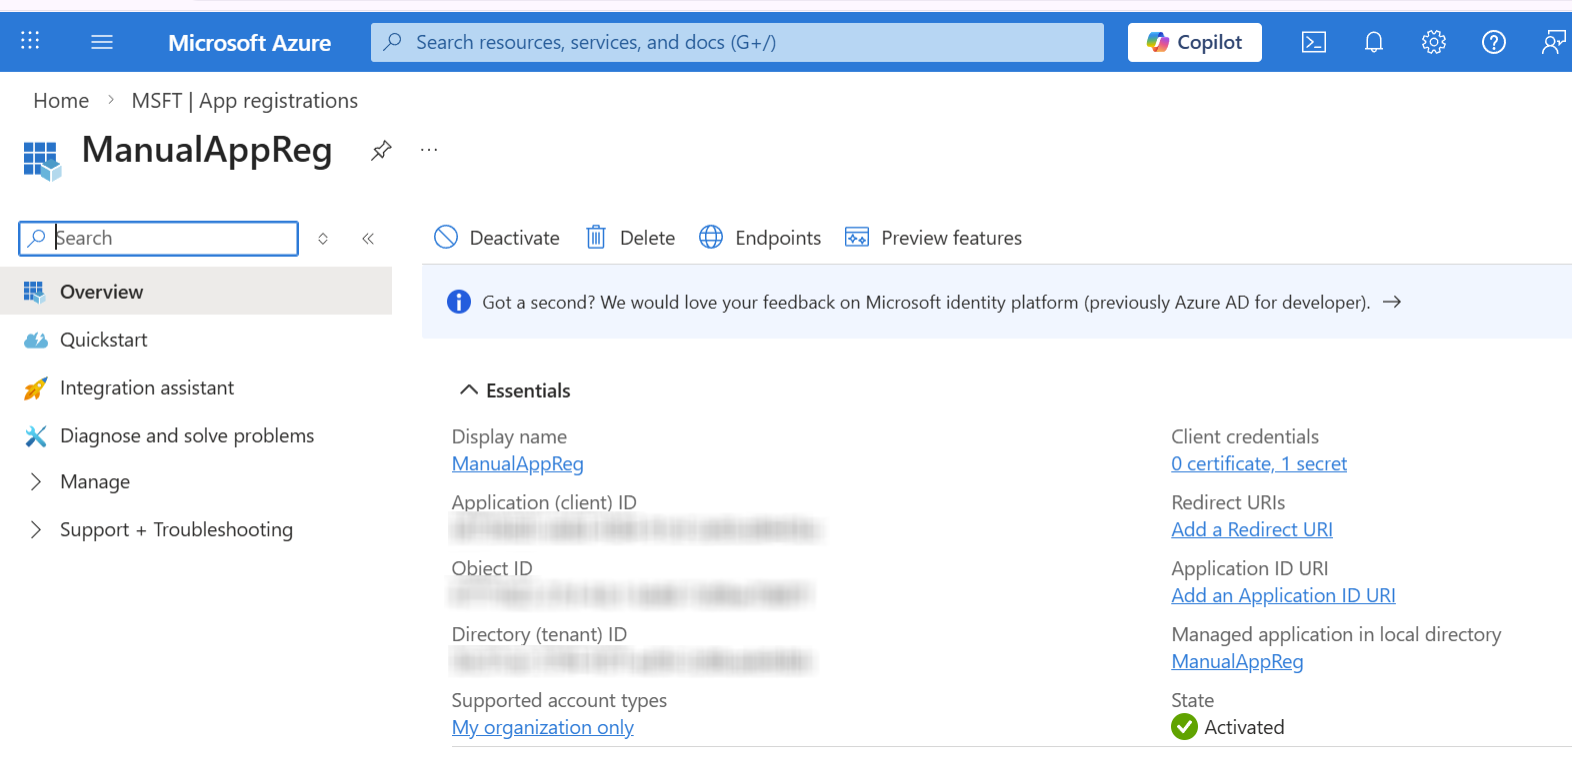
7.
|
Copy the Tenant ID and Application (client) ID value. |
|
8.
|
In the Navigation pane, select Manage > Certificate & secrets. |
|
9.
|
Click New client secret to add a new client secret. |

|
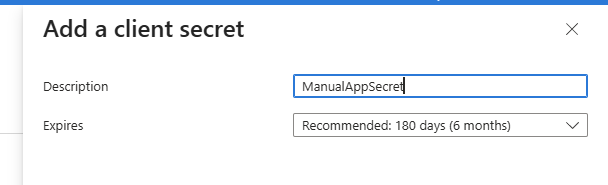
10.
|
Enter the Description for the secret and the Expires date (recommended 12 months) and then click Add. |
|
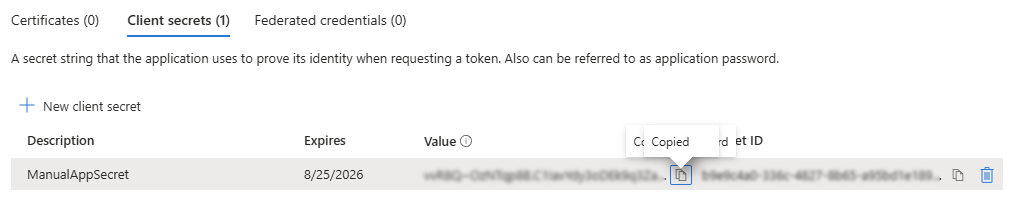
11.
|
Copy the value to clipboard as its required for later configuration in the Onboarding and Invitation wizards. |
|
●
|
Copy the value immediately to notepad as it hashed after a short time. |
|
●
|
If you use the Application registration to create additional services, a new secret should be created for each new service. |
|
12.
|
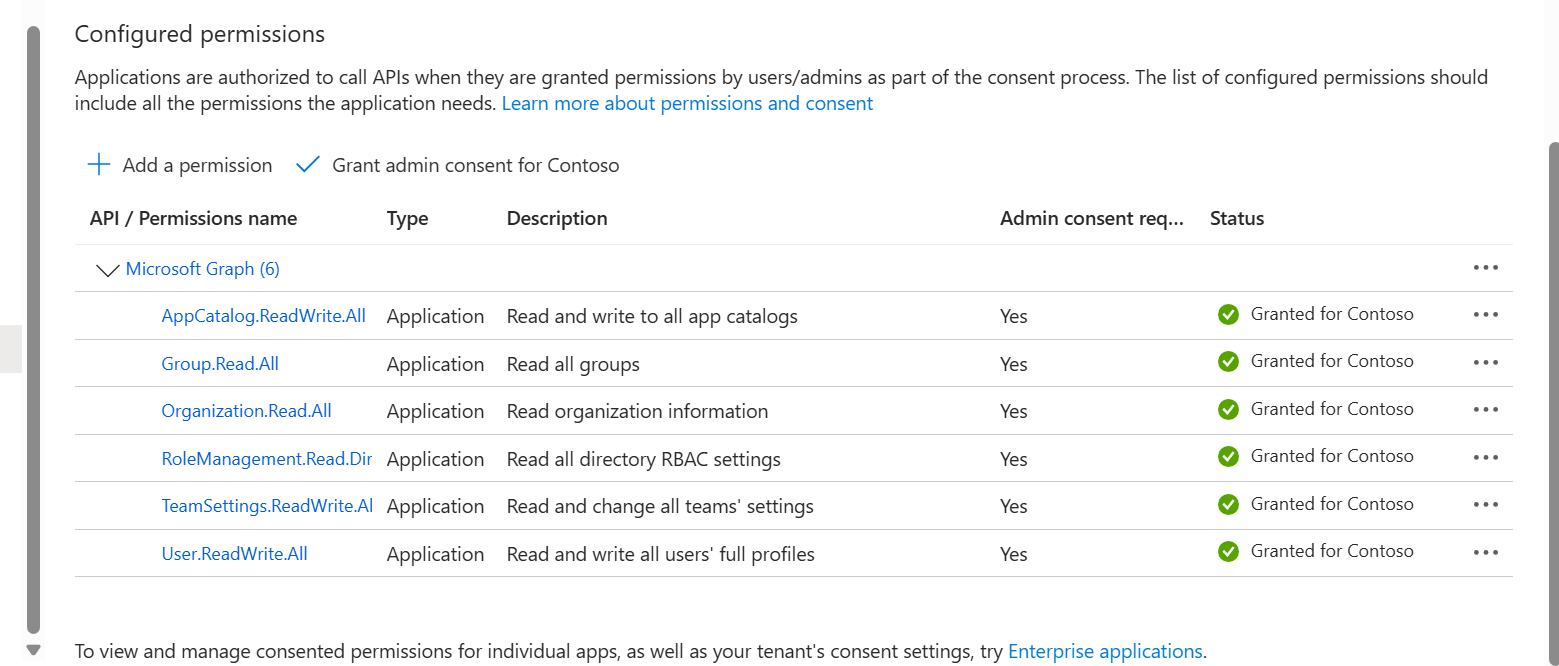
In the Navigation pane, select Manage > API permissions. |

|
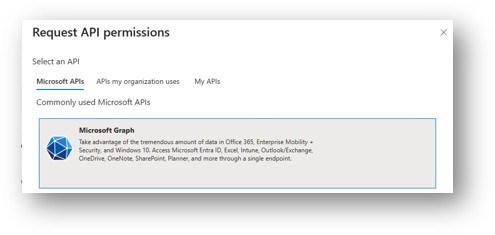
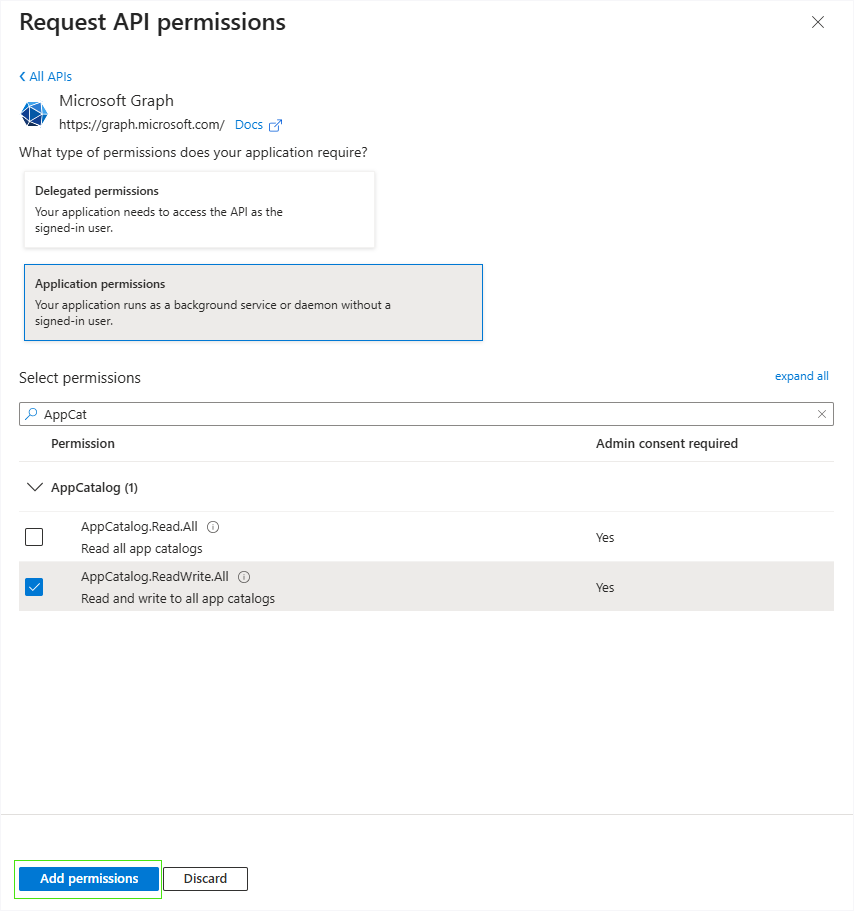
13.
|
Click + Add a permission and then select Microsoft Graph. |
|
14.
|
Select Application permissions. |
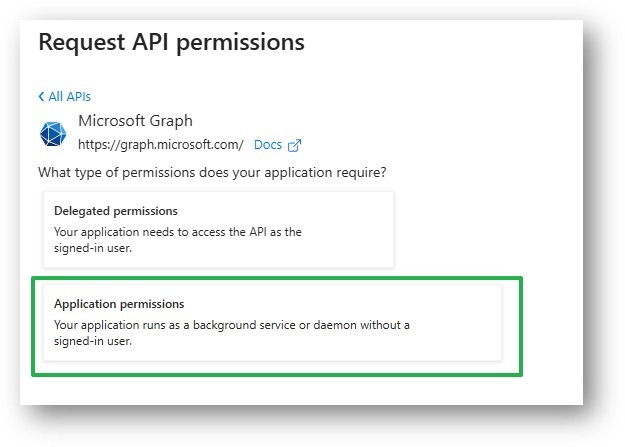
|
15.
|
Type AppCatalog, select AppCatalog.ReadWrite.All (Read and write to all app catalogs), and then click Add permissions. |
|
16.
|
At the following Application permissions following the steps shown above: |
|
●
|
Group.Read.All (Read all groups) |
|
●
|
Organization.Read.All (Read organization information) |
|
●
|
RoleManagement.Read.Directory
(Read all directory RBAC settings) |
|
●
|
TeamSettings.ReadWrite.All (Read and change all teams' settings) |
|
17.
|
Add the Delegated permission User.ReadWrite.All (Read and write all users' full profiles). |
|
18.
|
Grant admin consent for the new permissions. |
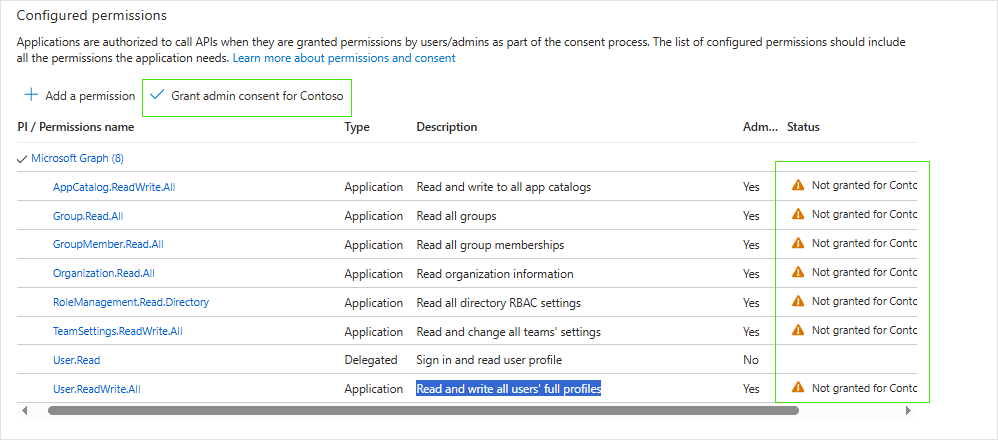

All permissions are granted.