Connecting T1/E1 Trunks using 68-Pin D-Sub Ports
|
●
|
This section is applicable only if you have ordered the device with support for up to 64 T1/E1 interfaces. |
|
●
|
Use only AudioCodes DB-68 to RJ-48 cable adapter for connecting the T1/E1 trunks. You need to order and purchase this cable separately from AudioCodes. The cable kit includes 4 sets of DB-68 to RJ-48 cable adapters, where each cable provides 16 RJ-48 male connectors. The kit also includes 4 patch panels (1U rack) with 16 ports each, which you can optionally use. |
The cable kit's ordering part number depends on the cable type:
|
✔
|
Straight-through: M3100-PATCH-PL-KIT-S |
|
✔
|
Crossover: M3100-PATCH-PL-KIT-C |
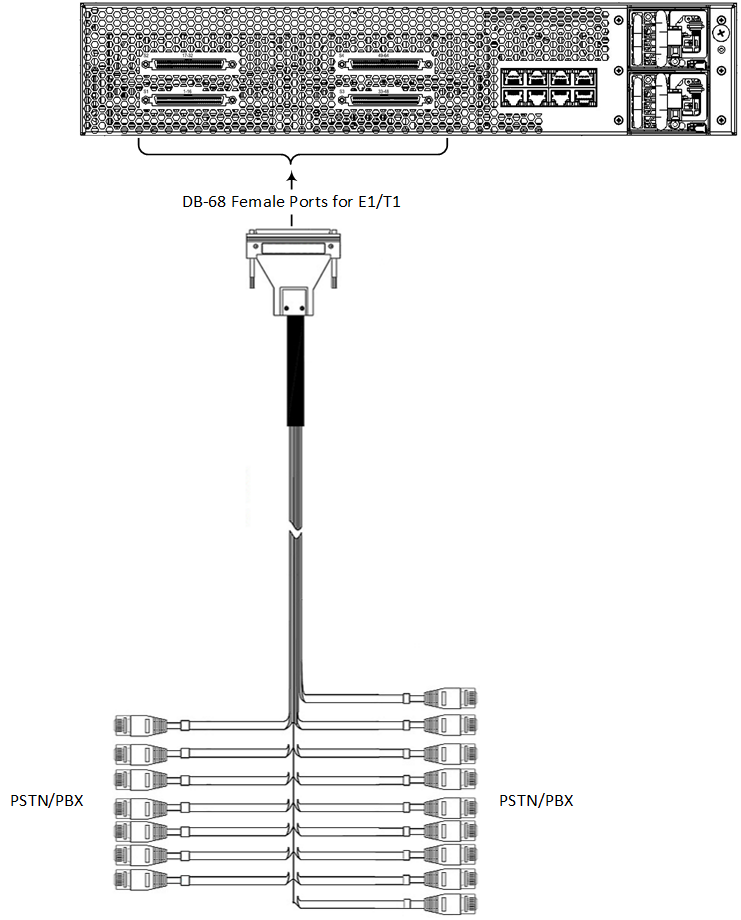
The device provides four DB-68 female ports on its rear panel for connecting T1/E1 trunks. Each DB-68 port provides connectivity to up to 16 T1/E1 trunks. Thus, the device can support up to 64 T1/E1 trunks.
The label on each DB-68 port indicates the slot number ("S") and trunk range:
|
■
|
S1: 1-16 - Slot 1, trunks 1 to 16 |
|
■
|
S2: 17-32 - Slot 2, trunks 17 to 32 |
|
■
|
S3: 33-48 - Slot 3, trunks 33 to 48 |
|
■
|
S4: 49-64 - Slot 4, trunks 49 to 64 |
The DB-68-to-RJ-48 cable adapter for connecting the trunks must be ordered separately from AudioCodes (see note above):
|
■
|
Cable: 26 AWG (100 to 120 Ohm) |
|
■
|
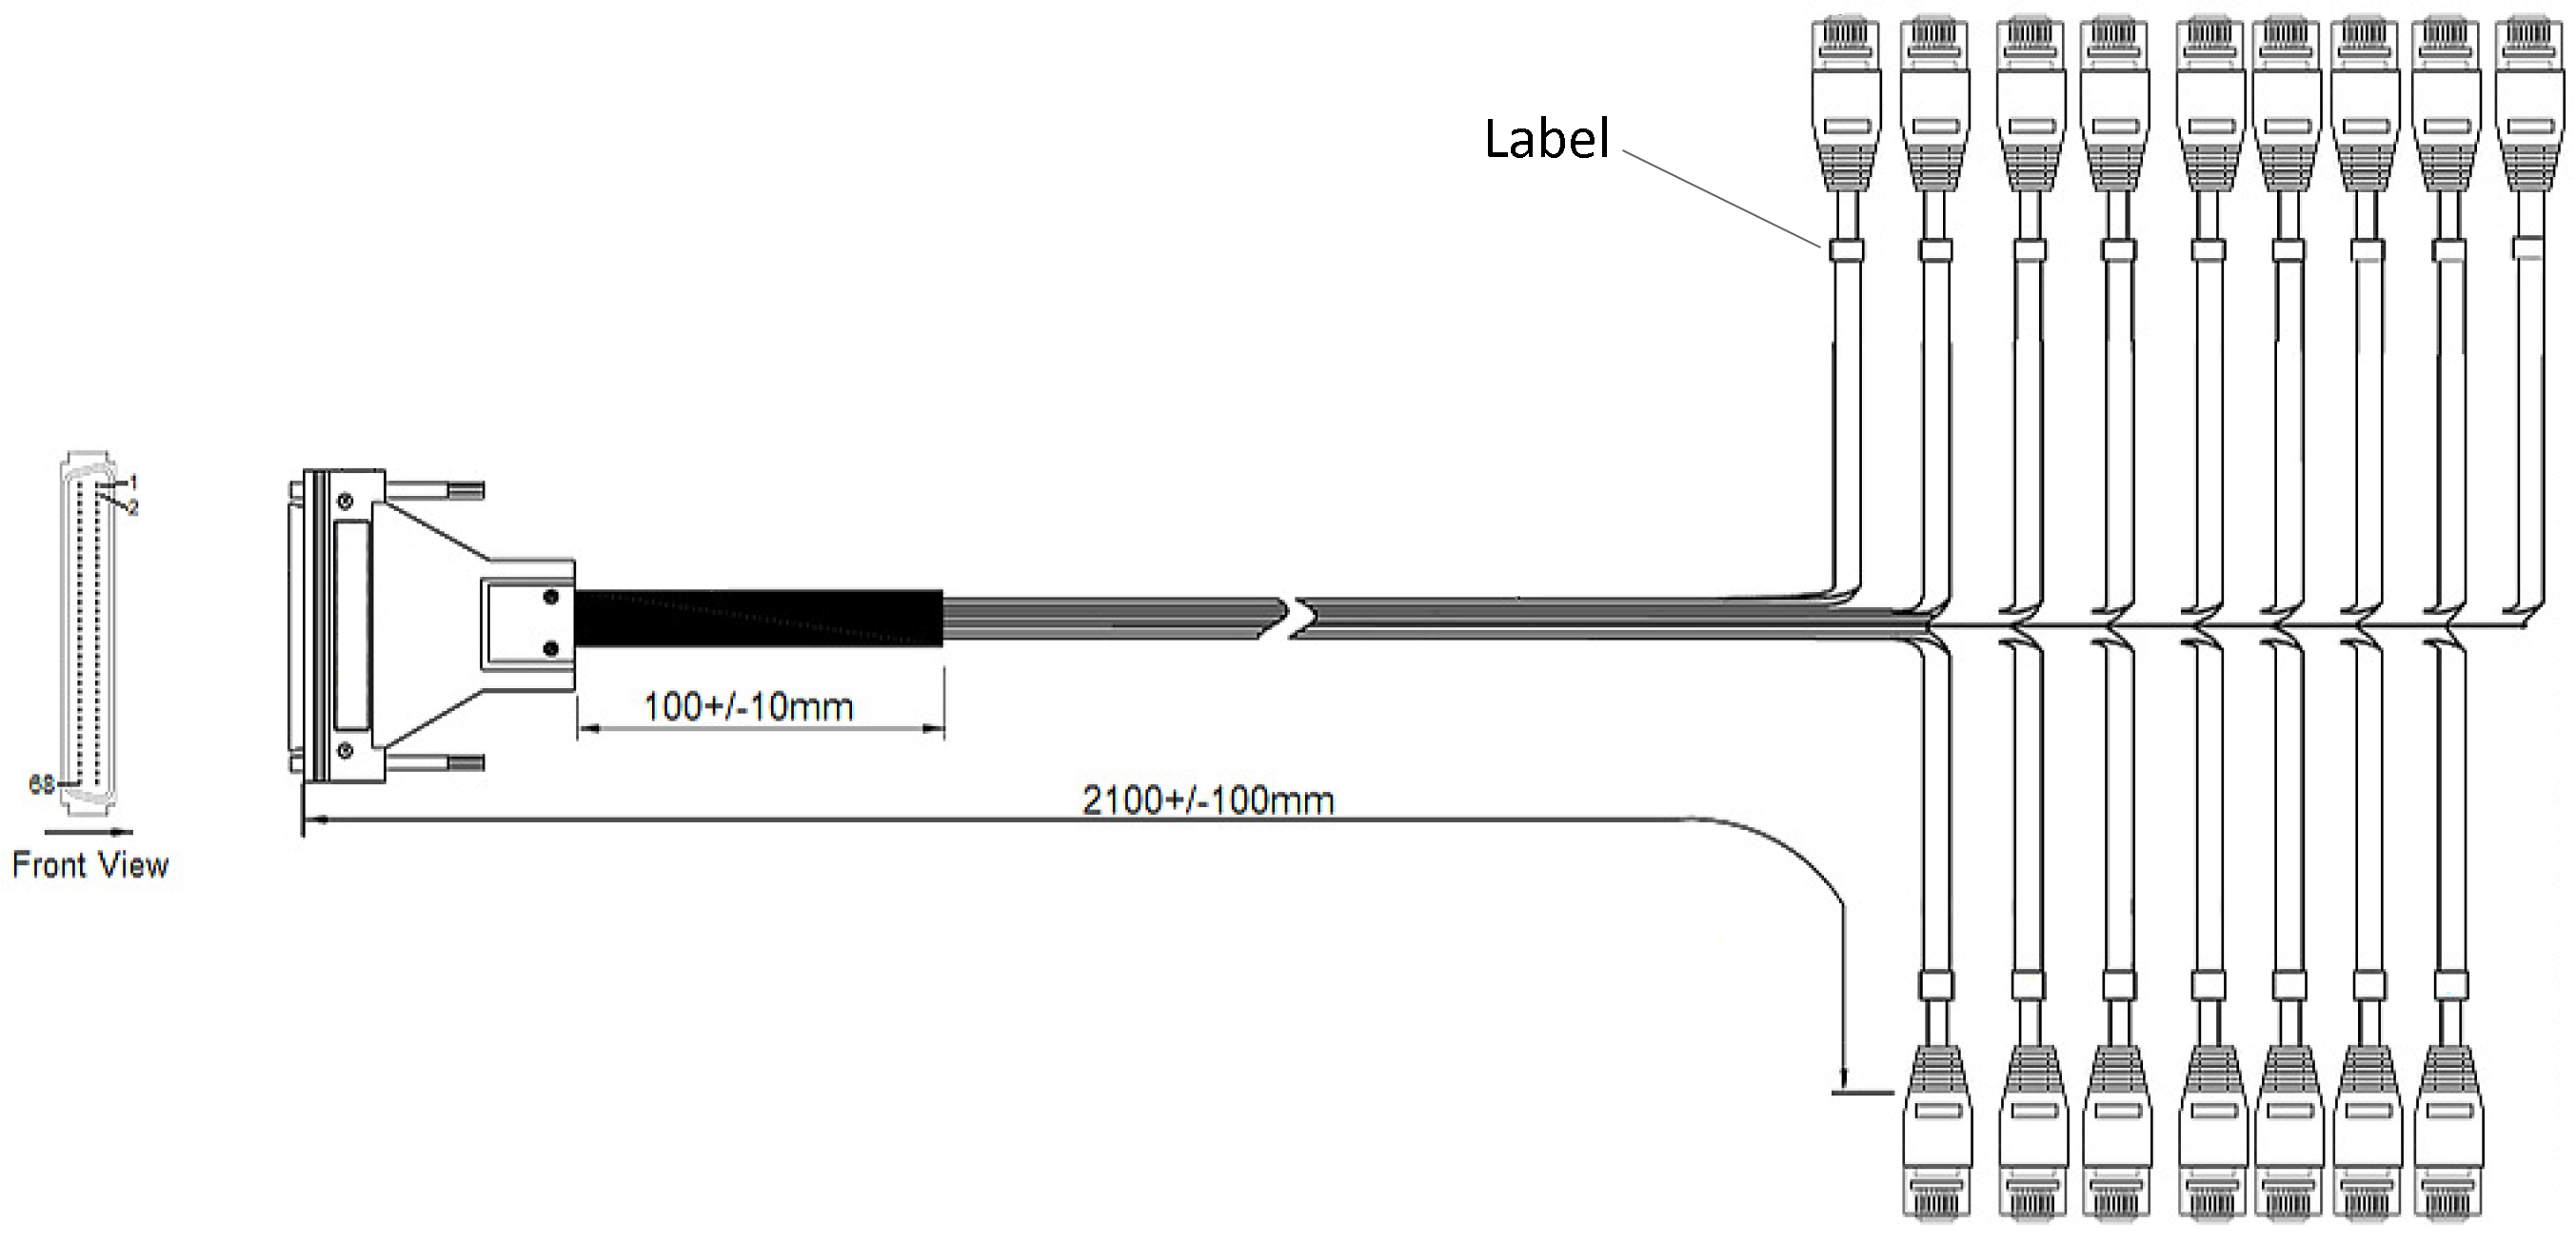
Connector Type: 68-pin D-sub male, 16 RJ-48 male: |
DB-68-to-RJ-48 Cable Adapter (Ordered from AudioCodes)
|
●
|
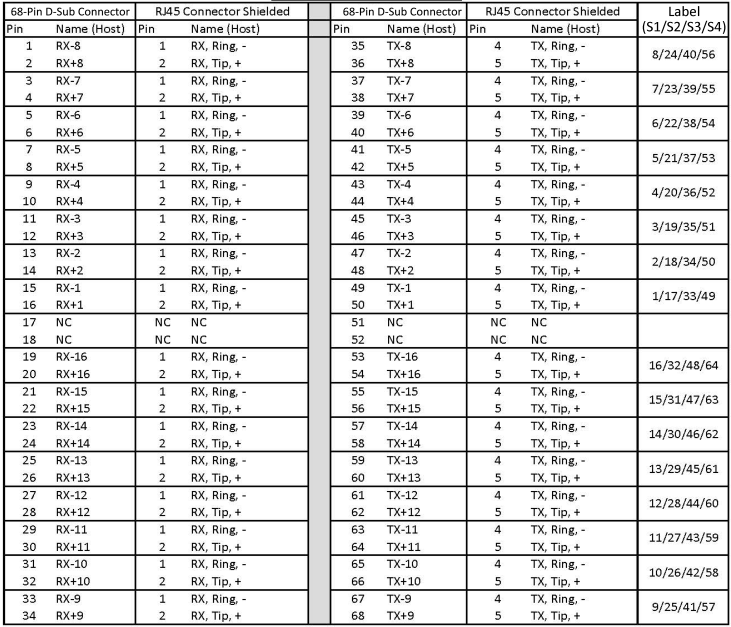
Straight-through cable:
|
Connector Pinouts for DB-68 to RJ-48 Straight-Through Cable Adapter (Ordered from AudioCodes)
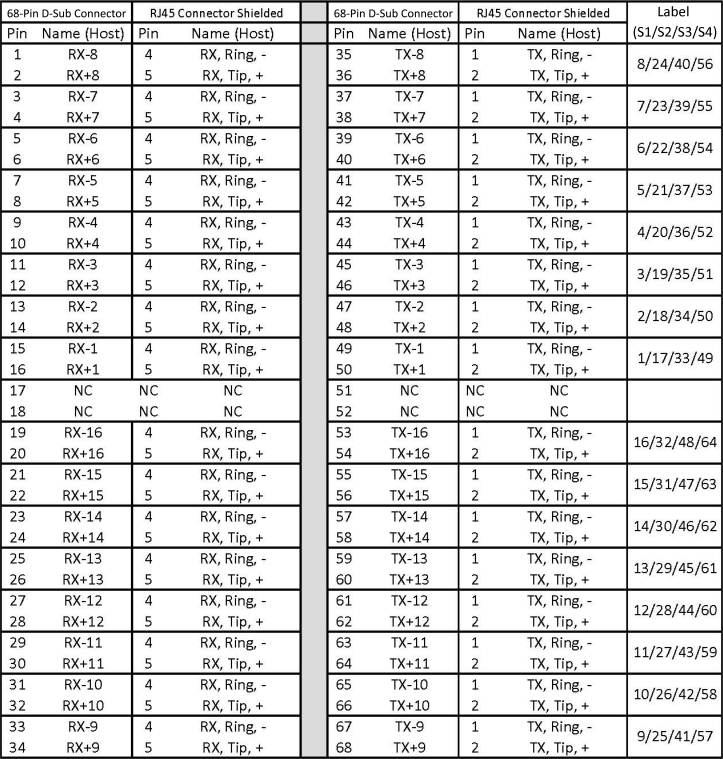
Connector Pinouts for DB-68 to RJ-48 Crossover Cable Adapter (Ordered from AudioCodes)
|
➢
|
To connect T1/E1 trunks using DB-68 ports: |
|
1.
|
Connect the DB-68 male connector to one of the T1/E1 slots (S1, S2, S3 or S4) on the rear panel. |
Connecting T1/E1 Interfaces
|
2.
|
If you are using AudioCodes patch panels (otherwise, skip to Step 3): |
|
a.
|
Mount the patch panels in the 19-inch rack, using the integrated mounting brackets on
either side of the patch panel (screws not included). Mount the patch panels close enough to the device so that the RJ-48 connectors can reach the panel. |
|
b.
|
Connect the RJ-48 connectors that are located on the other end of the DB-68 to RJ-48 cable adapter to the respective ports on the rear of the patch panel. The front of the patch panel shows the port numbers (1 to 16, 17 to 32, 33 to 48, and 49 to 64). |
|
c.
|
Connect the ports on the front of the patch panel (shown below) to your PBX/PSTN, using RJ-48 cable connectors. |

|
3.
|
If you're not using AudioCodes patch panels, connect the RJ-48 connectors on the other end of the DB-68 to RJ-48 cable adapter to your PBX/PSTN. |
|
4.
|
Repeat steps 1 through 3 for each DB-68 connector. |