Assigning Rows from Other Tables
Some tables contain parameters whose value is an assigned row (referenced-row) from another table (referenced-table). For example, the IP Groups table contains the 'Proxy Set' parameter whose value is an assigned Proxy Set, configured in the Proxy Sets table. These parameter types provide a drop-down list for selecting the value and a View button, as shown in the example below:

You can assign a referenced-row using one of the following methods:
|
■
|
Selecting a referenced-row from the drop-down list:
|
|
●
|
Scroll down to the desired item and click it. |
|
●
|
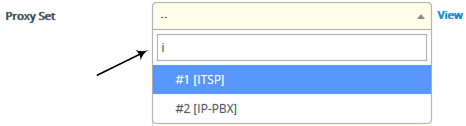
Search for the item by entering in the field the first few characters of the desired row, and then clicking it. The figure below shows an example of searched results for items (Proxy Sets) that begin with the letter "i": |
|
■
|
Selecting an existing referenced-row directly from the referenced-table:
|
|
a.
|
Click View; the table (e.g., IP Groups table) and dialog box in which the button was clicked is minimized to the bottom-left corner of the Web interface and the referenced-table (e.g., Proxy Sets table) opens. |
|
b.
|
Add a new row, if required; otherwise, skip this step. |
|
c.
|
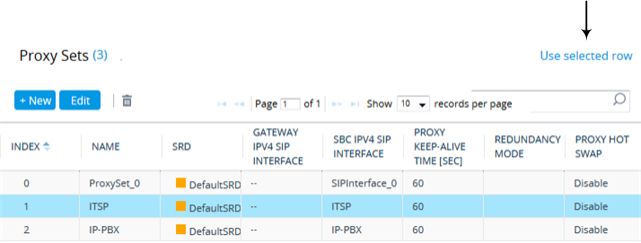
Select the desired row in the row-referenced table, and then click Use selected row located on the top-right of the table, as shown in the example below: |
|
■
|
Adding a new referenced-row:
|
|
a.
|
From the drop-down list, select the Add new option; as shown in the example below: |
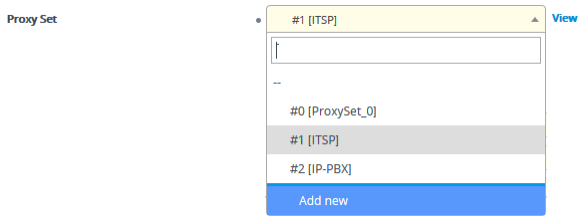
The table (e.g., IP Groups table) and dialog box in which the Add new option was selected is minimized to the bottom-left corner of the Web interface and a dialog box appears for adding a new row in the referenced-table (e.g., Proxy Sets table).
|
b.
|
Configure the referenced-row and click Apply; the referenced-table (e.g., Proxy Sets table) closes and you are returned to the dialog box in which you selected the Add new option (e.g., IP Groups table), where the newly added row now appears selected. |
You may want to access the referenced-table (e.g., Proxy Sets table) to simply view all its configured rows and their settings, without selecting one. To do this, click the View button. To return to the dialog box of the table (e.g., IP Groups table) in which you are making your configuration, click the arrow  icon on the minimized dialog box to restore it to its previous size.