Adding Email Interactions
The procedure below describes how to add Email Interaction settings.
|
➢
|
To add email Interaction Settings: |
|
1.
|
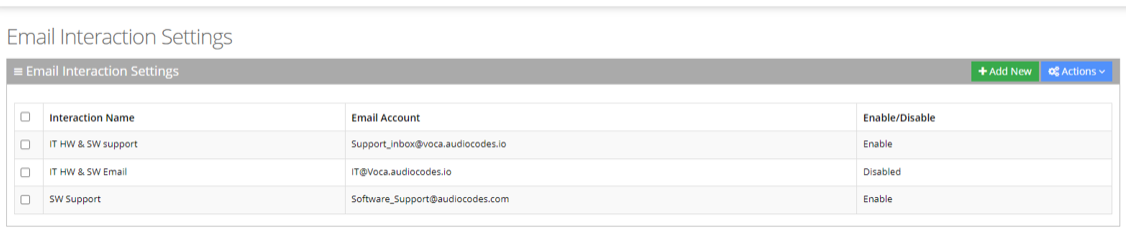
Open the Email Settings page (Configuration > Interaction Manager > Email); the following appears: |
|
2.
|
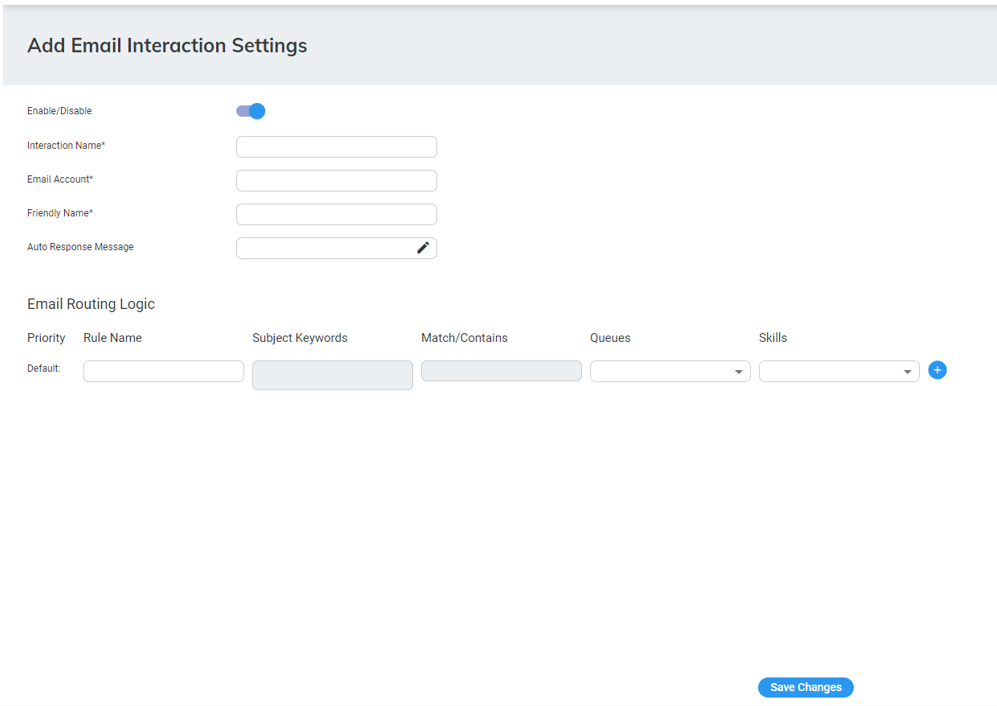
Click Add New; the following appears: |
|
3.
|
Click the 'Enable/ Disable' toggle button to enable the pulling of emails from the configured email account into Voca. |
|
4.
|
In the 'Interaction Name' field, type the name of the interaction. |
|
5.
|
In the 'Email Account' field, type the email address that is used for this interaction to receive and send emails. |
|
6.
|
In the 'Friendly Name' field, define the identification name of the sender, which is displayed in an email client. |
|
7.
|
In the 'Auto Response Message' field, type the message that is automatically sent to the customer when they send an email. |
|
8.
|
The Email Routing Logic section configures rules that connect commonly used phrases sent to the email account with queues and skills: |
|
a.
|
In the 'Priority' field, order routing logics by drag and drop to define which matches are checked first. |
|
b.
|
In the 'Subject Keywords’ field, type commonly used phrases (one or more) that should be routed to the same queues and skills. |
Press Enter in the text field for each phrase to save the entry.
|
c.
|
In the 'Match/Contains' drop-down list, select whether matches are based on exact or contains method. |
|
◆
|
Exact Match: a partial phrase is not considered a match. |
|
◆
|
Contains: a partial phrase is considered a match. |
|
a.
|
In the 'Queues' drop-down list, select the queue to where you want the email routed. |
|
b.
|
In the 'Skills' drop-down list, select the skills that the Worker should have to receive the email. |
|
10.
|
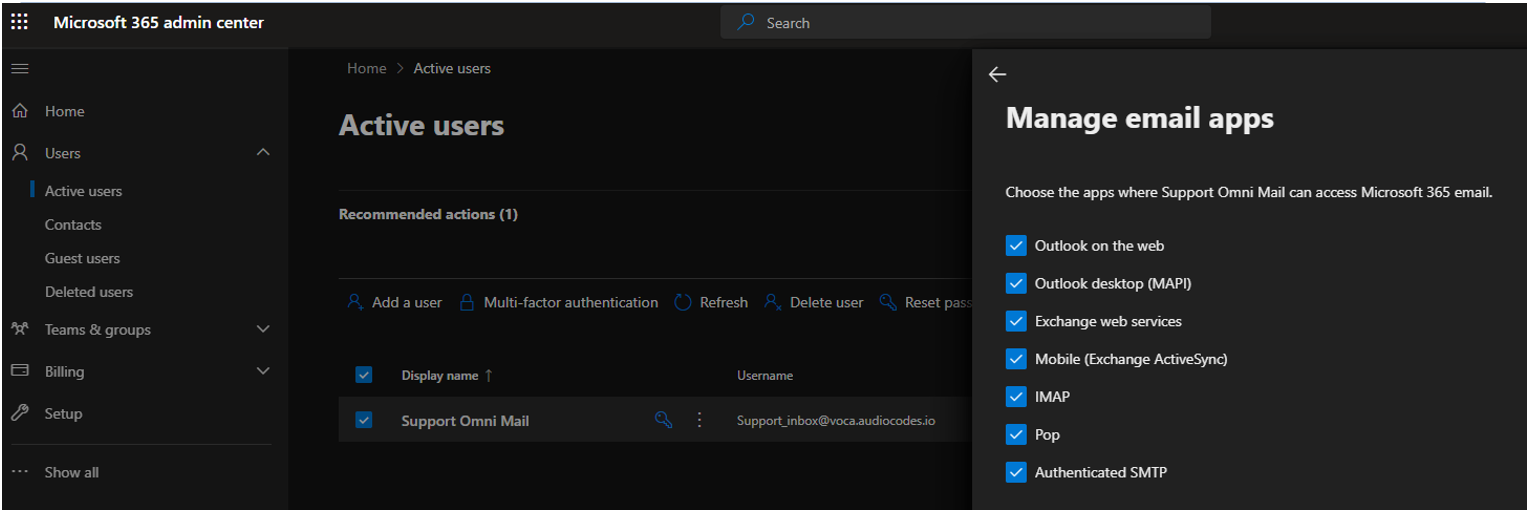
After configuring the 'Omnichannel' email server integration on the System Setting page (see Omnichannel Email Configuration), configure the following PowerShell commands on the customer’s Azure tenant to enable email interaction with a specific email mailbox: |
Connect-ExchangeOnline -Organization
The following command is a one-time configuration; there is no need to configure it again if it has been configured before:
New-ServicePrincipal -AppId <Voca Email Access Application ID> -ObjectId <Voca Email Access Object ID>
Add the following command for each new mailbox interaction:
Add-MailboxPermission -Identity “Support_inbox@voca.audiocodes.io" -User <Voca Email Access Object ID> -AccessRights FullAccess
After applying the above command on the email mailbox make sure that this mailbox has the 'Authenticated SMTP' check box selected from the Admin Center page in your Azure: