Adding a Webchat Interaction Settings
The procedure below describes how to add a Webchat Interaction Setting. Adding a webchat interaction setting includes the following three parts:
|
➢
|
To add a Webchat Interaction Settings: |
|
1.
|
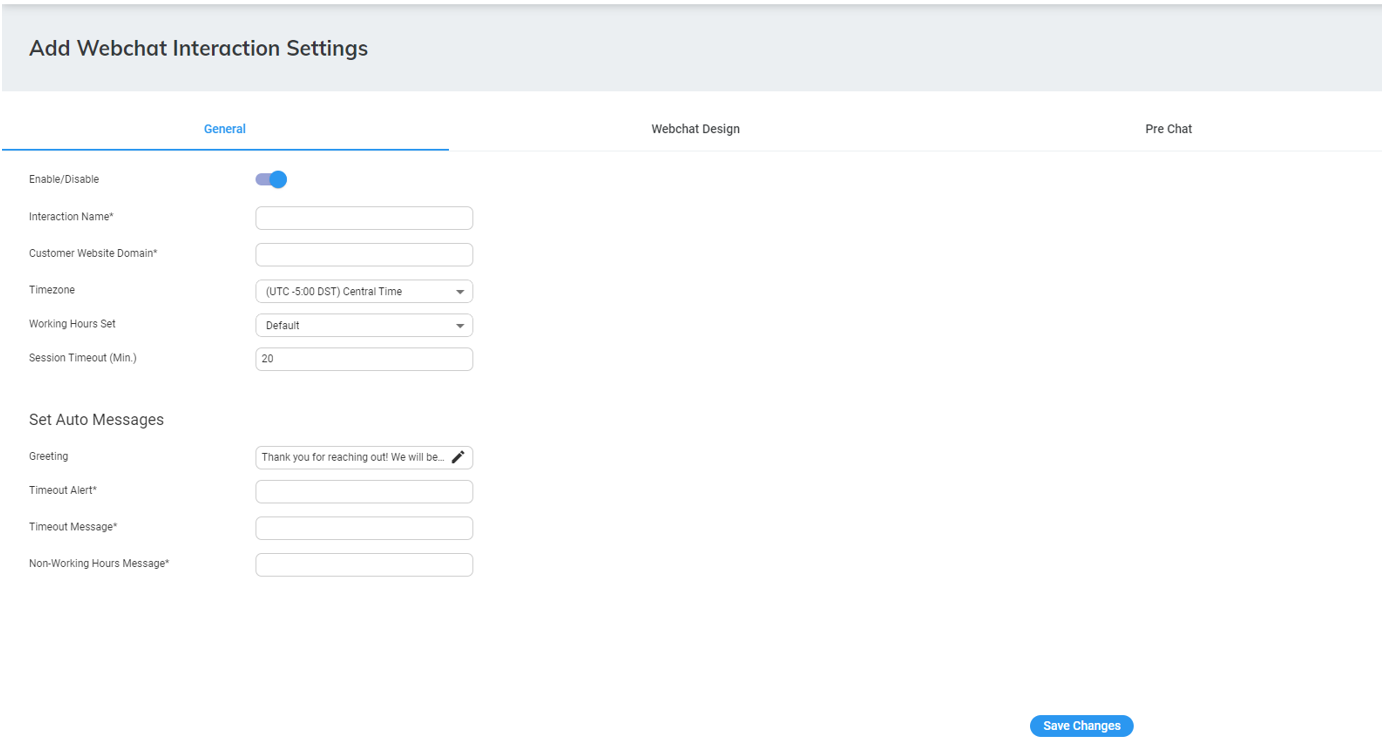
Open the Webchat Settings page (Configuration > Interaction Manager > Webchat); the following appears: |

|
2.
|
Click Add New; The following appears, with the General tab displayed by default: |
|
3.
|
Under the General tab, do the following: |
|
a.
|
Click the ‘Enable/ Disable’ toggle switch to enable the display of the webchat on the website. |
|
b.
|
In the ‘Interaction Name’ field, type the name of the interaction. |
|
c.
|
In the ‘Customer Website Domain’ field, type the domain of the website to connect with the webchat's widget. |
|
d.
|
From the 'Timezone' drop-down list, select the timezone associated with the webchat interaction. When interacting with this webchat, working hours, holidays and events are checked based on the timezone. |
|
e.
|
From the ‘Working Hours Set’ drop-down list, select a working hour set to define the working / non-working days and time for the webchat interaction. |
|
f.
|
In the ‘Session Timeout (Min.)’ field, define the time that a customer must respond to an agent before the session is automatically closed. |
|
g.
|
Under the Set Auto Messages group, define automatic messages for different scenarios: |
|
◆
|
'Greeting' field: Greet the customer when starting a new conversation. |
|
◆
|
'Timeout Alert': Notify the customer that the session is about to be closed because no response has been received. |
|
◆
|
'Timeout Message': Notify the customer that the session has been closed because of inactivity. |
|
◆
|
'Non-Working Hours Message': Notify the customer that the chat is currently unavailable because it's outside of working hours. |
|
4.
|
Select the Webchat Design tab; the following appears: |

|
5.
|
Define the widget's appearance: |
|
a.
|
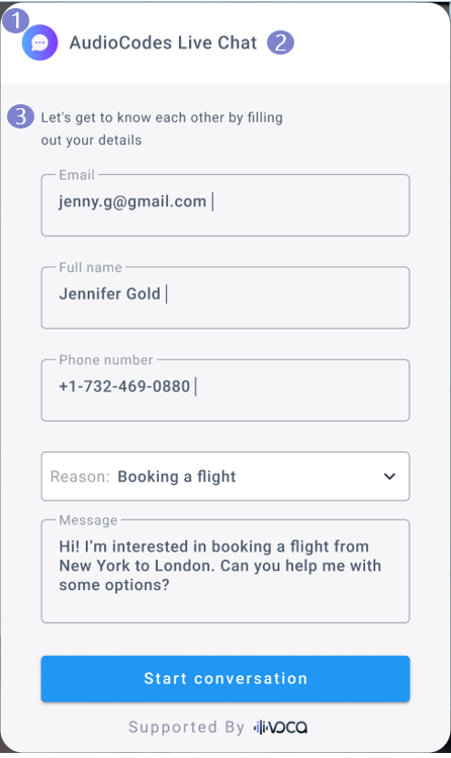
In the ‘Customer Logo’ field, click Choose File and then upload your organization logo (see item #1 in the example figure below). |
|
b.
|
In the ‘Website Name’ field, type the name of the website (see item #2 in the example figure below). |
|
c.
|
In the ‘Welcome Headline’ field, type a short webchat introduction (see item #3 in the example figure below). |
|
d.
|
Click the ‘Widget color’ button, and then pick a widget color. |
|
e.
|
From the ‘Widget Position’ drop-down list, choose the widget’s position. |
|
6.
|
Select the Pre Chat tab; the following appears: |

|
7.
|
Under the Pre Chat Form group, define the information customers should provide before starting a new conversation. Data can be viewed by an agent during the chat and in the conversation history: |
|
a.
|
In the ‘Field Name’ field, type a name for the field, which is displayed to the customer. |
|
b.
|
From the ‘Field Type’ drop-down list, select the type of input that the system expects to receive. |
|
c.
|
Click the ‘Required’ toggle button to turn on the field as mandatory. |
|
d.
|
Click the ‘Visible’ toggle button to turn on the display of the field on the widget, or turn off the toggle button to hide the field so that data is automatically pulled from signed-in users. |
Implementing data extraction from hidden fields should be configured by the administrator within the provided code script.
|
e.
|
Add a new field, by clicking  . . |
|
8.
|
Under the Contact Reasons group, define a set of contact reasons and assign them to the relevant queues and skills: |
|
a.
|
In the ‘Reason’ field, type a possible contact reason that is visible for the customer. |
|
b.
|
From the ‘Queue Name’ drop-down list, select the queue to which the email is routed. |
|
c.
|
From the ‘Skills’ drop-down list, select the relevant skills that the Worker should have to receive the email. |
|
d.
|
To add additional Main Contact Reasons, click the Add new reason button. |
|
e.
|
To delete a Main Contact Reason, click the ellipsis (...) button corresponding to the reason, and then from the drop-down menu, choose Delete. |
|
f.
|
To add a sub-reason to a Main Contact Reason, click the ellipsis (...) button corresponding to the reason, , and then from the drop-down menu, choose Add New. |
|
g.
|
You can add sub-reasons to sub reasons. |