Adding Meeting Recap in Teams Meeting
Once you have added the Meeting Insights optimized-for-meetings app  icon to your joined meeting, as described in Adding Meeting Insights Tab to Teams Meeting Window, you can start adding meeting recap items (summary, decisions, action items, and notes) in the Meeting Insights side panel of the Teams meeting window.
You can add recap items using any of the following methods:
|
■
|
Using the text box to type the recap text. |
|
●
|
The Owner of the meeting recording can add all recap types; participants can add only notes. |
|
●
|
Only one summary can be added per meeting recording. |
|
●
|
Action items, decisions and the summary are always public and therefore, visible to everyone that has access to the meeting recording. You can make notes private or public. |
|
➢
|
To add a meeting recap: |
|
1.
|
To add a recap using microphone:
|
|
a.
|
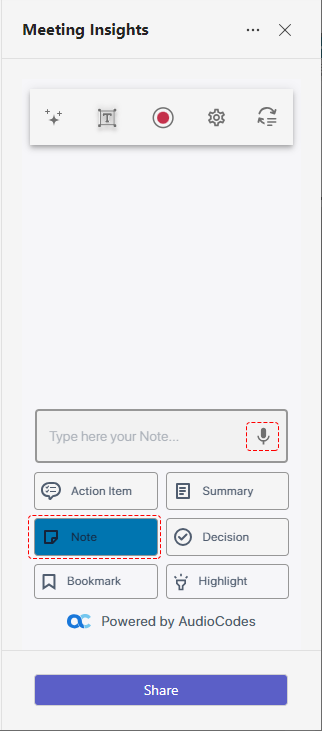
In the Meeting Insights side panel, click the required recap type button - Action Item, Note, Summary, or Decision: |
|
b.
|
Click the microphone  icon, and then record your voice for the recap. icon, and then record your voice for the recap. |
|
c.
|
When you want to end your recap, click the stop recording  icon. icon. |
|
i.
|
In the Meeting Insights side panel, click the Summary button. |
|
ii.
|
In the text box, type the summary, and then click  . . |
|
i.
|
In the Meeting Insights side panel, click the Decision button. |
|
ii.
|
In the text box, type the decision, and then click . |
|
i.
|
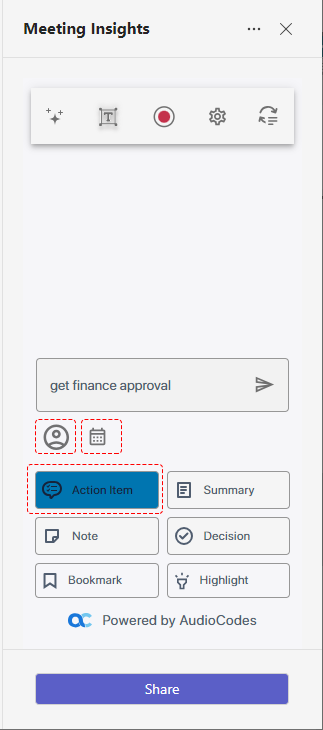
In the Meeting Insights side panel, click the Action Item button. |
|
ii.
|
In the text box, type an action item / task. |
|
iii.
|
To assign the action item to a specific participant, click  , and then from the drop-down list, select the participant. , and then from the drop-down list, select the participant. |
|
iv.
|
To define a due date for the action item, click  , and then select the date from the displayed calendar. , and then select the date from the displayed calendar. |
|
v.
|
Click . |
|
i.
|
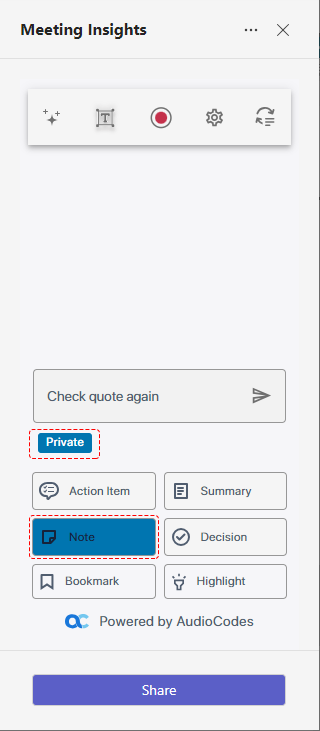
In the Meeting Insights side panel, click the Note button. |
|
ii.
|
In the text box, type your note. |
|
iii.
|
To make the note visible only to you (private) or visible to everyone (public), toggle the Private / Public button. |
|
iv.
|
Click . |
You can edit or delete your recap items, as described in the following procedure:
|
➢
|
To edit or delete a recap: |
|
1.
|
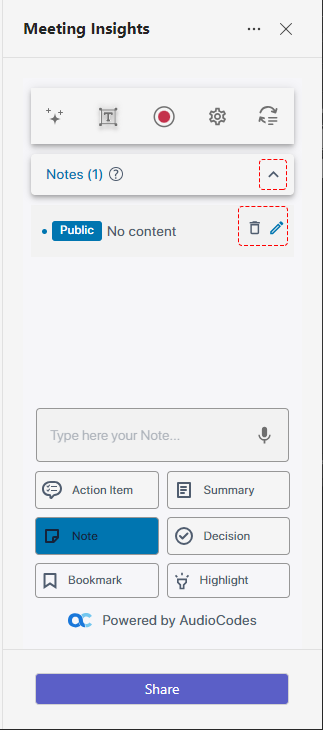
In the Meeting Insights side panel, click the down-facing arrow to expand the recap. |
|
2.
|
Hover your mouse over the recap contents; the edit  and delete and delete  icons appear on the right of the recap, as shown in the following example: icons appear on the right of the recap, as shown in the following example: |
|
3.
|
Do one of the following: |
|
●
|
To edit the recap item, click , edit the recap item, and then click  . . |
|
●
|
To delete the recap, click , and then in th epo-up message box, click Delete to confirm. |