Upload a Local Meeting Recording to Meeting Insights
When you upload a local meeting recording, Meeting Insights processes it and displays it in the List View. You can then manage it like any other meeting recording. After upload, you automatically become the Owner of the meeting recording.
|
➢
|
To upload a local meeting recording: |
|
1.
|
In the Navigation pane, click  Local Recordings; the Local Recordings page opens. |
|
2.
|
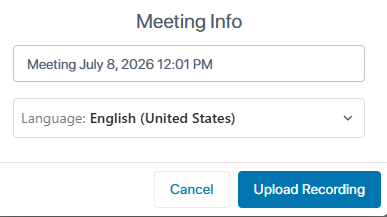
Click the Upload Meeting button of the local meeting recording that you want to upload; the following dialog box appears: |
|
3.
|
(Optional) Edit the name of the meeting recording. By default, Meeting Insights automatically assigns a name in the format "Meeting <date> <time>" (e.g., Meeting July 8, 2026 12:01 PM). If you want, you can give the meeting recording a different name. |
|
4.
|
From the 'Language' drop-down list, select the language of the recorded audio. |
Make sure you select the correct language so Meeting Insights can accurately generate a transcription and insights.
|
5.
|
Click Upload Recording; Meeting Insights uploads and processes the recording. The recording is removed from the Local Recordings page and added to the meeting recordings list in the List View. |
 Related Topics