Create a Confluence Page for the Recap Content
You can create a new Confluence page for the recap content you select. The meeting recording name becomes the page title.
|
➢
|
To create a Confluence page for the recap content: |
|
2.
|
Click Create a new page; the New page section appears. |
|
3.
|
Under Choose content, select the content to send: |
|
●
|
To include all content of a type, select the check box of MIA AI Summary or Action items. |
|
●
|
To include specific content, click the content type to expand it, and then select the sections or items. |
|
5.
|
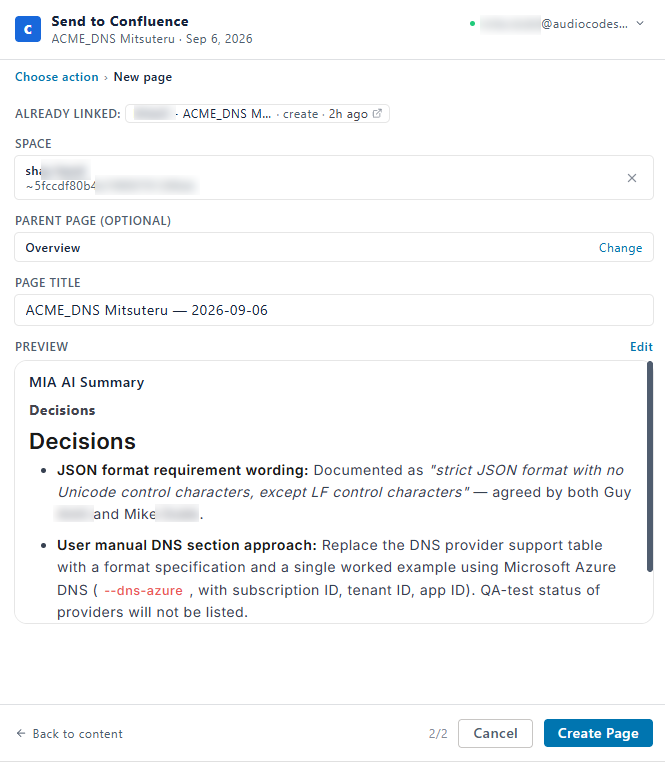
From the 'Space' drop-down list, select the Confluence space where you want to create the new page. |
|
6.
|
(Optional) In the 'Parent Page' field, select the Confluence parent page under which you want to create the new page. If you want to add it to the root of the space (i.e., no parent page), select Use root of space (no parent). |
|
7.
|
In the 'Page Title' field, enter a title for the new page. By default, Meeting Insights assigns the meeting recording name to the title page. |
|
8.
|
Under Preview, review the content. To modify the content, click Edit. |
|
9.
|
Click Create Page; Meeting Insights sends the content to the new Confluence page. The Confluence  icon is displayed with the meeting recording in the list view. |
The following shows example settings for creating a new Confluence page with the recap content: